Drone Fix: A Practical Guide for Beginners
Learn to diagnose, repair, and maintain common drone issues with safe, beginner-friendly steps. This guide covers diagnostics, tools, step-by-step repairs, calibration, and decision-making on repairs vs replacement.

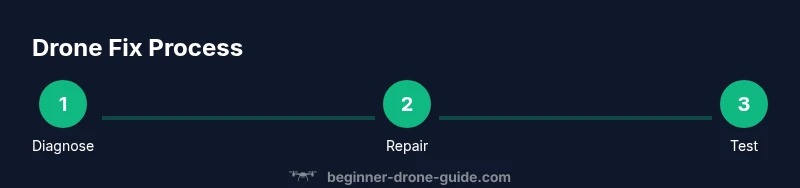
With this guide you’ll learn how to perform a safe, effective drone fix. You’ll diagnose common faults, assemble essential tools, follow a structured diagnostic flow, and complete a step-by-step repair with calibration checks to get your drone back in the air confidently. This approach emphasizes safety, accurate fault identification, affordable parts, and non-destructive testing so beginners can fix problems quickly without risking further damage. The plan is practical, non-destructive, and designed to keep you flying.
Understanding drone fix: what it is and why beginners should care
A drone fix refers to the process of diagnosing and repairing issues that prevent a drone from flying safely or performing as expected. For beginners, the goal is to restore basic function without voiding warranties or causing new problems. In this guide, drone fix means a practical, stepwise approach to power, control, propulsion, and sensor faults. You will learn to distinguish between simple fixes you can do at home and issues that require professional service. By mastering the core concepts, you’ll save time and money, reduce downtime, and gain confidence to handle common malfunctions. Throughout this article, you’ll see the term drone fix used to describe both the detection and repair stages. According to Beginner Drone Guide, starting with a clear plan and choosing safe testing methods sets you up for a successful repair, even if you are completely new to drones. As you read, keep in mind that this guide focuses on safe, practical fixes you can perform with common tools.
Safety and planning before you start
Safety is non-negotiable when performing a drone fix. Before touching any electronics, power off the drone, disconnect the battery, and remove the propellers to prevent accidental spins. Work on a non-conductive surface, in a well-lit area, and keep tools organized to avoid losing tiny parts. Establish a testing plan with limits and a safe fallback. For beginners, skipping safety steps is the fastest way to damage parts or injure someone nearby. The aim is to minimize risk while you learn. The Beginner Drone Guide team emphasizes documenting loose screws and damaged parts in a repair log so you can track the issue over time and avoid repeating mistakes.
Pre-diagnostic checklist you can trust
Starting with a pre-diagnostic checklist helps you focus on likely failure points rather than random tinkering. Check that the battery holds charge, the voltage readings are within spec, and the remote controller communicates reliably with the aircraft. Inspect for loose connectors, damaged wires, or bent propellers. Confirm that you are using the correct prop size and that the flight controller is responsive to basic inputs. This phase reduces guesswork and speeds up the drone fix process; you’ll spend less time chasing mysteries and more time applying targeted repairs.
Diagnosing power, battery health, and electronics
Power issues are among the most common causes of flight failure. Start by verifying battery health with a voltage check and by performing a simple load test if your equipment permits. Inspect the power rails for signs of discoloration, corrosion, or overheated components. Check the battery connectors for looseness or bent pins, which can mimic more severe faults. If the battery shows signs of swelling or excessive sag under load, retire it from service immediately. Understanding what a healthy battery looks like in your drone is essential for accurate drone fix decisions.
Mechanical checks: propellers, motors, and frame
Damaged propellers and worn bearings are frequent culprits. Remove all props and check each blade for cracks, chips, or warping. Spin each motor by hand (when safe to do so) to feel for grinding, wobble, or excessive play. Inspect the frame for hairline cracks, loose mounts, or collapsed grommets. Keep an eye out for cable routing that could snag during flight. Document any damage with photos to guide replacements and verify the fix later.
Electrical connections and wiring health
Loose or corroded connectors can produce intermittent faults that are hard to diagnose. Unplug and reseat connectors, ensuring a firm click; check for damaged insulation, pinches, or burnt smells. Solder joints should be clean, shiny, and solid if you repair them; if you are unsure, replace the connector or seek professional help. Use a multimeter to verify continuity on suspect wires and test for shorts. After reseating, gently tug on wires to confirm secure connections before powering up again.
Calibrations, sensors, and flight controller basics
Calibration ensures the flight controller and sensors interpret the world correctly. Start with compass calibration away from metal objects and large metal structures. Calibrate accelerometers and gyros per the manufacturer’s instructions, and confirm GPS lock if your drone supports it. Firmware updates can fix bugs but may change behavior; review release notes and back up your settings first. A correct calibration reduces drift and improves stability, which is part of a proper drone fix.
Step-by-step repair workflow (illustrative scenario)
In this section, we outline a typical repair workflow to fix a common issue like intermittent motor loss. Step 1 — Power off and secure: remove the battery and place the drone on a stable surface. Step 2 — Inspect: check propellers, screws, and mounts for damage. Step 3 — Disconnect and reseat: unplug and replug the main connectors, verify tightness. Step 4 — Test with bench power: run low-throttle tests using prop guards. Step 5 — Calibrate: perform a full magnetometer and IMU calibration. Step 6 — Update firmware if needed: ensure the flight controller is up to date. Step 7 — Reassemble and test professionally: reattach props and perform a gentle hover in a controlled space. Each step includes a safety pause; if something doesn’t feel right, stop and reassess. Tip: never run motors without prop guards or without the drone securely mounted to avoid injury or damage.
Preventive maintenance and when to seek pro help
Regular maintenance is the best defense against unexpected drone fixes. Schedule a routine check every 4–6 weeks of heavy usage, and after any hard landings or water exposure. Clean the shell, inspect seals, and lubricate moving parts as recommended by the manufacturer. If you encounter recurrent faults after a fix, or if you notice unusual sounds, smells, or overheating, seek professional assistance. This not only protects your investment but also keeps you, bystanders, and the airspace safe.
Real-world case studies and practical takeaways
Real-world scenarios help translate theory into action. In one common case, a beginner fixed a loose plug that caused intermittent power loss; after reseating the connector and rechecking the battery, the drone achieved stable hover with no further faults. In another scenario, damaged propeller blades were replaced, which eliminated vibration and improved camera stabilization. These examples illustrate the value of a methodical approach and careful documentation. The lessons are universal: plan, verify, and test in safe conditions, and always log what you changed.
Authority references for further learning
For deeper learning and to verify best practices, consult authoritative sources. FAA offers official safety guidelines and UAS information at https://www.faa.gov/uas. The National Institute of Standards and Technology provides drone-related measurement and safety references at https://www.nist.gov/topics/drones. You can also explore university-level material at https://ocw.mit.edu for related courses and tutorials that cover robotics, sensors, and control systems.
Tools & Materials
- Precision screwdriver set (phillips #00, #0)(Magnetized tips help hold tiny screws; use anti-static precautions)
- Torx driver set(Some drones use Torx screws; include T5/T6 sizes)
- Anti-static wrist strap(Ground yourself before touching sensitive electronics)
- Non-conductive work mat(Keeps parts from rolling away and protects circuitry)
- Isopropyl alcohol wipes (90-99%)(For cleaning contacts and sensors; avoid leaving lint)
- Replacement props compatible with your model(Use exact size and color from manufacturer)
- Spare batteries or a battery checker(Useful for quick health checks but not always necessary)
- Soldering iron kit(Only if you are experienced; improper soldering can worsen damage)
- Heat shrink tubing(Optional; aids in securing repaired wires)
- Small zip ties(Keep wiring neatly routed and protected)
Steps
Estimated time: 60-90 minutes
- 1
Power off and secure
Always power down the drone and remove the battery before touching any components. Secure the craft on a stable surface and keep your workspace clear of clutter. This initial step reduces the risk of accidental motor engagement during inspection.
Tip: Double-check that the battery is fully disconnected before starting any disassembly. - 2
Remove props and protect yourself
Take off all propellers using the correct tool and store them in a labeled container. Wearing eye protection is a good safety habit, especially for beginners who are learning handling techniques. Prop removal prevents injury and protects fragile blades.
Tip: Label each prop and its mounting position to avoid mismatches during reassembly. - 3
Visual inspection for obvious damage
Look for cracks in the frame, loose screws, bent arms, and damaged connectors. Try to reproduce the fault with gentle movement while the craft is powered off to observe any loose components. Document findings with photos for reference during repairs.
Tip: Obvious damage often points to root causes; don’t overlook small signs like hairline cracks. - 4
Check power and connectors
Inspect battery contacts, main power connectors, and any solder joints for corrosion, looseness, or burns. Reseat connectors firmly and test continuity with a multimeter if available. After reseating, replace damaged connectors if found.
Tip: Never force a connection—if it doesn’t click, recheck the mating parts. - 5
Bench-test the motors safely
With no props installed, perform a low-throttle test to ensure motors respond smoothly without gripping or stuttering. Listen for unusual noises and feel for vibration anomalies. If any motor misbehaves, stop the test and inspect that motor and its wiring.
Tip: Use prop guards during initial test flights to limit risk if things go wrong. - 6
Calibrate sensors and flight controller
Follow the manufacturer’s calibration procedure for the compass, accelerometer, and gyros. Allow sensors to settle, and verify GPS lock if available. Calibration helps eliminate drift and instability that can masquerade as hardware faults.
Tip: Perform calibrations away from metal objects and other electronics for best accuracy. - 7
Check firmware and settings
Verify you’re running the latest firmware or the recommended stable version for your drone. Back up current settings before updating, and reapply critical configurations after the update. Firmware fixes can resolve issues that appeared hardware-like.
Tip: Review release notes for changes that affect behavior you rely on. - 8
Reassemble and test in a controlled space
Reattach propellers in their correct positions, reinstall the battery, and perform a gentle hover test in a safe, open area. Start with low altitude and reduce throttle to verify handling. If everything feels stable, gradually test more demanding maneuvers.
Tip: Always have a safe landing zone and standby helpers during initial tests. - 9
Document the fix and monitor
Record what component was faulty, what repairs were performed, and the results of the test flights. Maintain a simple repair log so you can track recurring issues and anticipate future maintenance needs.
Tip: Keep a checklist for future flights to ensure consistent pre-flight checks.
Frequently Asked Questions
What should I do first when my drone won't power on?
Begin by checking the battery connection and ensuring the battery is charged. Inspect the main power cable and connectors for signs of damage. If there is no voltage, isolate the power chain to identify whether the issue is the battery, connector, or flight controller.
First check the battery and power connectors, then look for obvious damage in the power chain before testing further.
How can I tell if a propeller is damaged?
Inspect each blade for cracks, chips, or deformation. Spin the propeller by hand to feel for wobble or imbalance. Replace any blade that shows signs of damage, and ensure you use the exact type and size recommended by the manufacturer.
Check each blade for cracks or wobble and replace any damaged blade before flight.
Is it safe to test a repaired drone in the air?
Yes, but only in a controlled, open space free of people and obstacles. Start with gentle, low-altitude hover tests and gradually increase as confidence grows. Always have a spotter and a plan to cut power quickly if something goes wrong.
Do initial tests in a wide, open space with a helper nearby in case you need to intervene.
When should I replace a motor versus repair?
Consider replacing a motor if you hear grinding, feel excessive resistance, or see persistent abnormal heat after inspection. If a replacement motor is readily available and reliability improves after swapping, replacement is often more cost-effective than repeated repairs.
Replace a motor if it shows persistent fault after inspection and testing.
Do I need specialized tools to perform a fix?
Basic precision tools are enough for most beginner repairs. Soldering is optional for many fixes; only attempt it if you are confident to avoid damaging connectors or electronics. For complex fixes that involve flight controllers or ESCs, seek professional help.
Most fixes just need precision screwdrivers and basic tools; soldering is optional and equipment-dependent.
Can I fix a drone battery at home safely?
Swollen or damaged batteries should not be repaired; discard them safely following local guidelines. If a battery tests normally but shows reduced capacity, consider replacement rather than attempting risky repairs.
Don’t try to repair swollen batteries; replace them and handle with care.
Watch Video
Quick Summary
- Diagnose before disassembly to save time and money.
- Safety and planning protect you and your drone long-term.
- Calibrate sensors after any fix to ensure stability.
- Document everything to improve future repairs.