Fix Drones Near Me: Step-by-Step Repair Guidance for Beginners
Learn practical, beginner-friendly steps to fix drones near you. This guide covers safety, common faults, when to DIY versus seek local repair, and how to choose trustworthy nearby technicians.

Looking to fix drones near me? This guide helps you decide between do-it-yourself fixes and local services, with a safe, beginner-friendly workflow. Start by assessing safety, gathering essential tools, and diagnosing common faults. From there, decide whether you can repair it yourself or need a nearby pro, saving time and avoiding costly mistakes for confident, smart repairs.
Why Local Repair Matters
In the world of drones, light-use incidents can be resolved quickly when you know where to look locally. If you’re seeking to fix drones near me, you’ll find that local repair options often offer faster turnarounds, hands-on diagnostics, and FAQ-driven guidance that online tutorials can’t fully replicate. A nearby technician can validate your drone’s calibration, update firmware, and check for subtle frame cracks or loose connectors that aren’t obvious in photos. Choosing local services also reduces downtime, which matters if you rely on your drone for work, education, or hobby projects. The Beginner Drone Guide team notes that nearby support frequently helps beginners gain confidence and learn correct procedures without risking your gear on long trips or shipping mishaps.
Common Faults That Cover Most Fixes Near You
When people start troubleshooting, several issues show up repeatedly and are feasible to handle with minimal tools. Dead batteries or batteries that won’t hold a charge are common culprits, followed by damaged propellers, loose or corroded connectors, and motor stall or jitter. Visibility issues from firmware mismatches can also surface after an update. By understanding these triggers, you can quickly decide whether to attempt a quick DIY remedy or bring the drone to a local repair shop. Remember, “fix drones near me” often means you’re combining at-home checks with trusted local expertise for the best outcome.
Safety First: Battery Handling and Flight Readiness
Batteries are the most critical safety component when repairing a drone. LiPo packs can puff or fail dramatically if mishandled, so power off, disconnect, and remove batteries before any inspection. Work in a ventilated area on a non-conductive surface, use eye protection, and avoid puncturing cells. If you notice swelling, deformation, or heat, do not attempt a DIY repair—consult a licensed tech nearby. Before reassembling, perform a cautious bench test with a charger or a battery voltage checker to ensure the pack remains within safe voltage ranges. This cautious approach helps prevent accidents and adds a layer of safety when you’re searching for local help to fix drones near me.
Tools and Test Setup for On-Site Checks
For on-site checks, assemble a small toolkit with non-slip mats, a basic screwdrivers set, spare props, and a multimeter for voltage checks. A simple prop-balancing stand, spare clamps, and electrical tape can prevent parts from shifting during tests. Keep a clean workspace and label wires to avoid mix-ups. If you don’t have a required tool, note it for your local repair shop—many shops will accommodate reputable DIY checks but may perform essential tasks with professional-grade tools. A well-prepared setup speeds up diagnostics when you’re trying to fix drones near me and want reliable results.
Diagnosing Propellers, Motors, and Electronics
Start by inspecting propellers for nicks or cracks and rotate each motor by hand to feel for rough spots or drag. Check motor mounts and screws for tightness, ensuring arms aren’t bent. Look at ESC connections and harnesses for loose or corroded pins. Firmware anomalies can also cause erratic behavior; confirm you’re on a supported version and perform a controlled test hover if safe. If you observe overheating, unusual buzzing, or intermittent power, there’s a high likelihood you’ll need a professional assessment from a nearby repair technician. This is where local expertise can save you from costly trial-and-error repairs when you’re trying to fix drones near me.
DIY Repairs vs. Professional Service: Making the Call
DIY fixes are great for small issues like propeller replacement or tightening loose screws. More complex faults—like motor windings, ESC failures, or intricate frame cracks—benefit from a professional evaluation. If you decide to DIY, do not attempt high-risk repairs such as battery repair or cracked battery packs. When in doubt, reach out to a nearby drone repair shop for a diagnostic check to confirm the scope of work. Local experts can provide an accurate quote, limit liability, and often offer a warranty on repaired components, which adds long-term value to the decision to fix drones near me.
How to Find a Reputable Local Repair Shop
To locate a trustworthy local repair option, start with search terms like fix drones near me and check reviews from other pilots. Prioritize shops with drone certifications, clear labour warranties, and transparent pricing. Ask about turnaround times and whether they’ll test the drone after repairs. If you’re new to flying, seek shops that offer beginner-friendly explanations and a demonstration flight to confirm calibration after service. A strong local network also means you can learn from technicians for future maintenance.
Understanding Service Quotes and Warranties
When obtaining quotes, request itemized breakdowns for parts, labour, and return shipping if necessary. Clarify what’s covered by warranty and for how long. Compare multiple shops to ensure you’re not paying premium for the same service. Always confirm the expected turnaround date and whether follow-up adjustments are included. A reputable local repair provider will give a clear scope of work and a reasonable warranty period, which is essential for keeping your drone reliable after you fix drones near me.
Maintenance Habits to Reduce Future Repairs
Preventive maintenance reduces the frequency of local repairs. Regularly inspect propellers, motors, and airframe for wear; clean components with recommended solvents; recalibrate sensors after firmware updates; and store batteries safely at recommended voltages. Create a small maintenance checklist and perform it on a schedule, so you stay ahead of issues. Consistent care also makes any future local repair visits faster and cheaper, reinforcing the value of choosing nearby professionals to help fix drones near me.
Tools & Materials
- Flat-head screwdriver(For small frame screws and motor mounts)
- Phillips-head screwdriver(For main frame screws and electronics casing)
- Hex/Allen keys (set)(Various sizes for arms and screws)
- Spare propellers (set of 4+)(Match the drone model and propeller rotation)
- Multimeter (voltmeter)(Check battery and power rail voltages)
- LiPo battery checker / balance charger(Test battery health safely)
- Anti-static wrist strap(Prevent static damage to sensitive electronics)
- Electrical tape / heat shrink tubing(Secure wires and insulate joints)
- Small pliers / tweezers(Place small parts or reach tight spaces)
- Cleaning brush and isopropyl alcohol (70%)(Remove dust from delicate components)
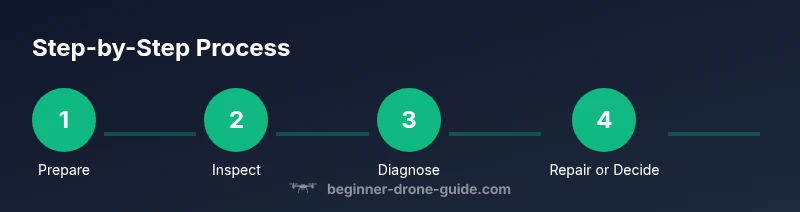
Steps
Estimated time: 60-90 minutes
- 1
Prepare a safe workspace
Set up a clean, non-conductive surface with ample lighting. Gather your tools and ensure the drone is powered off, with the battery disconnected before any inspection.
Tip: Place a small tray to hold screws so you don’t lose parts. - 2
Power down and inspect the exterior
Look for visible damage: cracks, loose arms, or broken mounts. Check the camera gimbal and landing gear for stress points that might affect stability.
Tip: Document any damage with photos to share with local techs. - 3
Check batteries and connectors
Inspect battery contact pins for corrosion and ensure the connector plugs are secure. If the voltage is low or the pack is swollen, discontinue use and seek local repair help.
Tip: Test battery voltage with a multimeter before reassembly. - 4
Inspect propellers and motors
Examine each propeller for chips and balance. Spin each motor by hand to feel for resistance or grinding. Tighten any loose screws on motor mounts.
Tip: Replace any damaged propellers before flight testing. - 5
Check wiring and ESCs
Look for loose or frayed wires, secure with tape if needed, and verify ESC connections stay snug during movement. A loose wire can cause intermittent power loss.
Tip: Take a photo of wiring before unplugging to ensure correct reassembly. - 6
Run a controlled test hover
With the drone tethered or in a safe open space, perform a light hover to observe stability and response. Listen for abnormal sounds or vibrations.
Tip: If you hear unusual noises, stop and reassess before continuing. - 7
Decide on DIY vs professional service
If issues persist beyond basic fixes, compare local repair options and obtain a diagnostic quote before proceeding. Weigh the cost of parts against the value of the drone.
Tip: Keep a repair log to track what was done and what remains. - 8
Find and contact a nearby repair shop
Search for local drone technicians with positive reviews and clear warranties. Share your test results and damage notes to get an accurate estimate.
Tip: Ask about a test flight and calibration after service.
Frequently Asked Questions
Can I fix a drone myself, or should I always go to a professional local repair shop?
Many minor issues can be addressed at home, such as propeller replacement and basic tightening. More complex problems like motor or ESC failures usually require professional diagnosis. Start with simple fixes and seek local repair services for persistent faults.
You can fix minor parts at home, but complex motor or electronics problems are best left to a local repair professional.
How long does a typical local repair take?
Turnaround varies by shop and issue, but most simple fixes are completed within a few hours, while major repairs may take 1–3 days. Always request an estimated timeline before authorizing work.
Most minor fixes are a few hours; complex repairs can take a couple of days. Ask for an estimate first.
What should I look for in a reputable local drone repair shop?
Look for certifications, transparent pricing, clear warranties, and reviews from local pilots. A good shop will explain the diagnosis and offer a test flight after service.
Choose a shop with certifications, clear pricing, and a warranty. Ask for a test flight after repair.
Is there a warranty on repairs?
Many reputable shops offer warranties on parts and labour. Confirm the length of coverage and what it includes before authorizing any work.
Yes, many shops back their work with a warranty. Confirm terms before agreeing.
What costs should I expect for local repairs?
Costs vary by issue and parts needed. Request an itemized quote with parts, labour, and any return shipping. Compare multiple shops to ensure fair pricing.
Prices vary; get an itemized quote and compare shops for fairness.
What if my drone is still under the manufacturer’s warranty?
If a fault is covered, coordinate with the manufacturer or authorized service centres to avoid voiding the warranty. Do not service critical components without confirmation.
Check warranty terms and use authorised service centres to preserve coverage.
Watch Video
Quick Summary
- Know when to DIY and when to seek local repair help
- Prioritize safety, especially with LiPo batteries
- Use a checklist to ensure consistent diagnostics
- Choose reputable local shops with clear warranties