How to Repair a Drone That Won't Fly: Beginner Guide
Learn practical, beginner-friendly steps to diagnose and fix a drone that won't fly. Power checks, firmware updates, calibration, and safe part replacements explained with clear, actionable tips.

By methodically testing power, electronics, and calibration, a drone that won't fly can often be revived without expensive repairs. Start safely, confirm battery condition, inspect the propellers and wiring, update firmware, and recalibrate flight sensors before replacing parts. This guide provides a beginner-friendly, step-by-step troubleshooting workflow.
Diagnosing the not-flying issue: first principles
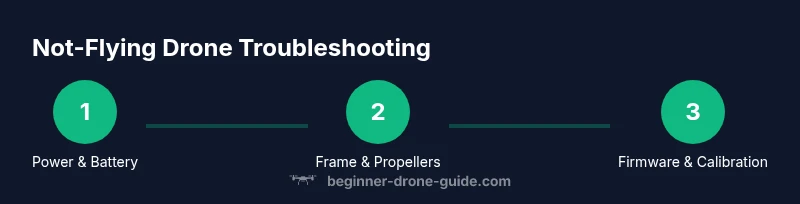
According to Beginner Drone Guide, many pilots encounter situations where a drone simply won't lift off. If you're asking how to repair a drone if it is not flying, approach the problem like a doctor: start with the basics, confirm power is available, and verify basic flight control connections before diving into complex repairs. In practice, the root causes usually live in three areas: power supply, propulsion, and flight-control software. Low voltage, damaged props, or a stuck motor can prevent takeoff even when the rest of the system is healthy. By building a structured checklist and testing each subsystem in order, you minimize risk and preserve components for later reuse. This diagnostic mindset is essential for beginners, focusing on safety, documentation, and a methodical approach over guesswork.
Safety first: pre-flight checks and safety precautions
Before touching any electronics, ensure you are in a clear, safe area away from people, pets, and delicate objects. Disconnect the battery before handling exposed connectors to avoid shorts. Use eye protection if you’ll be testing motors, and keep hands and loose clothing away from spinning propellers. Establish a designated bench space with ample lighting and a stable surface. For beginners, write down the steps you take and the results you observe; a simple log helps you track what works and what doesn’t, which is especially useful if you need to seek help later.
Visual inspection: frame, props, and wiring
A thorough visual check often reveals obvious culprits. Look for cracked frames, bent arms, loose screws, and damaged propellers. Inspect each motor housing for debris, hair, or fiber that could impede movement. Check wires for pinches, broken insulation, or disconnected plugs. If you find something obvious, note its position and take a clear photo before reassembling. Small cracks or misaligned props can prevent stable flight even if everything else seems fine.
Power system diagnostics: battery health and connections
Power issues are a leading cause of non-flying drones. Examine the battery for swelling, which is a safety red flag; never use a swollen pack. Confirm the battery is charging properly and delivering expected voltage when connected to the drone’s power bus. Inspect connectors on both ends for corrosion or loose pins. If you have access to a multimeter, measure the battery voltage and compare it to the drone’s specified operating range to determine if the pack is within tolerance.
Propellers and motors: wear, balance, and pairing
Damaged or unbalanced propellers can prevent a drone from lifting or cause erratic behavior. Replace any cracked, chipped, or warped blades with matching spares, ensuring the correct orientation and staggered setup. Spin each motor by hand carefully to feel for grinding, resistance, or unusual play. If a motor binds or stalls, it may need cleaning, lubrication, or replacement. After replacing props or fixing a motor, recheck the torque and make sure no wires are rubbing on moving parts.
Firmware, calibration, and software settings
Software issues can block flight simply by misconfiguring the flight controller. Check for the latest firmware from the manufacturer and perform an update if available. Recalibrate the IMU/gyro and accelerometer on the bench, then rebind or reconnect the RC link if your drone uses a controller. Ensure GPS or compass calibrations are reset according to the user manual. Document the firmware version and calibration values for future reference.
Step-by-step: firmware update and factory reset considerations
If the drone still refuses to fly after basic checks, consider a careful firmware update or a factory reset. Back up any custom configurations or flight logs if possible. Perform the update or reset in a well-lit, static-free area and follow the manufacturer’s instructions precisely. Avoid interrupting the update process. After a reset, you’ll need to re-calibrate sensors and rebind the controller, then test gradually to confirm improvements.
Step-by-step: test flight preparation and bench tests
Before any test flight, reassemble the drone securely and perform a zero-risk bench test: remove props and power the unit to verify motor response with a low-current test. Check that each motor responds to throttle input as expected and that the control signals from the transmitter are correctly mapped. If a motor or propeller pair behaves unexpectedly, pause and recheck connections and alignment. Move to a controlled outdoor area only after you’ve verified on the bench.
Step-by-step: field testing in safe, incremental stages
Begin with a gentle hover at a low altitude in a wide-open space, without wind or obstacles. If the hover is stable, slowly increase throttle while watching for yaw, pitch, or roll deviations. If any instability appears, land immediately and reassess the affected subsystem—propulsion, sensors, or calibration. Document each test and its outcome; incremental testing helps isolate the root cause and reduces risk of further damage.
Step-by-step: final checks and maintenance habits
After successful test flights, perform a final inspection and torque check on all screws and mounting points. Create a simple maintenance schedule: inspect batteries monthly, check propellers weekly for wear, and recalibrate sensors after firmware updates. Store batteries safely in a cool, dry place and avoid overcharging. Finally, log your results so you can compare future performance changes against your baseline.
Tools & Materials
- Drone-specific screwdriver set (Philips #0/#1/#2 and Torx)(Mixed driver sizes to fit screws on frame and motors)
- Spare propellers (set of 4 or more per prop)(Propellers compatible with your drone model)
- Replacement batteries(Spare packs for bench testing and flight testing)
- Multimeter(Use for precise voltage checks if available)
- Isopropyl alcohol 70-99%(Cleaning contacts and contacts safely)
- Tweezers and small brushes(For handling tiny connectors and debris)
- Soldering iron and solder (optional)(Only if you encounter loose solder joints)
- USB-C/USB-A cable and computer access(For firmware updates and logging)
Steps
Estimated time: 60-120 minutes
- 1
Power up and inspect battery
Power the drone with a safe bench setup and visually inspect the battery for swelling or damage. Check connector pins for corrosion or looseness. If the battery shows any puffiness or unusual warmth, stop and replace it. Confirm the battery voltage is within the recommended range before attempting flight.
Tip: Handle swollen batteries with care and never puncture the casing. - 2
Check RC link and controller
Verify that the remote controller is paired correctly and transmitting signals. Ensure sticks and buttons produce the expected responses in the ground control app or simulator. If the link drops or is unstable, rebind according to the manual and test again.
Tip: Test with the controller in an unobstructed line of sight. - 3
Calibrate gyro and accelerometer
Place the drone on a level surface and run the IMU calibration as recommended by the manufacturer. Accurate gyro data prevents drift and helps stabilize takeoff. If the calibration fails, restart the drone and retry after a short wait.
Tip: Keep the drone steady during the calibration process. - 4
Inspect propellers for damage
Check each propeller for cracks, chips, or deformation. Replace any damaged blades with matching spares. Ensure the propellers are mounted in the correct orientation and tightened securely.
Tip: Use the correct propeller type for your drone model. - 5
Inspect motors and wiring
Spin each motor by hand to feel for smooth rotation; listen for grinding noises. Inspect motor solder joints and wiring for fraying or loose connections. Clean any debris from the motor housing and reseat connectors as needed.
Tip: Power off before handling wires to avoid shorts. - 6
Update firmware and reset if needed
Download and install the latest firmware from the manufacturer. If issues persist, perform a factory reset to clear corrupted settings, then reconfigure from scratch. Always back up flight data or settings before a reset.
Tip: Use a wired connection when possible to ensure a stable update. - 7
Recalibrate compass and GPS
After a reset or firmware update, recalibrate the compass and GPS to ensure accurate positioning. Perform at least the recommended number of device movements or rotations as described in the manual. Validate GPS lock in an open outdoor area.
Tip: Do compass calibration away from large metal objects and power lines. - 8
Bench test with props removed
Power the drone with no props to verify motor responses to throttle and stick inputs. Confirm that each motor responds in the correct direction. If a motor is unresponsive, recheck wiring and controller mappings.
Tip: Avoid running motors with props on during bench tests. - 9
Controlled test flight
Move to an open space and perform a gentle hover close to ground level. Observe stability, responsiveness, and any abnormal vibrations. Increase altitude gradually only if the hover remains stable for a sustained period.
Tip: Always have a spotter and keep a safe landing area in sight. - 10
Document results and plan next steps
Record the steps you took, results observed, and any components replaced. Review your maintenance log to identify recurring issues and decide whether to seek professional help for unresolved problems.
Tip: Maintain a clear log for future troubleshooting sessions.
Frequently Asked Questions
Is it safe to repair a drone at home?
Yes, with proper precautions. Work in a clear area, disconnect power before handling components, and avoid high-voltage parts. If you notice dangerous signs like swelling batteries or smoke, stop immediately and consult a professional.
Yes, but follow safety steps. If you see swelling, stop and seek expert help.
How long does a typical DIY repair take?
A straightforward diagnostic and minor part replacement can take under an hour, but more complex fixes may require 1-2 hours or more. Plan for extra time if firmware updates are involved.
Most repairs take from 1 to 2 hours depending on complexity.
Will simply replacing the propellers fix the issue?
Propellers can prevent takeoff if damaged, but many non-flying issues are caused by power or calibration problems. Replace damaged blades, then re-test after updating firmware and calibrating sensors.
Propellers matter, but don’t rely on replacement alone; check other systems too.
Should I update firmware before calibration?
Updating firmware before calibration is usually recommended, as newer software may improve stability and fix bugs. After updating, perform the recommended calibrations per the manual.
Yes, start with the firmware update, then calibrate.
What if the drone won't bind to the controller after repairs?
Binding problems after repairs can indicate radio or controller issues. Rebind according to the manual, verify transmitter settings, and consider checking for interference or a damaged control link.
If it won’t bind, rebind and check for interference.
Watch Video
Quick Summary
- Follow a methodical checklist to reduce risk
- Power, propulsion, and software are common root causes
- Firmware updates and sensor calibration fix many issues
- Document changes and results for future maintenance
- Know when to seek professional help