How to Fly a DJI Drone Without a Phone
Learn how to fly a DJI drone without a phone using a display-enabled remote. Step-by-step setup, safety tips, and practical guidance for beginners to fly confidently.

To fly a DJI drone without a phone, use a display-equipped remote (like a DJI Smart Controller) or another built-in-screen controller. Ensure your drone and remote firmware are current, bind the devices, and enable GPS and home point. If your model requires the phone app for setup, phone-free flight isn’t possible until a compatible remote is used.
Why flying without a phone matters
For new pilots, relying on a phone to run the DJI Fly app can be inconvenient in bright sunlight, unreliable cellular reception, or when you’re wearing gloves. The good news: many DJI drones support flight with a dedicated controller that has its own display. This setup can reduce lag introduced by screen mirrors, simplify calibration, and let you focus on flight mechanics. According to Beginner Drone Guide, a growing number of new pilots choose a display-equipped remote to minimize smartphone distractions and improve reliability in beginner sessions. The Beginner Drone Guide team found that when users practice with a built-in screen, they report faster familiarization with controls, better visibility of telemetry, and fewer connectivity hiccups during critical maneuvers. That said, compatibility is model-dependent. Before you attempt a phone-free flight, verify that your drone-model supports a display-equipped controller and that you have the correct firmware version for remote-only operation. Also ensure you have a charged primary battery and a spare to avoid mid-flight power losses.
Beyond reliability, flying without a phone can improve safety in harsh environments (glare, rain, or gloves) and streamline practice sessions for beginners who are still learning the controls. This approach aligns with safe-flying best practices that emphasize hands-on familiarity with the remote’s tactile feedback and screen visibility. Always check your drone’s compatibility list on the manufacturer’s site before attempting a phone-free flight.
Brand note: This guidance reflects insights compiled by the Beginner Drone Guide team to help beginners choose practical, beginner-friendly workflows.
Choosing a display-equipped controller (DJI Smart Controller, RC Pro, and more)
If you’re committed to flying without a phone, your main tool is a display-equipped controller. The DJI Smart Controller and newer RC Pro variants provide built-in screens, enabling you to see live video, telemetry, and geofencing information without pairing a phone. When selecting a controller, verify compatibility with your specific drone model and confirm that the firmware can support phone-free operation. For many models, firmware updates are required to enable remote-only flight or improve anti-interference in busy environments. The DJI ecosystem also includes a few older third-party display remotes, but your safest bet for support and stability remains the manufacturer’s official display-equipped options. Always compare brightness levels, viewing angles, and battery life to ensure you can comfortably monitor live feed in outdoor lighting.
Key decision points include screen brightness, latency, battery endurance, and ease of use when wearing gloves or working in direct sun. If you already own a tablet or phone alongside a remote with a display, consider whether the additional hardware improves usability or adds unnecessary clutter.
Brand note: The Beginner Drone Guide team emphasizes prioritizing official, supported hardware to minimize troubleshooting during learning.
Pre-flight setup without a phone
Phone-free flight begins with a careful pre-flight routine. Start by powering on the controller first, then the drone, ensuring you hear the standard boot chimes and that the screen loads telemetry. Next, confirm binding status between the drone and the display-equipped controller. Successful binding will show a stable live video feed and GPS lock on the screen. If the drone requires a phone for first-time setup, you may need to connect to a phone simply for initial binding, update the firmware on both devices, and then rebind to the display-equipped controller for future flights. Calibrate compass and IMU as required by your model, and verify homing point and GPS accuracy. Always check the battery levels of both the drone and the controller, and prepare a spare battery if you anticipate a longer session.
In bright sunlight, consider shading the screen to improve readability, and set the controller’s brightness for visibility. Some displays include a sunshade accessory; if not, position yourself in shade when possible. Finally, enable any geofencing or safety settings your local rules require, and set audible alerts on the controller if available.
Flight safety and regulatory considerations when not using a phone
Safety remains the top priority when flying without a phone. Always fly within visual line of sight and respect local airspace restrictions. Without a phone screen, you’ll rely on the remote’s telemetry and live feed to monitor altitude, distance, and battery status; ensure the screen is legible in all conditions. Check weather conditions, wind, and potential interference from nearby structures or crowds. It’s essential to review the drone’s geofence data and ensure you have permission to operate in your area. Some jurisdictions require drone registration or licensing; verify your local requirements before flying. If your region enforces altitude or distance limits, adhere strictly to them and avoid risky maneuvers that demand rapid responsiveness. Regular safety checks—propeller integrity, gimbal movement, and rotor status—remain critical regardless of how you connect to the drone.
Being prepared with a preflight checklist and having a backup power source is especially important when you’re not relying on a phone for control, as you’ll want to minimize any maintenance-induced delays during flight.
Flight workflow without a phone: a built-in screen narrative
In practice, a phone-free flight follows a clear workflow: power up the remote and drone, verify binding, perform compass/IMU calibration, check GPS lock, verify home point, perform a gentle takeoff into hover, and then execute your planned maneuvers. The built-in screen guides you through all telemetry cues, including battery percentage, distance, altitude, and wind warnings. Begin with a short hover to confirm stability, then increase altitude gradually, while keeping a constant eye on the screen for any warning indicators. Avoid complex maneuvers until you’re fully comfortable with the controller’s haptic feedback and screen readability. If something goes wrong, immediately land and re-check all connections and firmware versions before attempting another takeoff.
By following these steps, you can minimize risk and develop solid piloting skills without depending on a phone.
Troubleshooting and common pitfalls
Several issues can arise when flying without a phone, most of which center on display readability, binding, or firmware mismatches. If you cannot see a stable live feed, rebind the controller, restart both devices, and verify that the firmware is up to date. A dim screen or laggy video feed often points to a low battery on the controller or a screen brightness setting that needs adjustment. If the drone won’t take off, check GPS availability and ensure the home point is set correctly. Some users encounter difficulties when geofencing is enabled but not fully up to date; in that case, consult the manufacturer’s guidance for updating geofence data. Finally, if you experience unexpected auto-landing, check for sensor obstructions or abnormal IMU readings. Regular maintenance and careful preflight checks mitigate most issues.
Real-world use cases and recommendations for beginners
For beginners, a phone-free workflow is most beneficial in controlled outdoor spaces with clear skies and minimal interference. A display-equipped controller reduces cognitive load by presenting telemetry in a single, direct view, enabling faster decision-making during flight. Consider starting with a simple hovering exercise, then progress to gentle forward/backward movements, circles, and a controlled ascent. As you gain confidence, document your sessions to observe improvement in response times and control precision. For new pilots, a phone-free approach also minimizes the risk of accidental app usage that might distract you from immediate flight safety tasks. Always choose a compatible drone-model pair and avoid jumping between multiple controller generations to reduce setup friction.
Real-world practice confirms that beginners who use a dedicated display remote can reach safe, stable flight sooner and with fewer interruptions to the learning curve.
Authoritative sources and further reading
- DJI official support on display-equipped controllers and compatibility lists: https://www.dji.com/support
- Federal Aviation Administration (FAA) small unmanned aircraft guidance and safety resources: https://www.faa.gov/uas
- National Aeronautics and Space Administration (NASA) drone safety guidelines and wind guidelines: https://www.nasa.gov
These sources provide authoritative information about device compatibility, airspace requirements, and safety practices relevant to phone-free flight.
Tools & Materials
- Display-equipped remote controller (e.g., DJI Smart Controller or RC Pro)(Built-in screen removes need for a phone during flight)
- DJI drone with updated firmware(Ensure compatibility with your display remote for phone-free operation)
- Spare charged battery(Prevents mid-session power loss)
- Sunshade or hood for screen (optional)(Improves readability in bright light)
- USB-C or HDMI cable (optional)(Only if your remote supports external displays or debugging)
Steps
Estimated time: 20-40 minutes
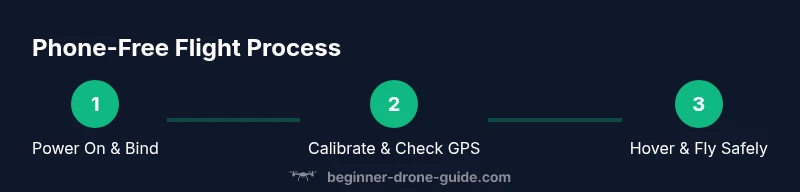
- 1
Power on remote and drone
Turn on the remote controller first, wait for the display to boot up, then power on the drone. Confirm you can see live telemetry and GPS status on the screen before proceeding.
Tip: Ensure the remote screen is legible and angled toward you for easy viewing. - 2
Bind the controller to the drone
Use the on-screen prompts on the remote to initiate binding with the drone. If binding fails, restart both devices and retry in a calm environment.
Tip: Keep the aircraft stationary during binding to avoid misbinds. - 3
Calibrate compass and IMU
Follow the on-screen calibration prompts. Calibrations ensure accurate navigation and stable flight, especially for compass-related errors.
Tip: Perform compass calibration away from metal structures and high-EMI sources. - 4
Check GPS and home point
Verify GPS lock and confirm the home point is recorded correctly in the remote’s telemetry. This helps ensure a safe return if needed.
Tip: Aim for a strong satellite count before takeoff. - 5
Perform a hover test
Carefully lift to a safe hover height, watch for stability, and verify that altitude and battery readings are normal on the display.
Tip: Hover at a low altitude first to confirm stability. - 6
Proceed with a controlled takeoff
Advance to a gentle climb, maintain line-of-sight, and execute planned maneuvers gradually while monitoring telemetry.
Tip: Keep your hands near the sticks and anticipate wind drift.
Frequently Asked Questions
Can I fly a DJI drone without a phone using the standard remote?
Yes, if your drone supports a display-equipped controller. Some models require a phone for initial setup or specific features, so always verify compatibility in the official docs before attempting a phone-free flight.
You can fly without a phone if you have a display-enabled remote, but check compatibility first.
Which DJI remotes have built-in screens?
DJI offers display-equipped options like the Smart Controller and RC Pro that provide built-in screens. Always confirm model compatibility and firmware requirements for phone-free operation.
Display-equipped remotes such as the Smart Controller and RC Pro support built-in screens.
Will I lose features like live camera feed when not using a phone?
Live video feed is typically available on the display-equipped remote. Some features tied to the phone app may not be accessible, so rely on the remote’s telemetry and built-in screen for key information.
You should still get live video on the remote, but some app-based features may differ.
Is phone-free flight allowed in all locations?
Regulations vary by region. Always verify local airspace rules, drone registration requirements, and any licensing needs before flying, even with a display-equipped controller.
Regulations vary; check local rules and registration requirements first.
What should I do if the drone won’t bind to the remote without a phone?
Power cycle both devices, ensure firmware is up-to-date, and follow official binding steps for your model. If issues persist, contact manufacturer support.
If binding fails, restart both devices and recheck firmware and guidance.
Do I need internet on the remote?
Typically you don’t need internet to fly with a display remote, but occasional updates or maps may require connectivity. Ensure updates are completed before flight.
Internet isn’t usually required for flight, but updates may need connectivity.
What if I only have a basic controller—can I still fly phone-free?
If your controller lacks a built-in screen, phone-free flight isn’t possible. Consider upgrading to a display-equipped remote to enable phone-free operation.
Without a display on the controller, you’ll need a phone for flight.
Watch Video
Quick Summary
- Use a display-equipped remote to fly without a phone
- Verify compatibility and firmware before flight
- Follow a careful pre-flight checklist
- Fly within line of sight and obey local rules
- Practice regularly to build confidence