Why My Drone Won't Fly: A Practical Troubleshooting Guide
Struggling with a drone that won t take off? This urgent guide covers power checks, calibration, propellers, and a step-by-step diagnostic flow to get you flying again safely.

Most drones won’t fly because of a basic false start: insufficient power, poor calibration, or a blocked propulsion system. Start by checking battery connections, then confirm the drone is properly calibrated and free of obstructions. This quick 3-step check solves the majority of beginner issues and gets you back in the air safely.
Quick Start: The Reality Check for why my drone won t fly
If you’ve ever asked yourself why my drone won t fly, you’re not alone. In most cases, the issue is rooted in power, calibration, or simple hardware faults rather than a mysterious defect. According to Beginner Drone Guide, many flight problems originate from power delivery or miscalibration, which means your first move should be a careful, step-by-step power cycle and sensor check. This section lays out the foundational checks you should perform before diving into more advanced diagnostics. By addressing these basics you set a solid baseline, reduce risk during testing, and increase your chances of a successful lift-off on the first attempt.
- Check the battery seat: reseat the lipo pack and ensure no loosened connectors.
- Confirm firmware is current: outdated software can prevent takeoff or trigger safety interlocks.
- Look for obvious obstructions: loose screws, hair, or dirt around motors can stall rotation.
- Verify the control stick response: a miscalibrated throttle can produce a non-linear lift-off.
- Keep the environment calm: avoid windy or cluttered spaces that complicate initial tests.
Note: The phrase why my drone won t fly is common among beginners, and this first check often resolves many early takeoff issues.
Calibrate and Lock GPS: Why Calibration Matters for a Solid Takeoff
Calibration is the backbone of reliable flight. Improper IMU and compass calibration can cause drift, unwanted yaw, and a failed takeoff sequence. Start with a factory reset of sensor data if the drone offers it, then perform IMU and compass calibration according to your model’s manual. After calibration, give the drone time to acquire GPS lock in an open area with a clear sky view. If GPS lock remains elusive, try a different location or reboot the flight controller. In many cases, a fresh calibration fixes the core problem behind why my drone won t fly by eliminating misalignment between the controller inputs and the drone’s attitude. Remember to rebind your controller if the link feels laggy or unstable.
- Use a level, open surface for calibration.
- Avoid metal objects or tall structures during GPS initialization.
- Allow several minutes for satellites to lock before attempting a takeoff.
- If the drone shows a compass error, perform a magnetic interference check and recalibrate.
Inspect Propellers and Motors: Durable hardware that must be healthy to fly
Damaged or misconfigured propellers are a leading cause of failed takeoffs. Check each blade for chips, cracks, or deformities, and inspect the hub for looseness. Ensure props are installed in the correct orientation and securely fastened with no wobble. Spin each motor by hand to feel for grinding, catching, or unusual resistance. If you find any damaged parts, replace them with manufacturer-approved parts before attempting another test flight. Brand-new propellers can dramatically improve lift efficiency and reduce vibration, which in turn stabilizes sensor readings and helps explain why my drone won t fly unless the hardware is sound.
- Replace damaged props immediately.
- Confirm propeller orientation with the color markings.
- Tighten all screws to the recommended torque.
- Run a low-speed hover test in a safe, open space to verify balance.
Safety note: Always remove the battery and propellers before any inspection to avoid accidental starts.
Check the Controller, Link, and Firmware: Connection matters more than you think
A solid link between the controller and the drone is essential for a successful takeoff. If you experience lag, throttling clippings, or inconsistent responses, the issue may be radio interference, a weak transmitter, or a stalled app connection. Update both controller and drone firmware to the latest versions, then rebind the link following the manufacturer’s instructions. A corrupted or mismatched firmware pair can trigger safety features that block takeoff and leave you stuck on the ground. In practice, keeping software current reduces the likelihood of encountering why my drone won t fly due to outdated control logic. When rebinding, ensure you follow the exact sequence—some models require the transmitter to be in pairing mode first, then a button-press on the drone.
- Charge the controller and check the radio channel selection.
- Delete or reset stale pairing records from the app.
- Perform a full power cycle after firmware updates.
- Test with a simple hover to confirm control responsiveness.
Environmental Considerations: Space, Weather, and Geofencing
Weather and space limitations can silently prevent takeoff. Wind gusts, temperature extremes, or magnetic interference near power lines can degrade sensor data, causing a safe-for-flight interlock. Geofencing settings might block flights in restricted zones; ensure you’re registered for the location and that your app shows permission is granted. If you’re troubleshooting why my drone won t fly, verify environmental constraints first and then move to hardware checks.
- Check wind speed and gusts before takeoff.
- Avoid metallic structures and large crowds during tests.
- Confirm geofence zones in your flight app and disable if you’re legally allowed to operate in the area.
- Enable low-wind mission profiles if your drone supports them.
This section highlights how the environment can be a silent barrier to lift-off and how adjusting for it can resolve many takeoff failures.
Firmware, Reset, and Rebinding: Deep fixes when basics fail
Firmware glitches can masquerade as hardware problems. If you’ve exhausted the basics, perform a clean firmware install, reset the flight controller to factory defaults, and rebind the remote. This sequence clears stale data that can confuse the flight stack and trigger safety interlocks. If you still can t fly after these steps, contact the manufacturer’s support for a known-good procedure. In many cases, a safe reset resolves why my drone won t fly by restoring factory conditions and clearing problematic configurations.
- Back up mission data before resetting.
- Do not interrupt firmware updates.
- Rebind the controller following the exact order in the manual.
- Test with a basic hover before attempting advanced maneuvers.
Safety First: Troubleshooting with an eye on safety and prevention
Troubleshooting should always balance speed with safety. Remove the propellers while inspecting, work in a clear, open space, and wear eye protection if available. Never power the drone near people, pets, or delicate objects. After you identify the issue and fix it, conduct a controlled test flight, staying near the ground and within line of sight. Finally, maintain a checklist for future flights to minimize the chances you encounter why my drone won t fly again. The goal is to resolve issues efficiently while keeping yourself and bystanders safe.
- Use a bench with a gravity-neutral surface for testing.
- Keep spare parts, especially props and motors, within reach.
- Document every fix for future reference.
- Schedule regular maintenance checks.
Preventive Maintenance: Keeping your drone flight-ready
Prevention beats cure, especially with complex drones. A routine maintenance plan that includes regular calibration, propeller inspection, battery health checks, and firmware updates can prevent most takeoff problems. Create a calendar reminder to perform these tasks after every 5–10 flights, or at least monthly if you fly less frequently. Based on Beginner Drone Guide research, consistent care dramatically reduces the occurrence of why my drone won t fly due to avoidable wear.
- Inspect and replace worn parts proactively.
- Calibrate sensors after rough landings or temperature changes.
- Log each flight to monitor performance and trends.
- Keep a clean firmware upgrade path and a tested rollback plan.
Following these steps will improve reliability, reduce downtime, and increase your confidence in flying.
Why This Matters for Beginners and How to Move Forward
For new pilots, understanding the common reasons a drone won t fly helps you build a solid troubleshooting routine. When you encounter a failure, start with power and calibration, then progress through hardware checks, controller integrity, and firmware updates. If after following these steps your drone still won t lift, consult the manufacturer’s support resources or a local service center. The Beginner Drone Guide team emphasizes the importance of a systematic approach to keep you flying safely and confidently, turning perplexing issues into teachable moments and hands-on skills.
Steps
Estimated time: 25-40 minutes
- 1
Power cycle and battery check
Power off the drone and controller, remove the battery, reinsert securely, and perform a full charge. Then reattach the battery and power on to test basic response.
Tip: Check for loose connectors and listen for confirmational beeps. - 2
Calibrate sensors
Follow the manufacturer’s IMU and compass calibration steps in a spacious area. Allow sensors to settle, then verify no error messages persist.
Tip: Use a level surface and avoid magnetic interference. - 3
Inspect propellers and motors
Visually inspect all blades for chips and cracks. Spin each motor by hand to feel for smooth operation without resistance.
Tip: Replace any damaged propellers and ensure correct seating. - 4
Test remote link and firmware
Update both drone and controller firmware, then rebind the controller. Perform a gentle hover test in a safe area.
Tip: Keep a backup of previous firmware if rollback is needed. - 5
Environmental check
Ensure you’re in a suitable location with visible GPS satellites and minimal wind. Geofence settings should permit flight in your area.
Tip: Move to an open area if GPS is weak. - 6
Factory reset if necessary
If all else fails, perform a factory reset following the official guide. Recalibrate after the reset and rebind the controller.
Tip: Only use factory reset as a last resort.
Diagnosis: Drone won't take off or hovers erratically after throttle input
Possible Causes
- highPower issue: battery seating, low charge, or power switch fault
- mediumSensor calibration mismatch: IMU/compass not aligned
- mediumPropellers damaged, loose, or incorrectly installed
- lowWeak or interrupted radio link between controller and aircraft
- lowFirmware glitch or geofencing restrictions
Fixes
- easy reseat battery, ensure full charge, and inspect power connectors
- easyRun full IMU and compass calibration per manufacturer steps
- easyInspect each propeller for damage, replace if needed, verify correct orientation
- mediumUpdate firmware, rebind controller, and test link in a clear area
- mediumIf geofence or legal restrictions trigger, obtain proper authorization or contact support
Frequently Asked Questions
Why won t my drone take off when the battery is charged?
Even with a charged battery, poor seating, loose connectors, or a faulty power switch can prevent takeoff. Check connections, reseat the battery, and test without load to verify power delivery.
A charged battery isn’t enough if it isn’t seated or connected correctly. Check and reseat the battery, then test again.
How do I calibrate the IMU and compass?
Follow your drone’s manual to perform IMU and compass calibrations in a spacious area away from metal objects. After calibration, recheck that the drone reports stable attitude and no compass errors.
Calibrate in a clear space, away from metal, and confirm there are no compass warnings after calibration.
What if GPS won t lock?
Ensure an open sky view, avoid reflective surfaces, and power cycle the drone. If it still won t lock, move to a different outdoor area and retry.
If GPS won t lock, move to an open area and retry after a fresh power cycle.
Can damaged propellers stop a takeoff?
Yes. Cracked or bent blades can cause instability or a safety interlock. Replace damaged props and verify correct orientation.
Damaged blades can prevent lift; replace them and check orientation.
Is a firmware update necessary to fix takeoff issues?
Firmware updates often resolve bugs and improve stability. Update both drone and controller, then rebind if needed.
Updating firmware can fix stability issues; rebind if the link changes.
Watch Video
Quick Summary
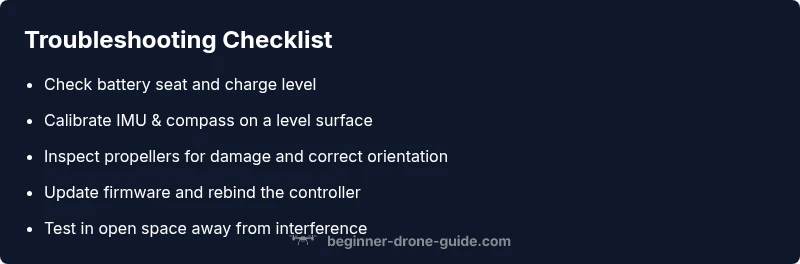
- Power and calibration first; fix most issues quickly.
- Inspect hardware before software resets.
- Keep firmware updated to maintain reliable links.
- Test in safe space with clear visibility.
- Maintain a routine maintenance log to prevent future problems.