How to Fix Drones: A Beginner's Troubleshooting Guide
Learn practical, step-by-step techniques to diagnose and repair common drone issues. This beginner-friendly guide covers safety, tools, troubleshooting, and real-world repair actions, helping you get back in the air with confidence.

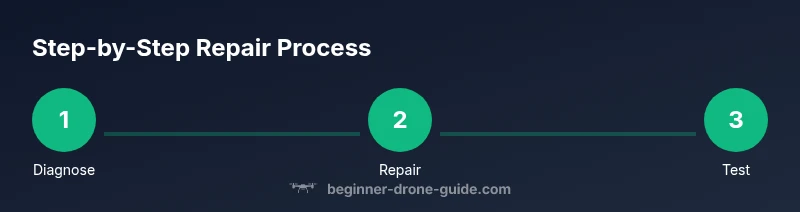
By following these steps, you’ll diagnose and fix common drone problems safely and confidently. This guide covers basic troubleshooting, safe handling, tool needs, and practical repair actions suitable for beginners who want to learn how to fix drones themselves before seeking professional help. These steps emphasize safety, proper diagnostics, and cost-conscious fixes that avoid unsafe improvisations while empowering new pilots to take control of their gear.
Understanding common drone faults
Drones reveal their faults in predictable ways, and recognizing the patterns is the fastest path to a fix. For beginners learning how to fix drones, a calm, methodical approach beats guesswork. According to Beginner Drone Guide, many common issues start with simple hardware problems: damaged propellers, loose connections, or degraded batteries. By learning to read these symptoms, you can triage safely and avoid unnecessary replacements. This section outlines the most frequent faults, how they manifest, and the first checks you should perform before moving deeper into repairs. You’ll gain a baseline understanding of what tends to fail and why, plus practical steps to verify or reject each possibility with minimal risk. From propeller wobble to phantom yaw during flight, the signs are clues. You’ll also see indicators in the LED patterns on the flight controller, voltage sag on the battery, and unexpected motor heat. Document what you observe and compare against your drone’s service manual. The goal is to build a reliable mental map of likely causes so you can work efficiently.
Safety first: pre-flight checks and precautions
Before you touch the drone, set the stage for a safe, controlled repair environment. Remove the battery and disconnect any power sources. Work in a clean, well-lit area free of distractions and bystanders. Use prop guards if you must handle the craft and keep hands clear of the prop arcs. Wear eye protection if you anticipate debris. Check your landing surface for stability and choose an open space for tests away from people or obstacles. According to Beginner Drone Guide, slow, deliberate checks reduce the risk of further damage. Have your tools organized, and never power up the drone with components exposed. By embedding these safety habits, you’ll minimize risk and set yourself up for a successful repair.
Common issues by subsystem: propulsion, electronics, motors
Problems cluster around three subsystems: propulsion (props and motors), electronics (flight controller, ESCs, wiring), and the power system (battery and connectors). Propellers can crack or become unbalanced and should be replaced in pairs when necessary. Loose or damaged connectors cause intermittent power loss or erratic behavior. ESCs may overheat if damaged or poorly soldered, and motors can wear bearings or accumulate debris. The more you learn the language of these subsystems, the quicker you’ll identify root causes. For example, a drone that yaws or wobbles often points to arm or prop issues, while unexpected shutdowns can indicate battery or power-supply faults. Maintain a simple check routine: inspect physical parts, test each motor individually, and validate power flow with a multimeter where applicable. This structured approach saves time and keeps repairs safe.
Tools, parts, and where to get replacements
Equipping yourself with the right tools makes repairs smoother and reduces the chance of introducing new problems. Essential items include a precision screwdriver set, hex drivers, a multimeter, spare propellers, wire cutters, heat shrink tubing, and electrical tape. Optional but helpful items include a soldering iron, spare motors for your specific model, an anti-static mat, and a parts organizer. Replacement parts should come from reputable sources—start with the manufacturer’s official store or trusted hobby retailers to ensure compatibility and safety. When ordering parts, have your drone model, motor count, and propeller size handy so you don’t receive mismatched components. Keeping spare parts organized and labeled speeds up future fixes and minimizes downtime.
How to troubleshoot: a systematic approach
Adopt a repeatable process so fixes aren’t guesswork. Begin with a power-down safety check, then inspect the propellers and frame for damage. Next, verify wiring connections and battery health, ensuring voltages are within expected ranges. If the problem persists, isolate subsystems by testing each motor individually on a bench setup with the propellers removed. Log observations and compare against a fault tree: does the issue appear during takeoff, in flight, or during a specific control input? This methodical approach helps you differentiate between mechanical, electrical, and software causes without rushing to conclusions. Finally, perform firmware updates or calibrations if necessary, but only after verifying hardware integrity. This disciplined workflow reduces error and protects your equipment.
Replacing a small component: rotors, props, and connectors
When a component shows visible wear or fails a bench test, replacing it is often the best fix. Start with the propellers, ensuring you replace them in matched pairs and install the correct direction for each arm. Unbalanced props can cause vibrations that stress the flight controller. For connectors, reseat and tighten, inspecting for corrosion or bent pins. If a wire is damaged, trim back cleanly and re-solder with heat-shrink insulation. Always re-check the mechanical fit after replacements, and avoid overtightening screws that can strip threads or crack the frame. After component replacement, re-check balance and alignment to prevent flight instability.
Calibrations and updates after repairs
Repair work often requires recalibration to restore reliable flight. Start with IMU and compass calibrations to ensure accurate inertial data, then verify radio link and control responsiveness. Firmware updates can provide bug fixes and improvements, but perform them only after confirming hardware integrity. Save flight presets where possible and re-check sensor fusion behavior in a safe environment. Keep a log of the changes you’ve made and the results of calibration tests. This diligence helps you detect drift or calibration deviations early and maintain stable flights over time. Remember that calibration quality matters as much as part replacements for repeatable, predictable performance.
Testing procedures: hovering, controls, and range checks
Testing should be done in a controlled, obstacle-free space. Begin with a gentle hover at a low altitude to assess stability and responsiveness to throttle, pitch, roll, and yaw inputs. Observe for any drift, wobble, or unexpected vibrations. Slowly increase hover altitude and test basic maneuvers, ensuring the drone returns smoothly to a stable position. Run a range check by verifying the controller range in an open area. If the drone behaves unexpectedly, land safely and re-inspect connections and calibrations before another test. Document test outcomes to guide further fixes and adjustments. A careful, logged approach helps you avoid repeat issues and confirms that repairs are durable.
When to seek professional help
Some repairs exceed the scope of a typical hobby fix. If you suspect a damaged flight controller, a cracked frame, or persistent calibration drift after multiple attempts, it’s wise to consult a professional technician or the manufacturer’s service center. Complex repairs may require specialized equipment or diagnostic tools that aren’t practical for home work. The safety of your drone and bystanders comes first, so don’t push through symptoms that indicate major hardware failure. If you’re uncertain, a quick consult with a pro can prevent further damage and save time in the long run.
Tools & Materials
- Screwdriver set (Philips and flat-head)(Variety sizes; precision handle)
- Hex/Allen driver set(For frame screws and mounts)
- Multimeter(DC voltage testing for power paths)
- Replacement propellers (set of 4-8)(Match your drone’s propeller size and pitch)
- Spare motors (brushless, if applicable)(Only for confirmed motor wear)
- Soldering iron and lead-free solder(For wiring repairs)
- Heat shrink tubing / electrical tape(Insulation and strain relief)
- Wire cutters/strippers(Trim and prepare wiring)
- Hot glue gun or epoxy(Lightweight component securing)
- Anti-static mat or ground strap(ESD protection)
- USB charging cable and spare battery(Power tests and bench checks)
- Parts organizer(Keeps fasteners sorted)
- Small magnifier or flashlight(Inspect tiny connectors)
Steps
Estimated time: 60-180 minutes
- 1
Power down and safety prep
Power off the drone and disconnect the battery. Move to a clean workspace and confirm there are no loose tools nearby. This prevents short circuits and injuries during inspection.
Tip: Hold the battery release while removing to avoid dropping it. - 2
Inspect propellers and guards
Visually inspect all propellers for cracks, chips, or warping. Check guards for cracks or looseness. Replace damaged props in matched pairs to maintain balance.
Tip: Spin-proof test later to confirm balance after replacement. - 3
Check electrical connections
Inspect power cables, battery connectors, and ESC wiring for loose pins, corrosion, or fraying. Re-seat connectors firmly and use contact cleaner if needed.
Tip: Look for discoloration indicating overheating. - 4
Bench test power and motors
With the props removed, power the drone briefly to verify each motor responds to throttle. Do not run motors for extended periods at this stage.
Tip: Keep hands clear of spinning parts and monitor for overheating. - 5
Check frame and wiring path
Inspect the frame for cracks and misalignment. Ensure wires aren’t pinched along arms or under screws. Adjust routing if necessary.
Tip: Avoid routing wires over sharp edges. - 6
Replace faulty components
Install new propellers or a failed motor if confirmed by tests. Re-solder joints as needed and insulate with heat shrink.
Tip: Always verify polarity when replacing motors. - 7
Firmware and calibration
Update firmware if available and perform IMU/compass calibrations as required by the model. This helps sensor fusion after hardware changes.
Tip: Follow manufacturer guidance for calibration order. - 8
Controlled test flight
Perform a slow, controlled hover outdoors in a safe area. Observe stability and control response before attempting advanced maneuvers.
Tip: Have a spotter and emergency kill switch ready.
Frequently Asked Questions
What is the first step when a drone won't power on?
Start by checking the battery connection, charge level, and any power switch. Inspect the power port and fuse if present. If the issue persists, move to safe troubleshooting steps.
First check the battery and connections, then the power switch and port. If it still won't power on, proceed with the safe troubleshooting steps.
How can I tell if a motor is damaged?
Look for unusual vibration, noise, heat, or resistance when spinning. Use a bench test to isolate each motor and compare performance.
Signs include unusual vibration, heat, or no response when tested individually.
Can I repair drones myself or should I hire a pro?
Many common faults, like prop or connector issues, are doable at home. More complex issues like a damaged flight controller or frame may need professional service.
Most beginners can handle simple fixes, but complex parts are better left to pros.
Is it safe to test flight indoors after repairs?
Indoor tests pose collision risks; prefer an open area or netted enclosure. Use prop guards and ensure people are clear of the flight path.
Only test indoors if the area is safe and protected; otherwise, avoid it.
Where can I buy replacement parts?
Choose the manufacturer’s official store or reputable hobby retailers to guarantee compatibility and safety. Avoid unknown marketplaces for critical components.
Shop from official stores or trusted hobby retailers to be safe.
Do firmware updates affect repairs?
Firmware updates can improve performance but should follow hardware checks. Calibrate sensors after installing new firmware if needed.
Firmware can affect behavior; update only after hardware checks and recalibration.
Watch Video
Quick Summary
- Diagnose with a repeatable process
- Prioritize safety above all
- Use matched spare parts
- Calibrate after hardware changes
- Test in a controlled environment