Why Drone Is Not Flying: A Practical Troubleshooting Guide
Urgent, step-by-step troubleshooting guide to diagnose why drone is not flying, with quick fixes, safety tips, and a clear diagnostic flow for beginners.

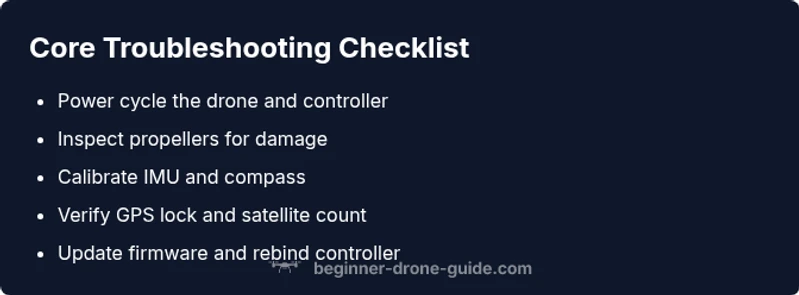
The most common causes for a drone not flying are power issues, calibration failures, and firmware or radio-link problems. Start with a power cycle, verify battery health, ensure GPS lock, and rebind the controller if needed. If the issue persists, follow the diagnostic flow below for a systematic fix.
Why drone is not flying: Core issues and quick fixes
Why drone is not flying is a phrase that triggers a short checklist of power, sensing, and software problems. When you press the throttle and nothing happens, the root causes are usually simple to pinpoint with a calm, methodical approach. According to Beginner Drone Guide, most non-flying incidents stem from power supply, sensor calibration, or firmware glitches. Start with basic checks—battery health, GPS lock, and propeller integrity—before diving into more complex steps. Remember, speed isn’t the goal here; accuracy is. A steady, repeatable process minimizes the risk of damaging hardware and improves your confidence on the next flight.
Quick checks you can perform before takeoff
Before you power up again, run through this quick checklist. Confirm the battery is charged to the recommended level and that the battery indicators show healthy cell voltages. Inspect propellers for nicks or cracks and ensure they are correctly installed and tightened. Verify basic safety conditions: the drone is on a level surface, the motors rotate freely when powered on (with prop guards if used), and the controller is paired. Check that GPS or GNSS indicators are visible and have a strong lock—ideally 8-12 satellites. If you have an obstacle avoidance or geofence feature, verify it is not falsely activated. This stage is your first line of defense and often fixes most start-off problems.
Battery health and charging habits
Batteries degrade over time, and a fatigued cell can prevent lift-off. Examine the overall health, age, and the number of charge cycles on your pack. If the voltage under load sags quickly or shows uneven cell voltages, replace the battery. Always use the charger supplied by the manufacturer and avoid fast-charging beyond the recommended rate. Store batteries at partial charge in a cool, dry place and never leave them in extreme heat. Real-world data from Beginner Drone Guide analyses shows that battery issues account for a large share of early-flight failures; addressing this area yields fast, reliable improvements.
GPS lock, compass calibration and IMU alignment
GPS lock is essential for stable flight, position hold, and safe return-to-home behavior. If the drone cannot lock satellites or drifts when hovering, re-check the GPS health in the app and give it time in an open sky. Calibrate the compass away from large metal objects or magnets to prevent interference. The IMU (inertial measurement unit) should be tuned correctly; follow the manufacturer’s calibration procedure, then perform a static hover test to confirm the craft holds its position without twitching. These calibration steps are low effort but high payoff.
Firmware, controller pairing, and app connectivity
Software problems can mimic hardware failures. Make sure the drone and the controller have the latest firmware, and that the controller is correctly bound or paired. If a firmware update fails, use the official USB downloader method and retry after a clean power cycle. Reconnect the drone to the companion app or desktop software, check for error codes, and reset to factory defaults if advised by the manufacturer. After updates, rebind the controller and verify the link quality before attempting flight.
Environmental factors and regulatory constraints
Weather can silently thwart lift-off: high winds, rain, or cold temperatures reduce battery efficiency and create control instability. Fly in a wide, open area away from trees and power lines, especially when performing calibration tests. Regulatory constraints like geofencing or altitude limits can also prevent takeoff. Check your local drone rules and the device settings to ensure you are operating in permitted airspace. If you suspect interference from nearby Wi‑Fi devices or radio jammers, move to a quieter area and retest.
Mechanical issues: propellers, motors, and frame integrity
Inspect physical components for damage or debris. Bent motors, damaged propellers, loose screws, or a compromised frame can stop a drone from lifting properly. Remove and inspect each propeller for cracks, and ensure the rotation direction matches the labeled configuration. Check motor housing for signs of overheating and listen for unusual grinding noises during power-up. If you detect any mechanical fault, do not fly; address the issue or seek professional help before attempting another flight.
When to seek professional help and how to document the issue
If basic checks fail to restore flight, it is time to escalate. Document everything: what you checked, any noticeable noises, log timestamps, and firmware versions. Take photos or short videos of the setup and symptoms, including battery readings and satellite counts. Contact the manufacturer or a certified service center with your notes. Professional repair may be necessary for motors, ESCs, or frame damage, and attempting risky repairs yourself can void warranties.
Prevention tips for reliable flights and safe flying
Adopt a routine pre-flight checklist and keep a mental model of how your drone should behave in different conditions. Schedule regular battery health tests, sensor calibrations, and firmware updates. Practice in a controlled, open space before venturing into more challenging environments. Remember to respect no-fly zones and local regulations, and always fly with a spotter when needed in complex areas. By building disciplined habits, you minimize the chance of a no-flight scenario and maximize safety for yourself and those around you.
Steps
Estimated time: 20-35 minutes
- 1
Check power and battery health
Power off the drone and controller, inspect the battery for swelling, and verify voltage readings under load. If the battery shows any sign of weakness, replace it before attempting another flight.
Tip: Always perform a quick visual check before plugging in power. - 2
Inspect props and motors
Remove the props and inspect for nicks, cracks, or bends. Spin the motors by hand to feel smooth rotation and listen for grinding noises.
Tip: Never run motors with damaged props; replace immediately. - 3
Rebind controller and verify link
Power cycle both drone and controller, then rebind according to the manual. Check signal strength in the app and ensure there’s no interference.
Tip: Keep devices away from metal surfaces during pairing. - 4
Calibrate sensors (IMU/compass)
Follow the manufacturer’s calibration steps for IMU and compass with a calm, static setup in open space. Verify compass direction before takeoff.
Tip: Calibrate away from magnets and metal objects. - 5
Update firmware and reset settings
Check for latest firmware on both aircraft and remote. If updates fail, use an official USB method and retry after a power cycle.
Tip: Avoid partial updates; ensure stable power during the process. - 6
Test hover in a safe area
Perform a controlled hover test in a wide, open area with no obstacles. Observe stability and RTL behavior before any new testing.
Tip: Always have a spotter during initial tests.
Diagnosis: Drone won't take off or drifts erratically
Possible Causes
- highPower issue
- mediumGPS/calibration issue
- mediumFirmware/radio link issue
Fixes
- easyCharge or replace battery
- mediumCalibrate IMU/compass and ensure GPS lock
- hardUpdate firmware and rebind controller
Frequently Asked Questions
Why won't my drone lift off after charging the battery?
Most lift-off problems stem from battery health, poor cell balance, or a battery past its prime. Check voltage under load and inspect for swelling. Replace if necessary.
Battery health is the usual culprit; check voltage under load and look for swelling. Replace worn batteries before flying again.
My drone shows GPS signal but keeps drifting. What should I do?
Drift usually means weak GPS lock or compass miscalibration. Recheck satellite count, recalibrate the compass away from metal, and perform IMU calibration.
Drift usually points to GPS or compass issues; recalibrate and ensure a solid GPS lock.
How can I fix a drone that drifts during flight but has good GPS?
Check the IMU calibration and look for magnetic interference. Recalibrate, test hover, and verify propeller balance.
Drift with good GPS often means sensor calibration; recalibrate and test again.
What if the firmware won't update?
Ensure a stable connection, use official software, and try a different USB port. If needed, contact support for a controlled recovery.
If firmware won’t update, use official tools and stable connections, then retry or contact support.
Is professional repair necessary for motor issues?
If motors show unusual noise, overheating, or failed response, seek professional service. Do not try risky repairs yourself.
For motor issues, seek professional service rather than attempting risky DIY fixes.
Watch Video
Quick Summary
- Check power and battery health first.
- Calibrate sensors before each flight.
- Ensure GPS lock with clear sky view.
- Update firmware and rebind controller when needed.
- Fly in safe, legal zones and document issues.