How to Fix Drone on Exhaust: Safe Removal Guide
A practical, beginner-friendly guide to safely removing a drone stuck on an exhaust vent, with tools, steps, safety tips, and real-world examples.

Why a drone ends up on exhaust and why it matters
According to Beginner Drone Guide, a drone can end up resting on an exhaust vent or pipe after a loss of lift, wind gusts, or a misread controller. Exhaust environments are hazardous for electronics: heat, fumes, and tight spaces can warp housings, melt seals, or strain motors and props. If you’re reading this, you likely want to know how to fix drone on exhaust safely so you can recover the aircraft without creating new problems. Understanding the risks helps you plan a methodical extraction rather than a rushed tug, which could worsen damage.
Ducts, vents, and exhaust housings can trap rotors or props, pinching wiring or bending cameras. Even if the drone seems undamaged, heat exposure can degrade batteries and circuitry. A calm, deliberate approach protects flight components, preserves resale value, and reduces personal risk. This section sets the stage for a safe retrieval, highlighting why patience and preparation matter as much as technique.
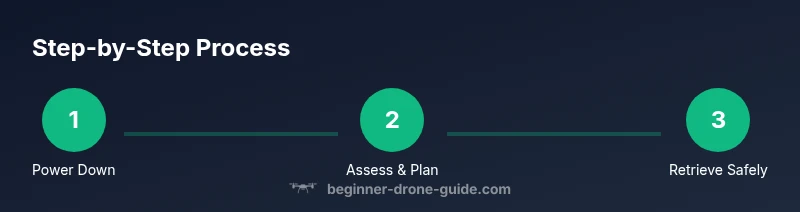
Safety first: assess heat, power, and surrounding hazards
Before touching the drone, verify the exhaust is not hot and there are no leaks or fumes that could irritate skin or eyes. If the area feels warm or you detect fumes, wait for cooling—exhaust components can reach high temperatures quickly, and touching a hot surface can cause burns or burnened wiring insulation. Power down any nearby equipment that might activate inadvertently, and switch off your own devices to avoid static discharge.
Ensure bystanders, pets, and adults maintain a safe distance. Use a flashlight to inspect the drone’s location without jostling it. If you’re unsure about the drone’s electrical state, err on the side of caution and postpone removal until you can safely power down the craft. Remember: the goal is to avoid a fire, further mechanical damage, or a shock hazard.
Immediate steps to take while you decide what to do
Take these steps in order to reduce risk: (1) power down the drone completely, (2) disconnect or isolate the battery if accessible and safe to handle, (3) place a protective barrier around the exhaust area to prevent debris from falling onto people or surfaces, (4) assess how deeply the drone is wedged and whether any components are visibly damaged. If the battery shows signs of swelling, leakage, or heat, treat it as a hazardous material and do not attempt removal yourself—call for professional assistance.
Document the situation with photos or video from a safe distance; this can help with insurance claims or later repairs. Patience is crucial: rushing removal can cause a rotor strike, wire pinching, or a short circuit. A deliberate plan reduces the chance of permanent damage.
Planning the extraction environment: evaluating risk and options
The extraction plan should consider the exhaust type (industrial, automotive, or building vent), the drone model, and your access to the area. If the exhaust is in a hood, chimney, or duct, the approach differs. In some cases, you can reach the drone with a long, non-conductive tool from a stable surface; in others, you may need to reposition to gain access. Regardless of method, prioritize non-destructive tools and avoid metal prying near delicate electronics.
If you suspect the exhaust contains moving parts or hazardous fumes, do not lean over the vent or reach with metal tools. Instead, identify safer angles or alternative access routes. The key is to keep both you and the drone out of harm’s way while ensuring the device is safe to retrieve.
Tools, gear, and setup you’ll need (and what to avoid)
As you prepare, ensure you have a clear workspace, adequate lighting, and non-slip footing. Use non-conductive tools whenever possible to minimize the risk of short circuits if you accidentally contact exposed wiring. If heat is present, allow the area to cool fully before attempting any manipulation. Always wear protective gloves and eye protection to guard against sharp edges, flying debris, and sudden rotor movement. Keep a charged phone or camera handy to document the process for safety and post-recovery checks.
Avoid using metal prying tools that could gouge the drone’s shell or puncture components. Also avoid applying lubricants near electronics or the battery compartment, as many substances can contaminate circuitry and create dangerous fumes when heated. The right tools can reduce both risk and difficulty—choose non-slip gloves, long-grip tongs, and a stable ladder if you need height.
Step-by-step extraction strategy: careful, repeatable actions
This section outlines a safe, repeatable approach to extraction. It emphasizes slow, controlled actions over forceful prods. Coordinating a partner can help—one person stabilizes while the other works with retrieval tools. Always maintain three points of contact when using a ladder or platform. Your goal is to release counterforces that keep the drone wedged without disturbing wiring or cooling ducts.
As you progress, reassess after each action. If something feels wrong or the drone shifts unexpectedly, stop and re-evaluate. A rushed move can bend blades or snap connectors, leading to further damage or personal injury. Be prepared to pause and seek professional help if you encounter immobilization, smoke, or heat.
Post-removal care and inspection: what to check once the drone is free
After retrieval, power down fully and inspect the drone for signs of damage. Check rotor mounts, camera gimbal, and internal sensors for bent components or debris intrusion. If you notice any abnormal vibrations, unusual noises, or reduced flight stability, avoid flying the drone until it’s been professionally inspected. A post-flight check can reveal heat damage, electrolyte leaks, or circuit board issues that aren’t obvious at first glance.
If a heat source was involved, allow the drone to cool completely in a safe area before attempting to charge the battery or power it on again. When in doubt, consult a professional repair service or contact the manufacturer’s support line for guidance. Document all findings for warranty or insurance purposes.
Prevention and best practices to avoid future incidents
Prevention starts with flight planning. Always scout your surroundings for potential exhaust zones—heating vents, car exhaust, or industrial ducts—before takeoff. Calibrate your GPS and vision positioning to reduce hover errors in cluttered spaces. Maintain a conservative altitude near structures, and practice precise returns so you have better control in confined areas. Use propeller guards if you fly in tight spaces to reduce the risk of gate- or vent-related entanglements.
Invest in protective accessories such as camera guards and landing pads to minimize damage in a crash or snag. Keep your battery in good condition and monitor for swelling or signs of heat. If you do approach an exhaust again, slow, deliberate maneuvers and pre-mission checks become your best defense.
Real-world tips and when to call professionals
In many jurisdictions, retrieving a drone stuck on exhaust is best handled with caution. If the drone remains wedged after initial attempts, if the exhaust area presents heat or fumes, or if you’re unsure about electrical safety, contact a licensed technician or a drone repair service. For educational purposes, testing a retrieval technique on a spare drone under controlled conditions can help you refine the approach without risking your primary device. Always follow local regulations and manufacturer guidelines when dealing with hazardous extraction scenarios.