How to Pair Drone and Controller: A Beginner Guide
Learn how to pair your drone with its controller with clear, beginner-friendly steps. This guide covers prerequisites, step-by-step pairing, troubleshooting, and safety tips to help you fly confidently.

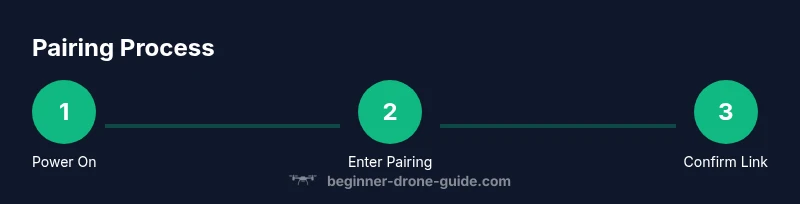
Pairing a drone and controller establishes a stable wireless link for safe, confident flights. You’ll typically power on both devices, activate pairing mode, and confirm the connection via the app or on-device interface. This quick guide outlines the common steps, potential hiccups, and essential checks to verify a solid link before you fly.
Why pairing a drone and controller matters
Establishing a reliable link between your drone and controller is the foundation of safe, predictable flight. When the two devices are properly paired, your throttle, yaw, pitch, and roll inputs translate instantly to the drone. According to Beginner Drone Guide, taking the time to master the pairing process pays dividends in flight stability and ease of use. If you’re asking how to pair drone and controller, this is the essential starting point before any other setup or flight planning. A solid pairing reduces latency, minimizes drift, and helps you respond quickly in dynamic situations, which is especially important for beginners building confidence and learning basic piloting skills.
Understanding pairing methods across brands
Different drone ecosystems use different pairing methods, but the goal is the same: a clean, authenticated link between the controller and the drone. Many consumer drones rely on a pairing button or a pairing option in the on-device menu, while others use a mobile app to initiate and confirm the link. The Beginner Drone Guide team has found that for most entry-level models, the app-based pairing path is the simplest and most reliable, especially for first-time flyers. In some models, you’ll also see light patterns or beeps that indicate a successful connection.
Prerequisites and safety checks before you begin
Before you attempt to pair, make sure you’re in a safe, open area away from people and obstacles. Check that both the drone and controller have charged batteries and up-to-date firmware. If you’re using an app, ensure your smartphone or tablet is running the latest version and that the drone is registered or compliant with local rules. Keep metal objects, power lines, and large metal surfaces away from the pairing zone to minimize interference. A calm environment helps you notice subtle cues that indicate a strong link, such as stable indicator lights and responsive controls.
A high-level overview of the pairing process
Most drones follow a similar high-level flow: power on, enable pairing mode on both devices, establish the link (often via the app or onboard indicators), test control responsiveness, and finally perform a quick calibration if prompted. While brand-specific steps differ, the underlying principles are consistent: prepare, initiate, verify, and test. As you build experience, you’ll recognize when the link is strong and when adjustments are needed to reduce latency or improve stability.
Common pairing problems and quick fixes
If pairing fails, start with the basics: ensure both devices are awake, in range, and not connected to another controller. A simple power cycle often resolves conflict or ghost connections. If you see flashing lights or a “link failed” message, re-enter pairing mode and retry with the app or interface. Check for firmware updates on both the drone and the controller, as compatibility issues can block pairing. If you’ve recently reset or changed a setting, re-run the pairing sequence from the start.
Brand-agnostic tips to improve reliability
To maximize pairing reliability, operate in a clean RF environment: minimize nearby Wi‑Fi and other 2.4 GHz interference. Keep the drone and controller within a modest line-of-sight range during pairing. If you upgrade or replace hardware, re-run the pairing process rather than assuming a saved profile will auto-connect. Regular firmware checks help prevent future pairing issues and ensure you have access to the latest stability improvements.
Firmware, apps, and ongoing maintenance
Firmware updates can enhance pairing stability and feature support, but they may also require re-pairing after installation. Always check the manufacturer’s app notes for any post-update steps. When using a companion app, keep it current and clear any cached device connections if you encounter lingering pairing problems. A routine maintenance routine—checking batteries, calibrations, and firmware—gives you fewer surprises during flights.
Final safety practices after pairing
After you pair, perform a quick functional check: confirm stick inputs map correctly, verify accelerometer and compass are calibrated, and conduct a brief hover test at a low altitude in a safe area. Respect local regulations and geofencing settings, and avoid attempting to fly near people or restricted zones during the first flights. Practicing in controlled spaces builds muscle memory and reinforces safe habits.
AUTHORITY SOURCES
- https://www.faa.gov/uas/getting_started/
- https://www.nationalgeographic.com/technology/article/drones
- https://ocw.mit.edu/
These sources provide official safety guidelines and educational context for responsible drone operation.
Tools & Materials
- Drone (model of your choice)(Fully charged battery installed)
- Controller(Paired-ready with fresh batteries)
- Smartphone or tablet with official drone app(Latest version installed)
- USB charging/data cable(For app pairing and firmware updates)
- User manual or manufacturer pairing guide(Helpful for model-specific steps)
Steps
Estimated time: 20-40 minutes
- 1
Power on devices
Turn on the drone and the controller and confirm both show ready indicators. Ensure batteries are fully charged and the devices have remained idle for a moment before attempting pairing.
Tip: Avoid starting with the devices in a metal area or near strong RF sources to prevent interference. - 2
Enter pairing mode
Activate pairing mode on the drone and the controller as per your model’s instructions, either via a dedicated button or on-screen menu. Wait for the indicators to signal pairing is active.
Tip: If you can’t find pairing mode, consult the user manual for the exact sequence; some models require a long press. - 3
Establish the link in the app or interface
Open the official app and follow the pairing prompts, or use the on-device pairing screen if your model supports it. Observe for a successful link indicator and feedback from the controller.
Tip: Keep the app and drone within direct line of sight during this step to avoid lockouts. - 4
Verify control response
Test basic controls by gently lifting the throttle and initiating a small hover. Confirm that stick input translates immediately without lag.
Tip: If the drone doesn’t respond, re-enter pairing mode and retry; avoid aggressive movements during testing. - 5
Check for firmware/app updates
If prompted, update firmware on both drone and controller and then re-check the pairing stability after the update.
Tip: Updates can reset pairing, so re-test after installation. - 6
Troubleshoot and re-pair if needed
If the link fails or drifts, power down both devices, reset network settings if available, and repeat the pairing sequence from the start.
Tip: Document model and firmware versions to help customer support if issues persist.
Frequently Asked Questions
Do I always need a smartphone to pair my drone and controller?
Not always. Some drones pair entirely on-device, while others rely on a companion app for setup and verification. Always check your model’s instructions.
Most models use a companion app for pairing, but some pair on the drone itself. Check your manual for the exact method.
What should I do if pairing mode won’t activate?
Make sure the batteries are charged, you’re using the correct buttons or menu, and you’re within range. If needed, power everything off and try again from the start.
If pairing mode won’t activate, double-check power, follow the manual’s sequence, and retry from scratch.
Can I pair more than one controller to a single drone?
Some drones support multiple controllers, but many models pair with a single controller at a time. Review your drone’s docs for the exact capability.
Some drones allow multiple controllers; others don’t. Check your model’s manual for clarity.
Will a firmware update affect pairing?
Firmware updates can change pairing behavior and may require re-pairing afterward. Always re-test the link after updates.
Yes, updates can reset pairing. Re-test after updating to ensure a stable connection.
Is pairing safe for beginners?
Yes. As long as you pair in a safe, open area and follow instructions, pairing is a routine setup step that builds confidence.
Pairing is safe when done in an open space and following the manual.
How long does pairing usually take?
Most beginners can complete pairing in a few minutes, depending on model complexity and whether firmware updates are required.
Typically a few minutes, depending on your model and updates.
Watch Video
Quick Summary
- Power on devices before attempting pairing
- Follow model-specific pairing steps in order
- Verify link reliably with app or onboard interface
- Test basic controls in a safe area before flights