How Drones Communicate with Controller: A Beginner's Guide
Learn how drones exchange control commands, telemetry, and video with the controller. This beginner-friendly guide explains RF links, data streams, safety features, and practical steps to maintain a strong, reliable connection during flight.

Drones communicate with their controller via a bidirectional radio frequency link that carries control inputs, telemetry, and video data. The system uses secure, often encrypted channels and safety features like failsafes to keep you in control. Understanding this two-way link helps you fly smarter, safer, and with more confidence.
How the Control Link Works
Drones rely on a dedicated two-way radio link between the aircraft and the handheld controller. When you move the sticks, your inputs are translated by the controller into control signals that the drone's flight controller interprets to adjust motors and attitude. At the same time, the drone streams telemetry data—battery status, GPS coordinates, altitude—and, in many setups, a live video feed back to your screen. This bidirectional communication happens in real time, with built-in safety features designed to detect degraded signals and initiate a safe response. According to Beginner Drone Guide, the quality of this link hinges on hardware, software, and how you manage the flight environment. A robust link is the foundation of predictable performance and safe, confident piloting.
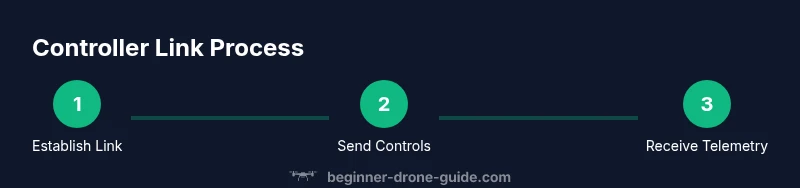
The controller and drone negotiate a pairing process that establishes a unique link. Once paired, the system uses a dedicated frequency channel and a communication protocol optimized for low latency and high reliability. While the exact implementation varies by model, the core concept remains the same: exchange commands, monitor status, and react to changes in signal quality without losing control.
Hardware, Frequency, and Encoding
Every link rests on three pillars: hardware, frequency, and encoding. The hardware includes a transmitter in the controller and a receiver on the drone, with antennas oriented to maintain line of sight. The most common control channels operate in unlicensed RF bands, often around 2.4 GHz, while video downlinks frequently use a separate band such as 5.8 GHz. Modern systems frequently employ dynamic spectrum management, frequency hopping, or spread-spectrum techniques to minimize interference and maintain a stable connection even in busy environments. Data is encoded with robust digital protocols and error correction to keep commands from being misread or lost mid-air. Overall, the design prioritizes low latency and high reliability, so your inputs translate quickly into smooth flight.
For beginners, this means that staying within a clear line of sight, avoiding metal obstacles, and keeping the controller and drone properly paired can dramatically improve how responsive your drone feels. This section explains how these technologies come together in everyday flight, and how small changes in setup can yield big gains in stability.
Data Streams: Control, Telemetry, and Video
The control stream carries your inputs—throttle, pitch, roll, and yaw—so the drone responds as you expect. Telemetry is a continuous broadcast of flight data, including GPS position, altitude, battery level, signal strength, and aircraft status. A separate video downlink, if your setup supports it, streams live footage to your display, often with its own channel. Some systems merge these streams into a single protocol, while others separate them for redundancy. Secure, encrypted channels protect sensitive data, reducing the risk that someone could tamper with commands or misread telemetry. Understanding these streams helps you interpret what you see during flight and recognize when something might be affecting performance.
Effective pilots regularly monitor all streams: if control input seems delayed, you check latency; if telemetry flags a weak signal, you adjust position or altitude; if the video feed stutters, you switch to a lower resolution or adjust the link settings. The goal is a transparent, predictable flying experience.
Factors That Affect Link Quality
Link quality is not fixed; it changes with the environment and flight conditions. Line of sight is king—obstructions like trees, buildings, and even terrain can attenuate signals. Interference from other devices, such as nearby Wi‑Fi networks or other drones, can degrade performance and increase latency. Distance matters: the farther you are from the controller, the more susceptible you become to signal loss or data packet delays. Weather also plays a role: heavy rain or strong winds can affect antenna performance and introduce noise into the radio channel. Finally, hardware issues—damaged antennas, loose connectors, or outdated firmware—can silently erode link reliability. By recognizing these factors, you can plan flights that stay well within the reliable sweet spot of the connection.
Practical takeaway: always survey the flight site beforehand, choose the highest, unobstructed vantage point, and anticipate possible interference by selecting a channel with the least congestion.
Safety, Compliance, and Best Practices
Maintaining a reliable link is not just about performance; it’s also about safety and compliance. Fly within visual line of sight and obey local airspace rules, which often require you to keep the drone under control at all times. Regularly update firmware on both the drone and the controller, calibrate sensors when prompted, and re-pair if you notice a drop in link quality. Enable failsafe features like return-to-home or auto-landing in case the link is lost, and set a sensible RTH altitude to avoid obstacles. Keep antennas oriented for optimal reception, avoid reflective surfaces, and stay away from environments known for RF interference. Practicing in a safe, open area helps you learn how the link behaves across different conditions while reinforcing good habits for real-world flights.
Practical Setup Checklist for Beginners
Before you take to the sky, run through a quick setup checklist to ensure the link remains robust. Confirm both devices are on the latest firmware and properly paired. Verify antenna orientation and inspect all cables for wear. Prepare your display (phone/tablet) and ensure telemetry is visible. Have spare batteries ready and test the return-to-home function in a safe environment. Finally, choose a flight area with minimal RF interference and ensure observers are at a safe distance. This proactive approach minimizes surprises once you start flying.
Troubleshooting Common Link Issues
When the link falters, start with the simplest explanations: recheck pairing, reboot both devices, and confirm the transmitter channel is clear of interference. Inspect antennas for damage and reseat connections. Move to a location with fewer obstructions and test at a lower distance. If problems persist, perform a firmware update or factory reset per the manufacturer’s guidance and then re-pair. Documenting the steps you took helps you reproduce a stable setup time after time.
Tools & Materials
- Drone(Fully charged; check for visible damage before flight)
- Controller/Transmitter(Paired with the drone; ensure antennas are functional)
- Smart device (phone/tablet) for monitoring( apps open and telemetry visible; charged)
- Spare batteries(Have at least one charged spare)
- MicroSD card (optional)(For flight data logging)
- Firmware updater cable / tool(Only if needed for manual updates)
- Printed quick-start guide(Helpful for reference during setup)
Steps
Estimated time: 25-45 minutes
- 1
Check firmware and pairing
Power on both drone and controller, verify firmware is up to date, and re-pair if the connection drops or behaves erratically. This ensures the latest safety features and link protocols are active.
Tip: If pairing fails, reboot both devices and retry in a clear environment away from metal or electronics. - 2
Calibrate sensors and compass
Run the calibration routine as instructed by the manufacturer to align sensors. This reduces drift, which can indirectly affect response timing and perceived link stability during flight.
Tip: Do calibrations away from metal objects and in a level area for best results. - 3
Position for optimal link
Hold the drone at or near eye level with a clear line of sight to the controller. Angle antennas toward the aircraft and avoid blocking paths with your body or nearby objects.
Tip: Prefer open spaces with minimal RF interference to maximize link quality. - 4
Test basic controls in a safe area
Gently test throttle, pitch, roll, and yaw at a low altitude and gradual motion. Observe response time and any stick dead zones before ascending or moving farther.
Tip: Maintain a safety buffer around people and obstacles, ready to disengage if needed. - 5
Verify telemetry and video streams
Check that telemetry updates in real time and the video feed remains smooth. If there is lag, reduce video resolution or switch to a lower-bandwidth mode if available.
Tip: Document any changes you make so you can revert if necessary. - 6
Enable failsafe and perform a tiny RTH test
Activate the failsafe feature and perform a controlled Returns-To-Home test in a safe area to confirm the aircraft responds correctly to signal loss.
Tip: Use a conservative RTH altitude and test only in an area clear of people and obstacles.
Frequently Asked Questions
What frequencies do controller links use?
Most consumer drones use RF links in the 2.4 GHz and/or 5.8 GHz bands, with digital encoding and sometimes frequency hopping for resilience.
Drones typically talk over 2.4 or 5.8 gigahertz radio links with digital safety features.
What is latency and why does it matter?
Latency is the delay between your input and the drone’s response. Lower latency improves direct control and reduces the feeling of lag.
Latency is the delay between your stick movement and the drone's reaction; lower is better for control.
What should I do if the link is lost?
If the link is interrupted, engage the built-in failsafe and use Return-To-Home or land safely per the manufacturer’s guidance.
If you lose the link, trigger the failsafe and either return home or land safely.
Can weather affect the control link?
Yes, wind, rain, and atmospheric conditions can affect signal quality. Plan flights in clear conditions and monitor link health.
Weather and interference can affect your link; fly in good conditions with good line-of-sight.
How can I safely extend range?
Follow the manufacturer’s guidance for range expansion, stay within line-of-sight, and avoid illegal or unsafe modifications to the link.
Stick to official options and stay within line of sight when extending range.
Do all drones use the same link technology?
No. Different models use different control links and data protocols; verify compatibility with your drone and controller.
Different drones use different control links and streams; check your specific model.
Watch Video
Quick Summary
- Know the two-way control link and data streams.
- Test and calibrate regularly for reliable flights.
- Maintain line of sight and observe safety systems.
- Enable and verify failsafe features before flight.
- Practice with varied environments to understand link behavior.