How to Stop Drone Drift: Practical, Safe Fixes for Beginners
Learn beginner-friendly techniques to stop drone drift and keep flights stable. This step-by-step guide from Beginner Drone Guide covers causes, fixes, and safe flying practices.

According to Beginner Drone Guide, drone drift is usually caused by calibration errors, wind, or control input inaccuracy. You’ll learn quick pre-flight checks, sensor calibration, and in-flight corrections to stabilize a drifting drone. The full article provides step-by-step actions, diagrams, and safety reminders. Follow along for practical tips, common mistakes, and safety checks.
Understanding Drone Drift: Causes and Manifestations
According to Beginner Drone Guide, drift is a common symptom of imbalanced propulsion, sensor drift, or magnetic interference. In many beginner-friendly flights, drift appears as a slow, sideways push or a gradual lean that seems to grow with wind gusts or stick input. Recognizing the difference between external wind as a force and internal calibration errors as a control mismatch is essential. The Beginner Drone Guide team found that early drift is most often tied to sensor misalignment, battery sag, or a loosely mounted propeller. By understanding where drift originates, you can design a pre-flight routine that minimizes surprises mid-flight. This knowledge is your first line of defense against unsafe or erratic flying, especially for new pilots.
- Common drift signs: sideways movement on hover, gradual yaw drift, and asymmetric tilt during hold.
- Primary culprits: wind, calibration gaps, and small motor imbalances.
- Immediate action: recheck stability modes and ensure sensors are clear of metal or magnetic interference.
Beginner Drone Guide Analysis, 2026, highlights that almost all drift-related incidents share a root cause in sensor setup or environmental factors. This section lays the groundwork for why precise calibration and controlled practice matter more than brute force corrections.
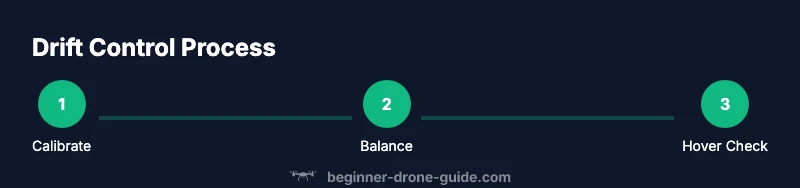
Pre-Flight Foundations: Calibration, Center of Gravity, and Setup
Your drone’s stability starts long before you lift off. Proper pre-flight calibration aligns internal sensors and ensures the aircraft understands its orientation precisely. Start with a clean, magnetic-free area away from large metal objects. Check the center of gravity by verifying propeller balance and ensuring payloads are evenly distributed. A well-balanced airframe reduces motor strain and helps prevent drift at hover. In addition, confirm that the landing gear is secure and the gimbal or camera hardware isn’t adding unexpected weight on one side.
A concise calibration checklist helps beginners avoid common mistakes:
- Verify compass and IMU calibrations are up-to-date before every flight.
- Confirm propellers are balanced and securely fastened.
- Ensure the battery is charged evenly to prevent subtle weight shifts.
- Calibrate in an environment free of magnetic interference and large metal structures.
The emphasis here is consistency. Regular pre-flight checks train your muscle memory and reduce drift over time. When you build a routine, you’ll notice drift less often and recover from it faster when it does occur.
Sensor Calibration Deep Dive: IMU, Compass, and Gyro
IMU (Inertial Measurement Unit), compass, and gyro calibration are the core of a stable drone. If any of these sensors drift or misread, a perfectly tuned aircraft can start to drift under nominal conditions. Begin with IMU calibration to align accelerometers and gyros, then perform compass calibration to account for local magnetic anomalies. Gyro drift is rarer but can contribute to yaw instability if ignored. Remember to power the drone from a stable source during calibration and avoid moving it while calibrations are in progress.
Practical steps:
- Use the manufacturer app or on-board menu to start IMU calibration and follow on-screen prompts.
- Complete compass calibration only when the drone is stationary and level on a non-metal surface.
- Verify calibration by letting the drone hover in a calm space and monitoring for any residual drift.
Keep a log of calibration dates and conditions. Regular calibration sessions reinforce stability and help you detect sensor drift early, before it becomes a problem during flight.
Proper Control Inputs and Flight Modes: Mastering Smoothness
Drift often stems from uneven stick inputs or abrupt control changes. For beginners, learning to make small, deliberate inputs helps maintain a steady hover. It’s also crucial to understand how different flight modes affect stability. Many drones use GPS hold to stabilize position, while altitude hold manages vertical motion. If GPS is unreliable, you’ll rely more on Attitude (Acro) mode, which requires smoother control to prevent drift. Practice gentle, incremental stick movements and avoid sudden throttle spikes that can cause altitude or lateral drift.
Guidelines for steady control:
- Start with slow, small inputs and wait for the drone to respond before another adjustment.
- When wind is present, anticipate gusts and counter with lighter, steady corrections rather than large moves.
- Use GPS or stabilized modes when available; switch to manual modes only after you’re confident with the aircraft’s baseline handling.
The aim is to train predictability. Consistent, measured inputs keep the drone’s attitude stable and reduce drift surprises.
Weather and Environment: How Wind and Gusts Affect Drift
Environmental conditions are a major variable in drift. Even mild wind can create noticeable drift on a hovering drone, especially with lighter airframes or if the drone is carrying a payload. When planning flights, check wind trends and avoid gusty conditions. Indoor flight with optical flow relies on visual cues for stabilization and can drift differently than outdoor GPS-held hover. Understanding how wind interacts with your drone’s mass, drag, and propulsion helps you adapt your technique in real-time.
Practical considerations:
- Choose a sheltered or calm outdoor spot when practicing hover control.
- Anticipate gusts by timing takeoffs with lull periods and maintaining a low center of gravity during ascent.
- If drift persists, re-check calibration and consider reducing payload until flight stability is established.
Wind awareness is part of safe flight planning and reduces unpredictable drift in real-world scenarios.
GPS vs. Optical Flow: Stabilization Methods for Beginners
Different stabilization methods offer varying resistance to drift. GPS stabilization provides position hold with satellite data, which is forgiving for beginners but can lag in speeds or require a clearer sky view. Optical flow uses ground texture to maintain position and can work indoors where GPS is unavailable. Both systems can be affected by drift if miscalibrated or overwhelmed by wind. Understanding their limitations allows you to select the right mode for the situation and adjust your expectations accordingly.
Tips:
- Use GPS hold in open, strong signal environments; rely on optical flow indoors or in cluttered spaces.
- Periodically cross-check hover behavior in both modes to confirm which is most stable on your model.
- If drift occurs in GPS hold, re-check compass calibration and sensor alignment.
Choosing the right stabilization method is a balance between reliability, responsiveness, and your flight environment.
In-Flight Corrections: Real-time Adjustments to Counter Drift
When drift occurs mid-flight, the quickest fix is a controlled, reduced input to counter the drift vector. Start by stabilizing your hover with small pitch and roll corrections, then gradually re-center the drone using gentle yaw corrections. If drift persists after a few seconds of steady input, land and reassess calibration and payload balance. Practicing controlled hover corrections in calm conditions builds your confidence for more challenging environments.
Action steps:
- Initiate small, opposite-direction corrections to cancel drift without overcompensating.
- Maintain gentle throttle to hold altitude while correcting horizontal drift.
- Monitor your screen or HUD for feedback on drift direction and adjust accordingly.
In practice, calm, deliberate corrections beat rapid, aggressive maneuvers, which often amplify drift rather than fix it.
Post-Flight Checks: Locking in Stable Setup for Next Flight
Post-flight checks are essential for long-term stability. After landing, reoxygenate your drone’s sensors by leaving it powered off briefly, then recalibrate if needed. Inspect propellers for damage or looseness, ensuring they match in rotation and balance. Note any consistent drift after each flight and adjust your calibration routine accordingly. Keeping a simple log helps you spot drift trends over time and adjust setup before the next flight.
Checklist:
- Inspect propellers and motor mounts for wear or looseness.
- Re-tighten any loose screws or mounting hardware.
- Record flight conditions and any drift observations in a log.
- Schedule a calibration session if drift frequently reappears.
Regular post-flight checks convert day-to-day practice into lasting stability improvements.
Troubleshooting Drift Scenarios: Quick Recovery Tactics
Common drift scenarios include wind gusts, magnetic interference, and unbalanced payloads. For wind drift, reduce wind exposure by flying lower and slower into the wind, and rely on stabilized modes if available. Magnetic interference from large metal structures or electronics can corrupt compass data; mitigate by moving away from interference sources and redoing compass calibration. If you notice persistent tilt after hovering, recheck balance, center of gravity, and propeller integrity. A systematic approach helps you identify root causes quickly.
Example fixes:
- Rebalance payload distribution and verify motor thrust equality.
- Recalibrate compass away from vehicles, metal objects, or power lines.
- Swap damaged props and re-test hover stability in calm conditions.
Authority sources and Safety Guidelines
For authoritative guidance on drone safety and regulations, refer to government and university sources as you plan and execute flights. These references provide foundational safety practices and regulatory considerations that apply to most beginner pilots.
- FAA UAS safety guidelines and Part 107 information (https://www.faa.gov/uas)
- NASA drone safety and education resources (https://www.nasa.gov/audience/forstudents/5-8/features/nasa-drones.html)
- IEEE Spectrum drone safety coverage and research insights (https://spectrum.ieee.org/)
Tools & Materials
- Drone model with calibration features and app(Use manufacturer app to access IMU and compass calibration panels.)
- Dedicated calibration card or flat surface(Calibrate on a non-metallic, level surface.)
- Balanced propellers and spare props(Check for nicks or cracks and replace as needed.)
- Fully charged batteries and charger(Avoid calibrations with low battery voltage.)
- Screwdriver/prop wrench(Use correct size for your prop nuts.)
- Notebook or flight log app(Record calibration dates, conditions, and drift observations.)
Steps
Estimated time: 60-90 minutes
- 1
Power up and connect to the controller/app
Turn on the drone and remote/controller, connect to the app if applicable, and ensure all indicators show normal. This initial connection is crucial for accessing calibration and hover features.
Tip: Verify connection stability before starting any calibration to avoid misreads. - 2
Initiate IMU calibration
Access the calibration menu and start IMU calibration. Do not move the drone during the process; wait for the app to confirm completion.
Tip: Calibrations should be performed on a flat, stable surface away from magnets. - 3
Calibrate compass (magnetometer)
Place the drone on the level surface and follow the prompts to complete compass calibration. Move only when instructed by the app.
Tip: Calibrate after ensuring there are no strong magnetic sources nearby. - 4
Balance payload and check CG
Ensure payload is evenly distributed and check that the center of gravity is within the recommended range. Adjust as needed by repositioning or removing weight.
Tip: Even a small CG shift can cause noticeable drift. - 5
Run a motor test and prop check
Power the motors and verify all propellers spin in the correct direction and remain secure. Replace any damaged props before flight.
Tip: A loose prop can dramatically affect stability. - 6
Firmware and calibration sanity check
Ensure firmware is up-to-date and recalibrate if the manufacturer recommends after updates or if drift persists.
Tip: Firmware updates fix known drift issues and improve stabilization. - 7
Test hover in calm environment
Take a short hover in a controlled environment, watching for drift in all axes. If drift is observed, repeat calibration steps or adjust controls gradually.
Tip: Use gentle inputs and don’t chase drift with rapid movements.
Frequently Asked Questions
What causes drone drift?
Drift is typically caused by a combination of wind, sensor calibration errors, magnetic interference, and minor motor imbalances. Regular calibration and proper setup greatly reduce drift.
Most drift comes from wind and calibration errors; keep sensors happy with routine checks.
Do I need GPS hold to stop drift outdoors?
GPS hold helps stabilize a drone outdoors by maintaining position, but you can still drift if sensor data is off. Use GPS hold when available and ensure satellites are visible.
GPS hold helps outdoors, but only if sensors are calibrated and reliable.
How often should I calibrate sensors?
Calibrate sensors after crashes, firmware updates, or when you notice drift during hover. Regular checks build stability over time.
Calibrate after crashes, updates, or if you notice drift.
Can wind indoors cause drift?
Indoors, wind is less of a factor, but HVAC drafts and airflow can cause subtle drift. Focus on sensor balance and stable hover practices.
Airflow indoors can cause drift; prioritize stable hover and calibration.
What safety steps help if drift occurs?
If drift happens, safely reduce speed, switch to stable mode if possible, and land to recheck calibration and balance before flying again.
If drift happens, land if safe and recheck calibration before flying again.
Should I update firmware to fix drift?
Firmware updates can fix known drift issues and improve stabilization. Check for updates from the manufacturer and apply them as recommended.
Firmware updates can improve stabilization; install updates when available.
Watch Video
Quick Summary
- Calibrate sensors before every flight.
- Balance payload and secure props to reduce drift.
- Use appropriate stabilization mode for the environment.
- Practice gentle, consistent control inputs to maintain hover.
- The Beginner Drone Guide team recommends thorough calibration and patient practice for drift-free flights.