How to Get Out of Drone R6: A Beginner’s Guide
A comprehensive, beginner-friendly tutorial on safely exiting a non-responsive or ‘R6’ flight state in drones, with practical steps, safety warnings, and a preventive plan for future flights.

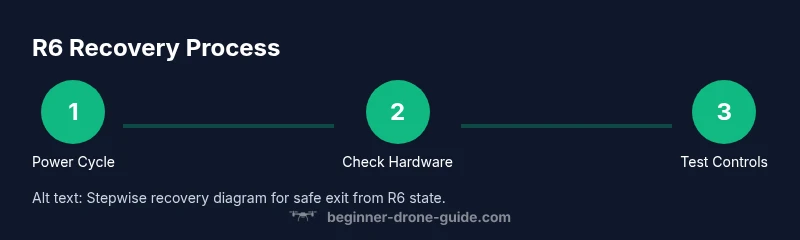
This guide shows how to safely get out of drone R6 by resetting controls, performing a controlled landing, and verifying system health before flight after the reset. You’ll walk through a quick diagnostic, a safe power-cycle routine, and clear decision points for when to seek professional help.
Understanding the R6 state and why exiting matters
In some beginner-friendly guides, a flight state labeled 'R6' is used as a placeholder for a non-responsive or unusual flight condition. This article uses that label to illustrate a recovery process you can apply to safely regain control. If you find yourself in a situation where the drone ignores stick input, fails to respond to the controller, or behaves erratically, you need a calm, repeatable plan. Remember: this guide is about getting out of R6 safely, not about forcing risky maneuvers. The goal is to land safely, protect the battery, and prevent damage to props or the gimbal. According to Beginner Drone Guide, maintaining composure and following a structured recovery routine yields the best chance of a clean reset and minimal downtime. The Beginner Drone Guide team emphasizes practical steps you can practice during preflight training so you’re confident when trouble arises.
Tools & Materials
- Small Phillips screwdriver(For opening access panels if needed)
- Torx driver set (T6-T8)(Useful for common fasteners on hobby drones)
- Replacement propeller set(Carry a spare pair matching your drone model)
- Propeller guards (optional)(Helpful during troubleshooting in safe area)
- Lint-free cloth and isopropyl alcohol(For cleaning motor terminals and connectors)
- Multimeter (optional)(Check battery and power rail if you suspect electrical fault)
- USB-C/USB-A cables(For firmware/app connections and rebinds)
Steps
Estimated time: 25-40 minutes
- 1
Power cycle and reset
Power off both the drone and the transmitter. Wait 10–15 seconds, then power up the drone first, followed by the transmitter. This sequence allows flight controllers to reset and reestablish a clean link. If the drone responds, proceed to a cautious hover test. If not, pause and inspect for obvious issues.
Tip: Avoid attempting rapid throttle inputs during the reset; a gentle approach reduces risk of prop strike. - 2
Check for obvious entanglement or damage
Visually inspect the propellers, guards, motors, and camera gimbal for snags, chips, or loose screws. Remove any entanglement safely before attempting a test flight. Document anything unusual for later reference.
Tip: Never run motors with visible damage; stop and repair as needed. - 3
Rebind controller and recalibrate
If the controller connection is unstable, rebind the controller to the drone according to the user manual. Recalibrate the IMU and compass in a low-stress environment to avoid drift.
Tip: Calibrate in an open, magnetic-free area to improve accuracy. - 4
Run a soft hover at low altitude
Move to a safe, low-altitude hover (2–4 meters) to observe stability without risking a ground impact. If the drone maintains position, proceed to a full test; if it yaw-drifts or shakes, stop and review hardware.
Tip: Use gentle throttle and stick inputs; abrupt moves can mask underlying issues. - 5
Reconnect sensors and apps
Reconnect any companion app and confirm sensor health (GPS lock, altitude, battery level). Check for firmware updates and apply if needed before a full flight test.
Tip: Back up current settings before updating firmware to easy rollback. - 6
Test RTH and basic flight controls
Enable Return-to-Home at a safe altitude and test basic controls (pitch, roll, yaw, throttle) in a controlled environment. If the drone responds reliably, you can schedule a longer-range test in a wide-open area.
Tip: Set a conservative RTH altitude to avoid obstacles. - 7
Document the recovery outcome
Record the conditions, steps taken, and the drone’s response. This creates a reference for future flights and helps if you seek support from the community or manufacturer.
Tip: A quick log speeds up troubleshooting next time. - 8
Prepare for the next flight
Recheck battery health, prop integrity, and firmware versions. Run a preflight checklist and consider practicing in a safe, controlled area before more ambitious flights.
Tip: Practice regularly to build muscle memory for emergency procedures.
Frequently Asked Questions
What does an R6 state look like on a drone?
R6 is a placeholder term used here for a non-responsive or unusual flight condition. Real drones use different codes or signals. If you see unresponsive controls, follow a calm, repeatable recovery routine, then consult your manual.
R6 state is a stand-in name for a non-responsive flight condition; use your manual for exact indicators and follow the recovery steps in this guide.
Can I fly again immediately after exiting R6?
Yes, but only after a full system health check, sensor calibration, and a cautious hover test in a safe area. If anything seems off, pause and inspect.
Yes, but make sure everything is healthy and you test in a safe area first.
What if the drone still misbehaves after reset?
If issues persist, discontinue use and seek manufacturer support or a qualified technician. Do not attempt advanced fixes without proper instructions.
If it still misbehaves, stop flying and contact support for a safe, professional check.
Is disassembling parts during recovery safe?
Only remove or adjust parts if you’re sure of the procedure and power is off. Otherwise, risk injury or further damage.
Only handle parts when powered down, and follow the manufacturer’s instructions.
Which parts are most likely to cause R6-like states?
Common culprits include loose connectors, damaged props, faulty IMU calibration, and software glitches. Start with a power-cycle and visual inspection.
Often it’s a simple fix like a loose connector or a bad sensor.
How long should I wait after a reset before flying again?
Give the drone a few minutes to finish post-reset checks and initialize systems. Begin with a slow hover, then gradually expand test flight.
Wait a few minutes to ensure all systems boot correctly before test flights.
Watch Video
Quick Summary
- Practice a repeatable recovery routine.
- Power-cycle and reset are often the first step.
- Calibrate sensors after resets for accuracy.
- Test flight controls in a safe area before longer flights.
- Document recoveries to improve future responses