How to Connect Drone and Remote: A Beginner's Guide
Learn how to connect your drone to its remote controller with a simple, step-by-step guide for beginners. Includes safety tips, quick troubleshooting, and setup best practices to get you flying confidently.

You can connect your drone to its remote controller by entering pairing mode on both devices and following the prompts to link frequencies or channels. Depending on the model, you may use a physical pairing button, a quick-start menu, or a companion app to guide setup. This initial connection is essential for safe, responsive control and reliable flight.
Why pairing matters
The connection between your drone and its remote is the lifeline of every flight. A strong, stable link means fast throttle response, predictable yaw, and reliable GPS-assisted flight; a weak or unstable link can lead to signal drop, flutter, or delayed control inputs. According to Beginner Drone Guide, a solid initial pairing reduces mid-flight surprises and makes it easier to troubleshoot later. Pairing isn't a one-and-done action: firmware updates, channel changes, and environmental interference can alter the link, so periodic checks are part of good piloting practice. In this section we explore what pairing really does behind the scenes—how different signal types affect range, how to identify interference, and why you should confirm the link with a quick control test before liftoff. We will also discuss how different environments (indoor vs. outdoor, urban canyons vs. open fields) can influence signal quality and why piloting practices should adapt accordingly.
Preparation: prerequisites and safety
Before you attempt to pair, make sure both devices are physically ready and powered on in a safe environment. Start with a well-lit, open area free of tall metal structures. Check that the drone’s battery is charged to at least half and the controller’s battery is similarly topped up; a low battery can cause pairing instability. Make sure the firmware versions on both devices are up to date. Have the user manual handy or access the model-specific pairing section in the companion app. If you use a smartphone for pairing, enable airplane mode if necessary to minimize interference from other Bluetooth/wifi devices nearby. Finally, ensure you are in a no-fly zone or outdoor environment with clear space for a test hover after pairing. A calm, controlled environment reduces errors and makes the initial pairing smoother.
Understanding pairing methods across models
Drones vary by brand and model, but most pairing methods fall into a few common categories. Some devices use a physical pairing button on the drone or remote; others rely on a menu option in the remote’s display; many newer models pair through a companion app on a smartphone or tablet. Various signal protocols are used (classic RF links, digital channels, or Bluetooth/Wi‑Fi backbones) and the exact steps depend on your hardware. In general, you should locate the correct pairing flow in the manual and follow it precisely. If you own multiple drones, note that cross-model pairing is usually not supported; each drone requires its own distinct link. Understanding your model’s pairing method helps you anticipate prompts and reduces confusion during setup.
The typical pairing flow (high-level overview)
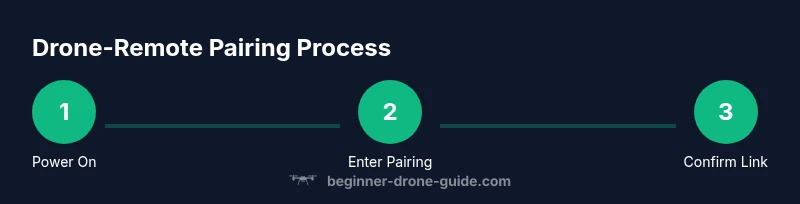
Although details vary, most pairing processes follow a familiar flow: power on the drone and remote, enable pairing mode on one or both devices, confirm the link via an indicator (LED, sound, or app notification), and perform a quick control test. After a successful link, save the pairing configuration and perform a basic hover test to verify responsiveness and stability. If you hear beeps or see flashing LEDs that indicate errors, you’ll need to re-enter pairing mode and retry. This high-level overview helps you prepare mentally for the exact steps in your model’s guide and reduces trial-and-error time during the actual pairing.
Using the drone app for pairing
Many modern drones use a companion app to streamline pairing. Start by opening the app and selecting the Pairing or Connect option. The app will guide you through the process, often including prompts to enable Bluetooth, select your drone from a list, and confirm a successful connection with a on-screen status. Follow the prompts precisely, keep your phone within a few feet of the drone to ensure a stable signal, and avoid activating other wireless devices during pairing to minimize interference. Once connected, the app will typically display signal strength, battery status, and GPS lock information, helping you confirm a healthy link before flight.
Troubleshooting common pairing issues
If pairing fails, start with the simplest fixes: reboot both devices, ensure batteries are charged, and verify you are following the model’s exact pairing steps. Common issues include wrong pairing mode selection, outdated firmware, and interference from other devices (nearby Wi-Fi networks, Bluetooth devices, or metal surfaces). Move to a open area, reset the pair, and attempt again. If the drone still won’t pair, consult the manual for model-specific reset procedures, and consider performing a factory reset on the remote if recommended by the manufacturer. Document any error codes or LED patterns to aid troubleshooting.
After pairing: calibration checks and safety
Pairing is just the first step. After a successful link, perform essential calibration checks such as compass alignment (if applicable), IMU health, and sensor initialization. Calibrate in a calm environment, away from metallic structures and large metal objects that can affect readings. Verify control axes, throttle response, and gimbal behavior where applicable. Confirm the return-to-home function, geofence alerts, and any safety features are active and functioning. Keep the firmware updated, as manufacturers routinely release improvements that affect pairing stability and flight safety.
Final pre-flight checklist before your first flight
Before lifting off, complete a quick, repeatable checklist to ensure the pairing remains solid throughout the flight. Confirm the remote and drone display a solid link indicator, re-check battery levels, verify GPS lock, and perform a small hover test at a low altitude. Review your flight area for obstacles, people, and no-fly zones. Ensure a clear line of sight and maintain a safe distance from others. Document any irregularities observed during the test and avoid flying if the link shows signs of instability. A disciplined pre-flight routine significantly reduces risk and improves your learning curve.
Authoritative sources
For formal guidelines on drone operation and safety, consult the following sources: 1) Federal Aviation Administration (FAA) UAS information: https://www.faa.gov/uas 2) NASA unmanned aircraft systems resources: https://www.nasa.gov/aeroresearch/unmanned-aircraft-systems 3) U.S. Department of Labor Occupational Safety and Health Administration: https://www.osha.gov
Tools & Materials
- Drone(Ensure powered off when preparing for pairing; charge battery before attempting pairing.)
- Remote controller(Power on and ensure it has fresh batteries; keep within recommended range during pairing.)
- Charged batteries(Charge both drone and controller to at least half-full before pairing.)
- USB-C or micro-USB cable(Used for firmware updates or connecting the remote to the app if needed.)
- Smartphone or tablet (optional)(Only needed if your model uses a companion app for pairing.)
- User manual or model-specific app(Keep handy for model-specific pairing steps and troubleshooting.)
Steps
Estimated time: 20-30 minutes
- 1
Power on both devices and verify batteries
Turn on the drone and the remote controller. Check that both devices indicate power and that the drone battery and controller battery are sufficiently charged to avoid mid-pairing drops.
Tip: Charge batteries to at least half-full before starting; pairing can fail if either device loses power mid-process. - 2
Put the drone into pairing mode
Enable pairing mode on the drone according to the manual. This often involves pressing and holding a button or selecting a pairing option in the drone’s menu.
Tip: If you aren’t sure, consult the manual to locate the exact pairing sequence for your model. - 3
Activate pairing on the remote/controller
Put the remote into pairing mode as directed by the manufacturer. Some remotes require a long press or a specific sequence of buttons.
Tip: Be precise with timing; a rushed hold can fail to enter pairing mode. - 4
Initiate link from the app or on-device menu
If your model uses an app, open it and choose Pairing or Connect. If not, follow the on-device prompts to complete the pairing process.
Tip: Keep the devices close during pairing to minimize interference and ensure stable detection. - 5
Verify connection and test basic controls
Once linked, perform a light hover with low altitude to verify throttle response, yaw, and pitch are aligned with the remote input.
Tip: Check for lag; if you notice delay, re-run the pairing process and test again. - 6
Save pairing and perform a final pre-flight check
Store the pairing configuration in the drone and controller settings if the option exists. Run a quick test in a safe area before any real flight.
Tip: Document the pairing method in your notes for future reference; models and apps update over time.
Frequently Asked Questions
What is the first step to pair a drone with its remote?
Power on both devices and enable pairing mode as directed by the manual. Confirm a link indicator before attempting any flight tests.
Power on both devices and enable pairing mode, then confirm the link before testing controls.
Can I pair using a smartphone app?
Many drones support app-based pairing. Open the app, select Pairing or Connect, and follow the on-screen prompts to complete the link.
Yes, many drones pair through a companion app; follow the prompts to connect.
Why does my controller say 'pairing failed'?
Common causes include wrong pairing mode, outdated firmware, and nearby interference. Reboot devices and retry with a clean environment.
Pairing failed usually means wrong mode, old firmware, or interference—restart and retry in a clear area.
Is it safe to fly immediately after pairing?
Only after you confirm a solid link and complete a small hover test in a safe area. Do not fly if the link seems unstable.
Yes, but only after you verify a solid link with a quick hover test.
Can one controller control multiple drones?
Most controllers pair with a single drone model at a time. Check the manual for multi-drone support and required switching procedures.
Usually a controller pairs with one drone at a time; check your manual for exceptions.
What if LEDs blink differently after pairing?
Different blink patterns may indicate pairing success or errors. Refer to the manual’s LED codes and retry the pairing if needed.
If LEDs blink oddly, check the codes in your manual and retry the pairing.
Watch Video
Quick Summary
- Power both devices and check batteries first
- Follow model-specific pairing steps precisely
- Test controls before flight to confirm responsiveness
- Keep firmware up to date for stability