How to Check If a Drone Is Bound: A Practical Guide
Learn how to verify binding between your drone and controller or app. This beginner-friendly guide explains LED indicators, app status, and safe steps to rebind or unbind if needed. Follow these practical checks to ensure reliable control and flight safety.

To determine if your drone is bound to its remote controller, check the controller binding indicator, attempt to arm with the remote, and verify the flight app shows a bound status. If binding is missing, you may see no arming response, unexpected LED patterns, or a mismatch in the controller-drone pairing menu. This guide walks you through safe, step-by-step checks.
What binding means for your drone
Binding is the formal pairing between a drone and its primary control device (the remote controller) and, in many cases, the companion app. When binding is active, your inputs travel from the controller to the drone with reliable timing, which makes the difference between a responsive flight and a crash. For beginners, understanding binding helps prevent random yaw, drift, or uncommanded resets. Learning how to check if drone is bound is a key safety step before your first flight. According to Beginner Drone Guide, binding integrity is the foundation of reliable control, so verify it before you fly and again after firmware changes.
To identify binding status, look for clear indicators in the flight app, consistent arming sequences, and stable control responses. If the drone is bound to a different controller, you may notice latency, a mismatch warning, or delayed command execution. This section outlines the core concepts so you can recognize binding status at a glance and decide whether you need to rebind or adjust your setup.
How to visually inspect binding indicators
Visual cues can tell you immediately whether binding is active. Many drones use LEDs on the drone or the controller to show a binding state—steady colors usually indicate a healthy bind, while blinking patterns may signal a binding retry or a mismatch. The beeps and tones from the controller during power-on often encode status messages. When learning how to check if drone is bound, start by powering both devices, observing the LED patterns for 5–10 seconds, and listening for pairing tones. If the LED refuses to stabilize or keeps cycling, binding is likely incomplete.
Document which pattern you see because models vary. For some drones, binding results in a green solid LED on the drone and a white steady LED on the controller; others might show a blue flash sequence. Regardless of model, a consistent, calm startup sequence is a good sign. If you cannot match the expected pattern, stop, re-enter binding mode, and retry with fresh power.
Checking binding status in the drone app
Using the official app to confirm binding is a reliable method across many brands. Open the app, navigate to the device or aircraft status page, and look for a binding indicator or a status message such as "Bound" or "Paired." Some apps display a small icon next to the aircraft name, while others show a dedicated binding tab. If you cannot locate a binding status, consult the user manual or support site for your specific model and ensure the app is updated to the latest version. This is a crucial step in learning how to check if drone is bound before any flight attempt.
If the app shows a binding error, follow the on-screen prompts to rebind. Many apps guide users through a simple pairing flow, often involving power cycling, placing the drone in binding mode, and initiating pairing from the controller UI.
Performing a safe test flight to confirm binding
A controlled test flight validates binding beyond static indicators. Start in a wide, open area away from people and obstacles. With propellers secured or removed during setup, slowly power up the aircraft and controller. Attempt a gentle hover at a low altitude to verify that throttle and stick inputs translate smoothly to movement. If you can command yaw, pitch, and roll with predictable response, the binding is active and stable. If the drone does not respond or drifts despite input, re-enter binding mode and retry or consult the manual.
Always have a recovery plan ready, such as a low hover and abort procedure, so you can cut power safely if anything feels off.
Brand and model variations: common differences
Binding methods are common in concept but vary by brand and model. Some drones bind by holding a physical pairing button on the drone while powering on the controller; others require you to use a mobile app to initiate pairing. Differences also exist in LED patterns, beeps, and the exact screens within the app that display binding status. When learning how to check if drone is bound, understand that the general principles apply across models, but you must follow the specific binding steps for your device. Always consult the official manual for your drone model to avoid confusion during the binding process.
Rebinding and unbinding: step-by-step caution
If binding fails or you suspect a different controller is bound, the safest approach is to unbind and rebind following the manufacturer steps. First, ensure the drone is powered down and the area is safe. Then place the drone in binding mode and initiate the binding sequence on the controller or through the app. After a successful bind, test basic controls and verify that the binding status remains stable after power cycling. Record the steps you took and the outcomes for future reference. Avoid binding multiple controllers to the same drone unless the manual explicitly supports it.
Safety-first checklist before flying
- Preflight bind check: Confirm that the drone is bound to the expected controller.
- Environment: Choose a wide, obstacle-free area for initial tests.
- Power management: Fully charge batteries and keep propellers secured during setup.
- Documentation: Log the date, firmware version, and binding outcome for future reference.
- Backup plan: Have a reset or unbinding path in case of unexpected behavior.
Following these steps helps ensure a safe and predictable binding experience, reducing the risk during first flights.
Troubleshooting binding failures
If binding fails repeatedly, start by verifying the compatibility between the drone and controller, ensuring both devices are on the latest firmware compatible with one another. Check for a known issue or firmware note on the manufacturer support page. If needed, perform a factory reset on the drone per the manual, then retry the binding process from a clean slate. Keep a log of error messages and observed LED patterns to help support staff diagnose the problem more quickly.
Tools & Materials
- Drone and Controller(Power off both before starting the binding sequence.)
- Smartphone or Tablet with drone app(Ensure the app is updated to the latest version.)
- Manufacturer-provided USB cable(Used to update or pair via the app if required.)
- Fully charged drone and controller batteries(Binding requires stable power; have fully charged batteries.)
- Printed binding steps or official online guide(Keep for quick reference if you are new to binding.)
- Notebook and pen(Log binding attempts and outcomes.)
Steps
Estimated time: 45-60 minutes
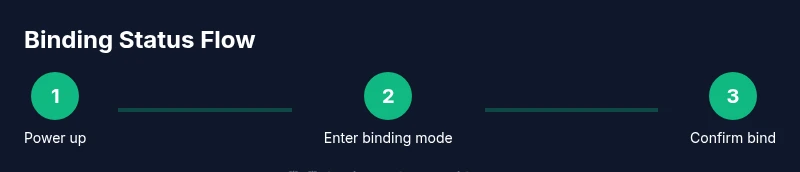
- 1
Power down and prep hardware
Power off the drone and controller. Gather the drone app on your phone, the charging cables, and any manuals you may need. Confirm the area is clear of people and obstructions. This ensures a safe starting point for the binding process and helps you document what you observe at each stage.
Tip: Double-check power switches and propeller guards; moving parts should be secured before handling. - 2
Put devices into binding mode
Activate binding mode on the drone as instructed by the manual (often a button sequence or a power cycle). Then initiate pairing on the controller or in the app. This creates the pairing window where signals will be exchanged and synchronized.
Tip: If you do not see quick, consistent signals, repeat the power cycle to reset the binding window. - 3
Initiate binding on the controller/app
Follow the on-screen prompts in the drone app or the controller’s menu to start binding. Confirm the pairing request and wait for a positive indication (sound cue, LED change, or status label).
Tip: Avoid moving the drone during binding to prevent accidental mis-pairing. - 4
Test basic inputs to confirm binding
Gently move the sticks to verify that the drone responds in real time. Check forward/backward, left/right, and yaw controls. Confirm that arming is responsive under safe conditions.
Tip: If any axis feels sluggish or delayed, rebind and test again in a controlled space. - 5
Verify binding stability after power cycle
Power down both devices, then power them back up and test the same controls again. A stable bind should persist after a restart, without requiring a second binding attempt.
Tip: Keep a simple log of these steps for future firmware updates. - 6
Document binding status
Record the binding method, device models, firmware versions, and any issues observed. Store this information for reference during future flights or updates.
Tip: Use a dedicated binding sheet or app notes to track history.
Frequently Asked Questions
What does it mean when a drone is bound?
Binding means that the drone and its controller (or app) have been paired so commands from the controller are interpreted correctly by the drone. Without binding, inputs may not produce the expected responses.
Binding is the pairing between your drone and its controller to ensure proper control.
How can I tell if my drone is bound to the correct controller?
Check the app or drone status indicators for a binding confirmation. If you see a mismatch warning or unpaired status, rebind to the intended controller following the manufacturer steps.
Check the binding indicator in the app and ensure you are using the right controller.
Can I bind multiple controllers to one drone?
Some drones support multiple bindings, but most require re-binding to switch controllers. Always follow the manufacturer’s guidance to avoid confusion or safety risks.
Yes, some models allow multiple bindings, but usually you bind one at a time as directed by the manual.
What should I do if binding fails during setup?
Power cycle both devices, retry the binding sequence as described in the manual, and ensure firmware compatibility. If problems persist, contact support with the observed LED patterns.
If binding fails, reboot both devices and follow the manual again; contact support if it continues.
How often should I rebind after firmware updates?
Check binding status after major firmware updates and rebind if required by the manufacturer. This helps maintain reliable control after software changes.
Recheck after updates and rebind if the manufacturer instructs you to.
Is binding required for all drones?
Most consumer drones require binding to the controller or app for safe operation. Always consult the manual for model-specific binding requirements.
Most drones need binding to function with the controller; check your manual.
Watch Video
Quick Summary
- Verify binding status before flight and after updates
- Use the official app to verify binding
- LED patterns or app alerts indicate binding health
- Follow manufacturer steps to rebind safely
- Log binding checks for future reference