Drone Build Kit: A Practical Guide for Beginners
Learn how to select, assemble, and safely operate a drone build kit. This step-by-step guide covers components, compatibility, budgeting, wiring, tuning, safety, and maintenance for new pilots.

With this guide you will learn how to select, assemble, and safely test a drone build kit. You’ll understand major components, frame sizes, and basic wiring, plus practical steps to verify flight readiness. By the end, you’ll have a clear plan to complete your first build confidently. This quick answer also highlights common pitfalls and safety basics to help you avoid costly mistakes.
What is a drone build kit?
A drone build kit is a complete bundle of hardware assembled to let you construct your own flying platform. According to Beginner Drone Guide, a typical kit includes the frame and arms, motors, electronic speed controllers (ESCs), a flight controller, a power distribution option, a battery, propellers, and basic wiring. Some kits add a basic radio transmitter and vertical accessories. The goal is to provide all core components in compatible sizes so you can focus on assembly and learning how the drone works in real time. This approach is ideal for experimentation, customization, and hands-on learning of how each subsystem influences flight behavior.
When you compare a build kit to a ready-to-fly model, you often gain flexibility to tune performance, swap parts, and extend capabilities as your skills grow. It also demystifies the electronics process, turning assembly into a controlled learning journey rather than a one-off purchase. The emphasis is on understanding why each component matters and how it translates to flight characteristics.
Why build from a kit vs. buying ready-to-fly
For beginners, a kit offers a structured learning path and a deeper understanding of how a drone operates. You gain hands-on experience with motor selection, ESC tuning, and flight controller setup, which builds confidence for future projects. Kits typically allow you to customize propulsion, control systems, and payload options. This flexibility is valuable if you plan to experiment with different lenses, sensors, or mapping tools. From Beginner Drone Guide’s perspective, the educational value of a kit is substantial because it forces you to confront real-world constraints like weight, power, and aerodynamics. However, you should also assess your timeline and budget because builds can take longer and sometimes require extra tools.
- Educational value: you learn wiring, calibration, and tuning.
- Customization: you can tailor power, control, and sensors.
- Long-term ownership: parts can be replaced or upgraded over time.
- Safety and testing: you’ll establish a methodical preflight routine.
If your primary goal is to fly quickly with minimal setup, a ready-to-fly model may be better. If you want hands-on learning and customization, a build kit is the better path.
Key components you’ll find in a typical kit
A standard drone build kit bundles core parts along with some extras to help you complete the project. Core components include the frame, motors (usually four for a quadcopter), ESCs, a flight controller, a power distribution option or harness, a compatible battery, and propellers sized to match the motors. In addition, kits often provide wiring harnesses, mounting hardware, basic tools, and a simple radio receiver. Some kits include a basic firmware for the flight controller and documentation that outlines wiring diagrams and calibration steps. When selecting a kit, check for compatibility among motors, ESCs, propeller size, and the flight controller. You’ll want to confirm the suggested battery voltage and current draw so everything works together safely and predictably.
Beyond parts, consider the learning materials that come with the kit. Clear setup instructions, annotated diagrams, and troubleshooting tips reduce the chance of miswiring and miscalibration. If you’re totally new, prioritize kits with step-by-step guides and beginner-friendly software configurations. This keeps the learning curve manageable while you build confidence in your first flights.
Understanding compatibility: frame sizes and motors
Frame size and motor compatibility are fundamental to a successful build. Frames are typically described by their wheelbase or diagonal span (for example, 210 mm, 230 mm, or 250 mm). Motors must be matched to your frame size and propeller dimensions. A good rule of thumb is to pair smaller frames with proportional motors and propellers and to avoid oversized motors that strain the battery and frame. ESCs should be rated for the motor’s current draw; mismatches can cause overheating or unstable flight. Flight controllers also have compatibility considerations with the firmware and sensors you plan to use. Before purchasing, cross-check the motor KV rating, propeller size, and recommended battery voltage from the manufacturer’s documentation. A well-matched set minimizes vibration, improves responsiveness, and simplifies tuning.
Keep a simple compatibility matrix handy: list the frame size, motor size, ESC count, propeller diameter, and battery voltage. Consult the build guide or community forums for typical pairings, but verify against official documentation whenever possible. As your knowledge grows, you’ll learn which combinations yield the best efficiency for your chosen flying style, whether it’s freestyle, cinematic footage, or light payloads.
Sourcing and budget: what to expect
Budgeting for a drone build kit depends on your goals, the quality of components, and whether you already own tools. A beginner-friendly kit with reliable components and a durable frame can range from modest to moderate cost. It’s wise to start with a kit that includes essential parts and good documentation; this reduces the risk of buying mismatched pieces. Remember to factor in batteries, chargers, and spare parts, which add up over time. If you plan to upgrade later, keep your initial choices modular so you can swap components without rebuilding the entire drone.
To make the most of your budget, compare kits that use common standards: frame size, motor mounting patterns, ESC connectors, and flight controller brands. Look for user reviews from other beginners, focusing on build quality and documentation clarity. Avoid oversized claims about extraordinary range or heavy payloads when you’re still learning fundamentals. A thoughtful budget plan helps you pace your project and preserves room for future learning.
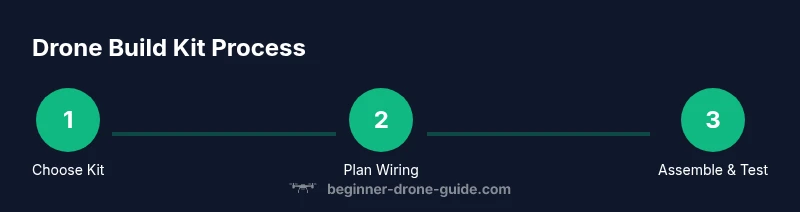
Step-by-step assembly overview
The assembly path for a drone build kit follows a general sequence that helps keep wiring clean and components protected. Start by organizing all parts and comparing them to the kit’s bill of materials. Mount the frame, attach motors to the arms, and secure the ESCs. Connect power distribution hardware, wire the flight controller and sensors, and ensure the battery connector type matches your charger and power setup. Calibrate the radio transmitter and the flight controller, then assign basic flight modes and verify control directions before proceeding to propeller installation. After installation, inspect wiring routes for clearance and potential pinch points. Finally, perform a bench test to verify signals and motor spin order before your first hover attempt.
Following a clear sequence reduces mistakes and accelerates the learning process. If you get stuck, consult the kit’s documentation, search beginner-friendly tutorials, and compare your steps with community build logs for your frame and motor combination.
Tuning and safe testing basics
Tuning involves setting the flight controller parameters to align with your frame, weight, and propulsion. Start with a gentle minimum throttle and gradually increase as you observe stability. Calibrate accelerometers, gyroscopes, and compass to minimize drift. For safety, perform initial tests on a soft surface with a controlled area and a reliable fail-safe setting. Use propeller guards during early flights to reduce injury risk and limit damage if control is imperfect. Logging and reviewing flight data helps you identify issues such as motor overheating, vibration, or poor yaw response. As you gain experience, you’ll fine‑tune PID settings and tune the throttle curve to your preferred flying style.
Beginner Drone Guide emphasizes practicing in a safe environment and progressively expanding your envelope as skills improve.
Real-world practice while staying safe
Practice is about consistency and safety. Start with short, controlled hover tests in an open area free of people and obstacles. Use line-of-sight checks to confirm orientation and control direction, and always perform a preflight checklist covering battery, prop guards, screws, and loose wiring. As you become comfortable, introduce light wind conditions and slow, deliberate maneuvers to understand how the drone responds. Wear eye protection and ensure spectators maintain a safe distance. Document each test session and reflect on what adjustments were needed for stability and smoother control. This disciplined approach accelerates learning while reducing risk and component wear.
By following these guidelines, you’ll build confidence and achieve more predictable flight performance with your build kit.
Maintenance and upgrade paths
Maintenance keeps your build kit reliable over time. Regularly inspect motors for wear, check for loose screws, and clean dust from the frame and electronics. Lubricate bearings if applicable and replace worn propellers promptly. When upgrading, consider incremental changes rather than broad overhauls; for example, upgrading one motor and one ESC at a time helps you evaluate impact on flight characteristics. Maintain spare parts storage in labeled bins so you can quickly locate the right components for future repairs. Documentation of your build, including a parts list and firmware versions, simplifies troubleshooting and future upgrades.
Staying organized and deliberate about upgrades will extend the life of your kit and accelerate future projects. Beginner Drone Guide recommends keeping a simple inventory and a backup plan for critical parts such as batteries and flight controllers.
Common mistakes to avoid and safety rules
Avoiding common mistakes saves time and money. Do not rush the wiring or skip protective covers, wear proper eye protection, and never power the system with loose connections. Ensure motor rotation direction matches the flight controller’s expectations; incorrect wiring can damage ESCs or cause unstable flight. Always bench-test before attempting flight and use a controlled area free of people and obstacles. Read the documentation thoroughly, consult community build logs for your specific frame, and start with light payloads. For safety compliance, stay informed about local drone regulations and respect no-fly zones to prevent legal issues.
Authoritative sources are listed for reference, including official drone safety guidelines and regulations. This helps beginners stay within legal boundaries while learning.
Authoritative sources:
- https://www.faa.gov/uas/
- https://www.faa.gov/uas/getting_started/
- https://www.faa.gov/uas/commercial_operations/
Authoritative sources
This section lists external resources to support your learning and ensure compliance with safety and regulatory guidelines. Rely on established authorities for the most accurate information. Official drone safety guidelines and regulatory pages provide critical context for any build and operation.
Tools & Materials
- Frame and arms(Matches motor count and frame size (e.g., 210mm, 250mm).)
- Motors (4x brushless)(Select motors rated for your prop size and weight goals.)
- Electronic Speed Controllers (ESCs)(One per motor; consider BLHeli_S compatibility.)
- Flight controller(Ensure compatibility with sensors and firmware.)
- Power distribution board or wiring harness(Routes power from battery to ESCs.)
- Battery (LiPo or suitable)(Check voltage and discharge rating appropriate for motors.)
- Propellers(Size matched to motor KV and frame clearance.)
- Radio transmitter/receiver(Bind with flight controller or use simulator setup.)
- Battery charger(Use a charger compatible with battery type and connector.)
- Screwdriver set and hex keys(Metric sizes common: M2, M3, M4.)
- Soldering iron and basic supplies(Only if wiring requires soldering.)
- Heat shrink tubing and electrical tape(For safe, clean wiring and insulation.)
- Multimeter(Useful for checking continuity and voltages.)
- Safety gear (eye protection)(Always wear during assembly.)
Steps
Estimated time: 60-120 minutes
- 1
Unpack and inspect components
Lay out all parts and verify you have every item listed in the BOM. Check for damaged packaging or bent connectors. Photograph the contents for warranty and reference, then set aside bagged pieces in labeled zones.
Tip: Take pictures of each component’s serials and connectors to aid future maintenance. - 2
Mount frame and secure motors
Attach the arms to the frame and mount the four motors. Use the correct screws and tighten to a standard torque to avoid looseness that could cause vibration. Verify motor rotation matches the flight controller’s expected direction.
Tip: Double-check motor polarity before wiring to avoid nonfunctional spins. - 3
Install electronics and wiring
Install the flight controller, ESCs, and power distribution components. Route power cables neatly along frame channels, securing with zip ties. Use heat shrink where necessary and ensure no loose wires are near rotating parts.
Tip: Label each ESC wire to motor to simplify troubleshooting later. - 4
Connect power and sensors
Connect the battery harness, power bus, and any sensors to the flight controller. Confirm all ground wires are common where required. Keep the battery unplugged while wiring to prevent accidental activation.
Tip: Plan wire routing before final assembly to minimize crossovers. - 5
Bind radio and calibrate
Bind the radio receiver to your transmitter and configure basic channels. Calibrate the accelerometer, gyroscope, and compass per the flight controller’s guidance. Check control directions on the bench with propellers removed.
Tip: If control directions are reversed, swap throttle or yaw inputs in the software rather than rewiring. - 6
Install propellers and bench test
Attach matched propellers and perform a dry run by powering only the electronics without motors spinning. Confirm motor spin order and verify no unusual noise. Proceed to a controlled hover test in an open space when all checks pass.
Tip: Keep a safe distance and have a fire extinguisher nearby during first tests.
Frequently Asked Questions
What is a drone build kit?
A drone build kit is a packaged set of core components required to assemble a drone, including frame, motors, ESCs, flight controller, a battery, and propellers. It’s designed for learning through hands-on assembly and tuning.
A drone build kit is a ready-to-assemble set that helps you learn by putting the drone together yourself.
Do I need to solder to assemble a build kit?
Some kits require soldering for custom wiring or battery connections, while many come with plug-and-play connectors. If you’re new, choose a kit with pre-soldered harnesses to minimize difficulty.
Some kits need soldering, but many beginners can start with plug-and-play options.
What skill level is required?
A basic understanding of electronics and mechanical assembly helps, but many kits include step-by-step guides. Start with a beginner-friendly kit and progress as you gain confidence.
It’s suitable for beginners, especially with guided kits and tutorials.
How long does it take to assemble a kit?
For a beginner-friendly kit, plan for several hours spread over a few sessions to complete assembly, wire routing, and initial calibration.
A few hours over a couple of sessions, depending on your pace.
What safety steps should I follow?
Always power off during wiring, wear eye protection, test in a safe area, and follow local regulations for flight. Use a bench test before attempting hover tests.
Power off during wiring, wear protection, test in a safe area, and follow local rules.
Can I upgrade parts later?
Yes, most kits are modular. You can upgrade motors, ESCs, or flight controllers as you learn, but keep compatibility in mind.
Yes, upgrades are common as you grow, just check compatibility.
Watch Video
Quick Summary
- Match kit parts to your frame and motors.
- Do full preflight checks before any flight.
- Calibrate sensors and firmware for stable flight.
- Test gradually in a safe area to build confidence.
- Plan upgrades and keep organized documentation.