How to Get Started in Real Estate Drone Photography
A practical, beginner-friendly guide to starting real estate drone photography—gear, safety, planning, shooting techniques, post-processing, and landing your first client.

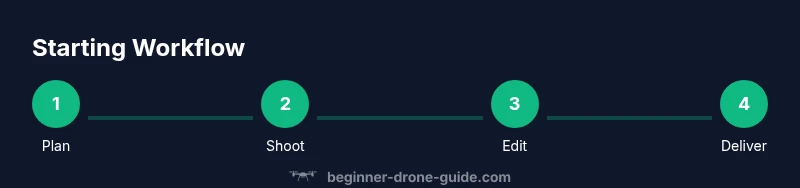
If you’re wondering how to get started in real estate drone photography, this guide covers the essentials: safe flying, baseline photography skills, and a practical, repeatable workflow designed to help you book your first property shoot and deliver client-ready images. You’ll learn gear choices, licensing basics, and a simple plan you can implement this week, even as a complete beginner.
Understanding the Real Estate Drone Photography Landscape
Real estate drone photography blends aerial perspectives with marketing-focused visuals. If you’re wondering how to get started in real estate drone photography, you’re stepping into a field where properties are framed to emphasize space, light, and architectural details. The best results come from a clear plan that combines flight strategy with photography fundamentals. As a beginner, focus on consistent shot composition, level horizons, and smooth camera motion. The industry rewards photographers who can tell a story from above: depth, neighborhood context, and clean foregrounds. Over time you’ll learn to adapt your approach for residential, commercial, or rural properties. This section emphasizes practical steps you can implement this week, rather than lofty theory. Beginner Drone Guide suggests starting with small, low-pressure projects to build confidence while you refine a simple workflow that yields reliable results. The core question you’re answering is how to get started in real estate drone photography, and this guide provides a clear path.
Core Gear: Cameras, Drones, and Lenses
Your gear choice defines the ceiling of your results. Start with a stable, camera-equipped drone, a reliable controller, spare batteries, and fast memory cards. For lenses, prioritize a stable wide-angle option that preserves perspective without distortion. ND filters can help with bright exteriors but aren’t mandatory for your first shots. Keep a lightweight toolkit: a basic landing pad, a microfiber cloth for optics, and a small screwdriver kit for quick maintenance checks. In learning mode, practice on simple properties to understand how flight height, angle, and framing affect the narrative of a home. This section outlines the essentials without tying you to specific brands or price points, keeping your setup scalable as you grow your practice. The goal is to enable you to start shooting confidently while you evaluate what to upgrade later.
Safety, Licensing, and Compliance
Safety comes first in every flight, followed by awareness of local regulations. Before you fly, check wind conditions, keep a visual line of sight, and avoid restricted airspace. Many regions require some form of license or certification for commercial drone work; verify your local rules and secure any needed permits or waivers before taking on paid shoots. Create a simple safety checklist that covers preflight checks, geofencing awareness, propeller safety, and emergency procedures. Practicing in controlled environments helps you internalize risk controls and reduces chances of incidents. This section also discusses common compliance pathways and emphasizes that staying informed is an ongoing responsibility for any real estate drone photographer working in 2026 and beyond.
Planning Your First Shoot
A successful first shoot starts with clear planning. Gather client briefings, determine the property’s strongest selling points, and map a shot list that prioritizes exterior context, interior space flow, and any outdoor amenities. Schedule your flight window to capture optimal light, and build a reusable shot checklist you can adapt for future properties. Prepare a simple shot plan that includes flight paths and fallback options in case of weather changes or restricted zones. This planning work reduces real-time stress and helps you deliver consistent results. Remember to communicate expectations with the client and schedule a follow-up review to confirm preferred deliverables.
Shooting Techniques for Real Estate
To maximize impact, combine aerial and ground-level angles that tell a complete property story. Shoot at low, medium, and high altitudes to showcase site context and architectural scale, then mix steady verticals with flatter interior views. Use wide framing to convey space, and reserve tight shots for details like architectural features or textures. Maintain smooth motion by planning your flight path and timing each shot to avoid abrupt movements. Check lighting when you shoot interiors—overhead light often reduces harsh shadows. For each frame, aim for clean exposure, accurate horizons, and minimal distortion. As you gain experience, you’ll develop a personal style that highlights a property’s unique appeal while remaining market-appropriate.
Post-Processing and Delivery
Post-processing is where real estate images become sale-ready. Start with raw files, apply consistent color correction, adjust white balance, and ensure doors and windows aren’t overbright unless intentional. Create a streamlined workflow: organize files, apply batch presets for exterior and interior shots, then fine-tune details per image. Export deliverables in multiple formats (print-ready and web-optimized) and provide the client with a well-structured gallery or PDF brochure. Maintain a clean naming convention and metadata so the listing agent can find assets quickly. A repeatable, efficient workflow saves time and elevates professional perception.
Building a Client-Focused Portfolio and Pricing
A strong portfolio demonstrates your ability to tell a property’s story with aerial and ground footage. Curate a mix of exterior, interior, and lifestyle shots that reflect different property types and markets. When it comes to pricing, start with simple packages and clear add-ons, while avoiding overly specific price points in this guide. Emphasize value: turnaround speed, image quality, and consistency. Include a thought-out deliverable structure (number of images, formats, and revisions) and document it in a short contract or service agreement. Your portfolio should evolve as you complete more shoots; continually seek testimonials and case studies to build credibility with future clients.
Getting Your First Booking: Steps and Scripts
Break into the market with friendly outreach and professional presentation. Build a simple outreach kit that includes a short intro, a link to your portfolio, and a few example shot concepts tailored to the client’s property type. Use a script that asks about property dimensions, listing timelines, and preferred deliverables. Offer to perform a quick no-cost pilot shot on a sample segment to demonstrate your value. After you secure your first booking, deliver beyond expectations and request feedback to improve your workflow. This approach aligns with practical, beginner-friendly steps to establish your presence in the field.
Growing as a Real Estate Drone Photographer
Growth comes from continual learning, practice, and networking. Attend local real estate meetups, join drone clubs, and participate in online communities to share work and receive constructive critique. Invest in ongoing training for flight safety, image editing, and marketing, and gradually diversify into commercial or architectural projects. Keeping a learning mindset helps you adapt to evolving listing formats, virtual tours, and new imaging techniques that buyers expect in today’s market. The purpose is sustainable improvement that compounds over time.
Common Mistakes to Avoid
New photographers often skip planning, over-rely on auto settings, or rush edits which undermines quality. Flying without a proper safety margin or disregarding local rules can jeopardize both people and licenses. Another common pitfall is delivering a large batch of mediocre images instead of a well-curated selection. Adopt a methodical process, slow down for critical shots, and prioritize safety every flight.
Tools & Materials
- Drone with integrated camera(Stable gimbal, basic stabilization, and reliable motors)
- Controller/remote(Ensure reliable connection and spare batteries for the controller)
- Extra batteries(Have at least two spares and a smart charging plan)
- SD/microSD cards(High-speed cards for reliable capture and quick transfers)
- ND filters(Optional for bright exteriors to manage exposure)
- Propeller guards(Useful for indoor shoots or tight spaces)
- Landing pad(Keeps takeoffs/landings clean on uneven ground)
- Basic toolkit(Small screwdriver, cleaning cloth, and spare parts)
- Wind meter / weather app(Helpful to assess flight conditions quickly)
Steps
Estimated time: approximately two to four hours
- 1
Define your goal and niche
Clarify the types of properties you want to shoot (residential, luxury, commercial) and what you aim to deliver (exterior tours, interior flyovers, or twilight shots). Write a simple one-page plan with target markets, delivery timelines, and a basic portfolio idea. This focus helps you guide gear choices and practice scenarios.
Tip: Create a one-page plan and reference it before every shoot to stay aligned with your niche. - 2
Learn safety basics and flight skills
Practice preflight checks, maintain line of sight, and build a habit of scanning for hazards. Learn to manage wind, lighting, and obstacles with calm, deliberate movements. Establish a personal safety protocol you can repeat on every flight.
Tip: Run a short mock flight in a closed area to build muscle memory without risk. - 3
Investigate local rules and licensing
Research the regulations that apply to commercial drone work in your region. Determine whether you need certification, waivers, or permits, and keep your paperwork accessible during shoots. This knowledge protects you and your clients.
Tip: Keep a simple compliance checklist in your field kit for quick reference. - 4
Plan the first shoot’s flight path
Draft a flight plan that covers key exterior angles, entry points, and interior transitions. Consider lighting, time of day, and potential hazards. Note fallback options if weather shifts or access changes.
Tip: Visualize the shot order and coordinate with the client on delivery priorities. - 5
Execute the flight and capture shots
Follow the plan with smooth, deliberate movements. Capture a mix of wide, mid, and tight frames; ensure horizons are level and exposure is consistent. Capture multiple takes to ensure you have usable options.
Tip: Use a mission checklist to avoid forgetting critical angles. - 6
Edit efficiently and deliver
Organize footage, apply consistent color corrections, and prepare deliverables in multiple formats. Create a client-friendly gallery and a clean, professional report that explains what each shot conveys. Maintain a reliable turnaround workflow.
Tip: Standardize your naming and export presets to save time. - 7
Showcase work and collect feedback
Solicit testimonials and add successful projects to a portfolio section. Use client feedback to refine shot lists, editing styles, and delivery speed. Positive referrals are a natural growth driver for beginners.
Tip: Ask for specific feedback on shot composition and lighting for targeted improvements. - 8
Grow your business and skills
Continue practicing, attend local real estate events, and expand your network. Explore partnerships with brokers or staging companies to expand opportunities and field-tested workflows that scale with demand.
Tip: Invest in ongoing training and keep building a broader, diversified portfolio.
Frequently Asked Questions
Do I need a license or certification to shoot real estate commercially?
Regulations vary by country. In many regions, commercial drone work requires some form of certification, and you may need permits or waivers. Check with your national aviation authority for exact requirements.
Regulations vary by country. Check your aviation authority for the exact license and permit requirements before starting commercial drone work.
What camera settings work best for property photos?
Shoot in RAW where possible, maintain balanced exposure, and keep horizons level. Use wide angles to capture space while avoiding distortion. Adjust white balance to reflect natural lighting.
Shoot RAW, keep horizons straight, and use wide angles to capture space with natural lighting.
How should I price my real estate drone services as a beginner?
Start with simple packages and clearly outline deliverables and turnaround times. As you gain experience, update packages to reflect market value and client needs without sacrificing quality.
Begin with straightforward packages and clear turnarounds; adjust as you gain experience.
How long does editing take for a typical shoot?
Turnaround depends on project size and client requirements. Establish a standard window and communicate it upfront to manage expectations.
Turnaround varies; set and communicate a standard delivery window.
What safety practices should I follow on site?
Follow a preflight checklist, keep a safe distance from people, and avoid hazardous weather. Always have a plan for emergencies and respect privacy.
Follow preflight checks, stay clear of people, and plan for emergencies.
What’s the best way to grow my client base?
Build a targeted portfolio, network with real estate professionals, and ask for testimonials. Consistent outreach and a clear value proposition attract referrals.
Build a focused portfolio, network, and collect testimonials to attract referrals.
Watch Video
Quick Summary
- Define a clear real estate niche and a practical workflow.
- Prioritize safety, compliance, and planning before every flight.
- Build a simple, repeatable post-processing and delivery process.
- Showcase a targeted portfolio to attract first clients.
- Grow through practice, networking, and ongoing learning.