Drone Photography for Beginners: How to Take Great Pictures
A practical beginner's guide to choosing gear, flying safely, and capturing stunning aerial photos with a drone for real-world use.

By the end of this guide, you will be able to pick a beginner-friendly drone for photography, plan shots, and capture sharp, well-composed aerial images. You’ll learn essential safety rules, camera settings, and a practical shooting workflow that keeps your flights efficient and enjoyable while you practice with a drone to take pictures.
Why the phrase drone to take pictures matters for beginners
For aspiring photographers who want to turn aerial moments into lasting memories, focusing on the idea of a drone to take pictures helps you set realistic goals. You’re not just buying a gadget; you’re investing in a discipline that blends flight control with composition, exposure, and timing. In this section, we’ll outline how your decisions—from which drone you choose to how you frame a shot—directly affect the quality of the final image and your confidence as a new pilot. As you read, keep the keyword in mind as a guiding theme: the goal is to capture compelling photos, not just fly toy-like drones around the yard. This approach keeps you focused on outcomes and safety first, so your learning curve stays steady and enjoyable.
Understanding camera specs that impact photo quality
A drone’s camera is a central tool for achieving sharp, color-accurate photographs. Key specs to understand include sensor size, dynamic range, lens focal length, and stabilization. A larger sensor generally delivers better low-light performance and cleaner details, while a robust gimbal system helps keep footage steady in less-than-ideal wind. Resolution matters, but so do color science and white balance consistency. For beginners, prioritize a drone with a stabilized camera, easy auto settings, and RAW photo capability. Remember: the best camera is the one you actually use and understand, not the most expensive model you can’t operate confidently.
Planning shots: composition and light
The best aerial images start with a plan. Before you take off, consider the time of day and the direction of light, which dramatically affects mood and texture. Use the rule of thirds to place interesting subjects off-center and create a sense of depth. Think about wind, glare, and horizon placement to avoid warped perspectives. When practicing with drone to take pictures, outline a simple shot list: a skyline silhouette, a leading line through a park, or a dramatic overhead perspective of a building. This planning minimizes wasted flight time and helps you capture more meaningful frames.
Choosing the right drone for photography
For photography-focused beginners, not all drones closely resemble expensive pro kits, but many offer strong value. Look for models with stabilized 2-axis or 3-axis gimbals, reliable auto-exposure, and straightforward photo modes (RAW, bracketing, and panoramic options). Battery life is essential because longer flights yield more opportunities to shoot. Start with a drone known for stability in light wind, simple app-based controls, and accessible safety features such as return-to-home and obstacle avoidance. If you plan to shoot different subjects—people, landscapes, or architecture—make sure the drone’s field of view and color profile align with your goals. The aim is to reduce complexity while maintaining quality outcomes.
Safety and setup: preflight routines
Safety is foundational when you’re learning to capture photos from the air. Before each flight, check local regulations, weather, and airspace restrictions. Calibrate compass and IMU if required by your model, and inspect propellers for nicks or cracks. Verify SD card speed class and sufficient battery levels, and set a conservative altitude limit to avoid overexposure and risk. A simple preflight checklist saves time and prevents avoidable mishaps. Practicing these routines helps you build muscle memory and ensures consistent image quality as you grow.
Basic shooting techniques: framing, exposure, and focus
Start with automatic modes to learn workflow, then gradually tweak exposure with ISO and shutter settings. For still photos, prioritize a small aperture (higher f-number) for greater depth of field, but avoid overly slow shutter speeds that cause motion blur. Use RAW format when possible to preserve latitude for post-processing. Focusing on steady framing, keep the horizon level and avoid dramatic tilts that distort perspective. These techniques reduce the chance of soft images and make the transition to manual settings smoother as you gain experience with the drone to take pictures.
Real-world use cases: real estate, travel, and events
Photography drones shine in real-world scenes where ground-based shots are impractical or limited by access. Real estate photography benefits from clean exterior angles and rooftop views that elevate property listings. Travel photography relies on unique vantage points—overlooking waterfalls, forests, or cityscapes—that add narrative to stories. Event coverage with controlled flight paths can create dynamic panoramas or crowd shots without intruding on the moment. When you practice, choose one scenario at a time and compose several frames from different altitudes to understand how perspective changes impact storytelling.
Post-processing and color management
Post-processing closes the gap between captured images and polished photographs. Begin with a neutral color correction pass to balance exposure across frames, then fine-tune contrast and saturation to reflect the scene’s mood. When you shoot in RAW, you retain greater control over highlight recovery and shadow detail, which is critical for landscapes and architectural shots. Develop a consistent workflow: organize, cull, color-correct, and export optimized JPEGs for social sharing and RAWs for archival or further edits. Remember that consistent color profiles help your portfolio feel cohesive and professional.
Maintenance and care for consistent image quality
Regular maintenance protects image quality and flight performance. Clean the lens and gimbal area after sessions, inspect motors and propellers for wear, and store batteries in a safe, regulated environment. Keep firmware updated and back up photos to multiple locations to prevent data loss. A well-maintained drone system reduces the risk of unexpected issues that derail shoots and compromise photos you’ve worked hard to capture. Your ongoing care supports the discipline of taking great pictures every time you fly.
Common mistakes and how to fix them
Beginners often overcorrect, rush flights, or ignore wind effects. To fix it, slow down your control inputs, rely on automatic exposure rather than pushing manual too soon, and practice gentle yaw movements to frame subjects more naturally. Many blurry shots stem from motion during exposure; use faster shutter speeds and stabilize with a well-balanced gimbal. When you notice color drifts, reset white balance and shoot in RAW for post-processing. By identifying patterns in your mistakes, you’ll accelerate learning and improve with each flight.
Next steps: practice, projects, and progress tracking
Create a small, progressive practice plan with weekly themes: urban skylines, park landscapes, night photography, or motion studies. Track progress by maintaining a photo log: date, location, settings, and what you learned. Build a personal project that tells a story across multiple flights—from planning to post-processing. Revisit older photos to compare improvements and refine your technique. Regular practice in a structured way makes the journey enjoyable and the results consistently better.
Tools & Materials
- Drone with stabilized camera(Choose a beginner-friendly model with a reliable gimbal)
- Extra batteries(At least 2-3 on hand for longer shoots)
- Spare propellers(A couple of sets for quick changes)
- MicroSD cards(Fast cards (Class 10/UHS) for RAW photos)
- Battery charger(Keep a charger with spare adapters)
- ND filters (optional)(Helpful in bright daylight to control exposure)
- Carrying bag or backpack(Protects gear during transport)
- Smartphone/tablet with controller app(Necessary for live feed and settings)
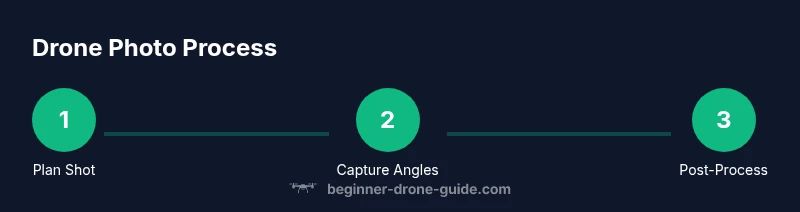
Steps
Estimated time: 1 hour 45 minutes
- 1
Define your photography objective
Identify what you want to photograph and the mood you aim to convey. Write down your goals and the leading subjects for the shoot. This keeps you focused and helps choose a suitable location.
Tip: Sketch a quick shot list before you fly to maximize image variety. - 2
Check regulations and plan the flight
Review local airspace rules, weather, and time windows. Plan safe flight paths that avoid sensitive zones and crowds. This reduces risk and protects you from fines or interruptions.
Tip: Use a flight planning app or map to mark no-fly zones. - 3
Preflight gear check
Inspect propellers, test motors, and verify battery charge. Ensure memory card is formatted and the camera is set to RAW if available. A solid preflight reduces mid-shoot surprises.
Tip: Run a quick compass calibration if your drone prompts you. - 4
Set up exposure basics
Start with auto exposure and RAW capture. If lighting is harsh, switch to a neutral density filter or adjust ISO to balance brightness without introducing noise.
Tip: Lock exposure and white balance for a consistent look across shots. - 5
Frame your shot and start the flight
Hover at a comfortable altitude, frame using the rule of thirds, and take a test shot. Move slowly to avoid motion blur and adjust angle to emphasize the subject.
Tip: Use circular or straight-line movement to guide the viewer’s eye. - 6
Capture a variety of angles
Take overhead, oblique, and low-angle shots to discover compelling perspectives. Shoot multiple frames to ensure you have good options for editing.
Tip: Document a wide range of framing in a single session. - 7
Review and back up photos
Transfer images to a computer and back up to at least two locations. Flag the best frames for editing and note any settings that produced good results.
Tip: Keep a simple catalog for easy retrieval later. - 8
Post-process and finalize
Begin with color balancing and noise reduction, then adjust contrast and clarity. Export a web-friendly JPEG set and a high-quality RAW archive.
Tip: Apply consistent color grading across the shoot for a cohesive portfolio.
Frequently Asked Questions
What is the best beginner drone for taking pictures?
Look for a model with a stable gimbal, easy auto modes, and RAW photo capability. Prioritize safety features and battery life over sheer megapixels.
For beginners, choose a drone with a stable gimbal, simple auto modes, and RAW capability. Prioritize safety features and battery life.
Do I need a license to fly a drone for photos?
Licensing rules vary by country. In many regions you must register your drone and complete a knowledge test or certification before commercial or certain recreational flights.
Licensing depends on where you are. In many places you’ll need to register and pass a knowledge test before certain flights.
What camera settings should I start with for photos?
Begin with automatic exposure and RAW capture. Later adjust ISO, shutter speed, and white balance to suit light; avoid high ISO to minimize noise.
Start with auto exposure and RAW. Then tweak ISO and shutter speed as you learn, avoiding high ISO to keep noise down.
How can I avoid blurry pictures while flying?
Use faster shutter speeds, stable framing, and a steady hover. Refrain from rapid panning; plan movements to minimize motion during exposure.
To avoid blur, shoot with faster shutter speeds and steady framing, and plan slow, deliberate movements.
Can I shoot indoors with a drone?
Indoor flights are possible in small, optically clear spaces with careful planning. Some drones lack robust obstacle sensing indoors; choose a model with sensors and fly conservatively.
Indoor flying is possible in small spaces with caution. Pick a drone with good sensors and fly slowly.
How do I transfer photos from the drone to my computer?
Remove the microSD card and use a card reader, or connect the drone directly to your computer via USB. Back up files to two locations for safety.
Copy photos from the SD card with a card reader or USB connection, and back them up.
Watch Video
Quick Summary
- Choose a stabilized drone meant for photography.
- Plan shots, light, and composition before flying.
- Use RAW and steady framing for higher-quality results.
- Prioritize safety and local regulations on every flight.
- Build a simple post-processing workflow for consistency.