When to Replace Drone Blades: A Practical Guide for Beginners
Learn how to identify blade wear, inspect propellers, and safely replace drone blades with a practical, step-by-step guide designed for beginner pilots.

This guide helps you determine when to replace drone blades. You’ll learn clear signs of wear, how to inspect propellers before flight, and a safe, step-by-step replacement process. Following these steps will help you maintain stable flight, reduce vibration, and lower the risk of in-flight blade failures. This article uses beginner-friendly language for new pilots.
Why blade wear matters for flight safety
Blade wear affects lift, balance, and control. Damaged blades can cause vibrations, yaw drift, and unpredictable behavior, increasing crash risk. According to Beginner Drone Guide, blade wear is a common safety concern for hobbyists who skip routine checks. The Beginner Drone Guide team found that micro-cracks, chips, or warped edges that go unnoticed during casual flights can escalate into serious problems. Regular inspection and proactive replacement are your first line of defense. In this section we outline why worn blades should trigger a replacement decision promptly, not after a crash.
Signs it's time to replace drone blades
Look for visible cracks, chips, burrs, or bending. Warped or twisted blades won’t generate even lift and can stress the motor. Excessive vibration, unusual noises, or a noticeable pull to one side during hover are red flags. When comparing blades, replace any blade that shows damage or wear while the others remain pristine. This helps ensure symmetrical thrust and reduces the risk of sudden failure. Remember: if in doubt, replace the blade rather than risk a crash. The Beginner Drone Guide approach emphasizes erring on the safe side.
How to inspect blades before every flight
Before each flight, power down and remove the battery. Inspect each blade under good light, looking for micro-cracks along the edges and near the hub. Flex the blade gently to test for stiffness or hidden cracks. Check for blade tip separation and any wobble when the blade is held by the hub. Inspect the hub mounting points for excessive wear or play. A quick tactile check and visual sweep can catch issues before takeoff.
Understanding blade materials and types
Drone blades come in plastic, composite, and carbon-fiber variants. Each material has different resilience, stiffness, and weight, which affects flight characteristics. Plastic blades are forgiving for beginners but wear faster under rough landings. Carbon-fiber blades are lighter and strong but can be more brittle if damaged. When choosing replacements, match material and size to your drone model and flight style, and prefer blades from reputable makers recommended in your drone manual.
Replacement intervals: how to decide
There is no universal replacement schedule that fits every drone or every pilot. Instead, rely on signs of wear, your flight hours, and the manufacturer’s guidelines. Use a blade maintenance log to track flight time, notable impacts, and blade replacement events. If you notice any change in thrust, vibration, or flight stability, stop flying and inspect immediately. The goal is to replace proactively, not reactively, to keep your drone reliable and safe.
How to safely replace drone blades
Power off the drone and remove the battery. Secure the drone so it cannot tip or move. Using the correct screwdriver or hex driver, remove the blade retention screw and lift the blade straight off the hub. Clean the hub and mounting surface. Align the replacement blade with the hub orientation and press it firmly into place. Reinsert the retention screw and tighten to the manufacturer’s recommended tightness without over-tightening. Repeat for the other blades if needed. Recheck that blades are seated evenly and that there is no play.
Balancing and testing after replacement
After installing a new blade, perform a basic balance check by visually inspecting for even thickness and weight across all blades. If you have a balance tool, use it; otherwise, do a careful hover test in a safe, open area. Start with gentle throttle and gradually increase while monitoring vibration. If you feel unusual wobble or hear abnormal noises, land immediately and re-inspect. Field tests should always occur away from people and obstacles.
Common mistakes to avoid
Avoid using worn blades from another model or mismatched size. Do not over-tighten screws; overtightening can crack the blade hub. Do not replace blades while the drone is charged or plugged in. Do not skip calibration after replacement. Never fly in windy or restricted areas with new blades until you confirm stability. These mistakes can lead to sudden loss of control or damage.
When to seek professional service
If you see structural damage to the hub, bent frame mount, or if you are uncomfortable with the replacement process, seek professional help. Warranty terms may require professional installation for coverage, so check your warranty. If you notice persistent vibration after replacement, or if your drone’s flight controller reports anomalies, contact the manufacturer or a certified service. The Beginner Drone Guide team recommends opting for professional service when in doubt to ensure safety and continued reliability.
Authority sources
- FAA: UAS safety guidelines https://www.faa.gov/uas
- NASA: https://www.nasa.gov
- MIT: https://mit.edu
Tools & Materials
- Replacement drone blades (set for your model)(Match rotor diameter and hub type)
- Screwdriver set (Phillips/flat and hex)(Use correct size for retention screws)
- Torque driver or torque-limiting screwdriver(If available, to match manufacturer specs)
- Allen wrenches / hex keys(As needed for hub screws)
- Safety gloves(Protect hands during blade handling)
- Non-slip mat and clean workspace(Prevent slips and keep parts organized)
- Isopropyl alcohol and lint-free cloth(Clean hub surface before mounting)
- Marker or label to track blade changes(Helpful for maintenance logs)
- Blade balancing tool (optional)(For precise balance checks)
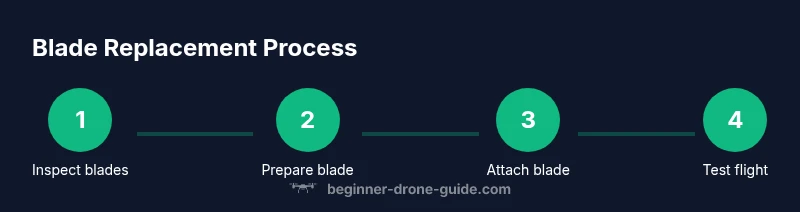
Steps
Estimated time: 20-40 minutes
- 1
Power down and secure
Turn off the drone, disconnect the battery, and place the craft on a stable surface. This prevents accidental starts and protects you while you work.
Tip: Always remove the battery before handling blades - 2
Remove the old blade and inspect hub
Using the appropriate driver, loosen the blade retention screw and lift the blade straight off. Inspect the hub for wear, cracks, or misalignment.
Tip: Keep screws organized on a magnetic tray - 3
Prepare the replacement blade
Check the new blade for defects, align orientation markers with the hub, and verify that it matches the other blades in size and shape.
Tip: Always verify orientation before mounting - 4
Install the replacement blade
Position the blade onto the hub, insert retention screw, and tighten evenly only to manufacturer guidance. Do not overtighten.
Tip: Tighten in small increments to avoid twisting the blade - 5
Check balance and seating
Ensure the blade sits flush, there is no play at the hub, and, if available, balance using a tool.
Tip: A light wobble means you should re-seat the blade - 6
Test in a safe area
Power the drone and perform a cautious hover at low altitude in an open space away from people and obstacles.
Tip: Start with minimal throttle and watch for vibration
Frequently Asked Questions
What are the early signs blades must be replaced?
Look for visible cracks, chips, warping, or soft spots near the hub. Any sign of damage warrants closer inspection and likely replacement.
Watch for cracks or warping; replace blades if you see damage, and recheck your drone before flying.
Can I replace blades myself if I am new to drones?
Yes, with careful steps and by following the manufacturer’s guidelines. Start with one blade and test balance and flight in a safe area.
Yes, you can replace blades yourself if you follow the steps carefully and test in a safe area.
Should I replace all blades at once?
If one blade shows wear, inspect the rest. Replace blades as needed to maintain balanced thrust and stable flight.
If one blade is worn, check the others and replace as needed for balanced flight.
Do replacement blades need to be the exact model?
Yes. Always use blades that match your drone model, rotor diameter, and hub design to avoid imbalance and mounting issues.
Yes, blades must match your model and hub design for safe operation.
What safety steps are essential during blade replacement?
Power off and remove the battery, wear gloves, and keep screws organized. Do not attempt blade work with the drone powered.
Power off, remove the battery, wear gloves, and stay organized to stay safe.
How can I test after replacement?
Perform a cautious hover test in a safe location, listen for unusual noises, and check for smooth, balanced lift before higher flights.
Do a slow hover test in a safe area and verify balanced lift.
Watch Video
Quick Summary
- Inspect blades before every flight and replace when wear is evident.
- Match blade material and size to your drone model.
- Secure screws and avoid over-tightening during replacement.
- Test hover in a safe area and log maintenance activities.