How to Remove SD Card from a DJI Drone: A Step-by-Step Guide
Learn how to safely remove the SD card from a DJI drone with a beginner-friendly, step-by-step guide. Power down, locate the slot, eject, and back up data to protect footage and hardware.

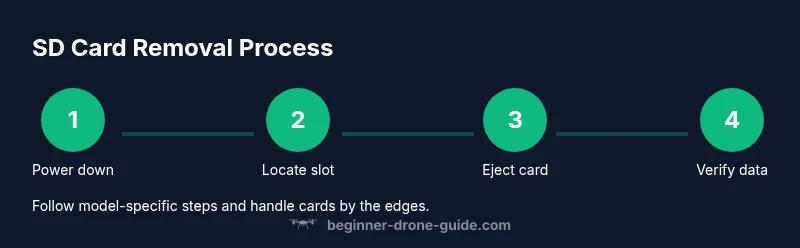
To safely remove the SD card from a DJI drone, power down the drone and controller, locate the SD card slot, gently press the card to eject, and pull it out by its edges. Use clean hands, avoid touching the contacts, and store or back up the card after removal.
Why removing the SD card safely matters
According to Beginner Drone Guide, safely removing the SD card protects your footage and the drone's microelectronics. The Beginner Drone Guide team found that many beginners skip powering down or handle cards by touching the metal contacts, which can cause data corruption or wear on the contacts. In practice, a calm, methodical approach minimizes wear and reduces the risk of losing recordings during card exchange. This section explains why proper procedure matters and how to perform it without risk. When you follow these steps, you also reduce the chance of accidental damage to the card slot cover, the battery, or nearby sensors. Remember: safety and data integrity go hand in hand when managing drone memory.
Locate the SD card slot on your DJI drone
Most DJI drones place the SD card either behind a small access door on the body or near the battery compartment. The exact location varies by model (for example, some Mavic lines hide the slot under the gimbal area, others near the back). Before touching anything, consult your model's manual or the official DJI support site to confirm the slot's location. When you find it, inspect the exterior for any protective cover or a tiny latch. A clean, dry environment helps prevent dust from entering the slot during removal.
Power-down and prepare to remove the card
Powering down is essential to protect both the card and the drone's electronics. Turn off the drone and the remote controller, and remove the battery if recommended by your model's manual. Wait about 10-20 seconds for all capacitors to discharge. Avoid handling the card when the device is still connected to a power source. This step reduces the risk of data corruption and makes the eject operation predictable.
Ejecting and removing the SD card
With the slot accessible, gently press the card straight in to release it from its locked position (some models use a spring mechanism). If it does not eject, do not force it; re-check alignment and ensure you are pushing in the correct direction. Once the card pops out, grip it only by the edges with clean hands, and pull it straight out. Avoid bending or twisting the card during removal to protect the contacts.
Inspect, clean, and reinsert or back up data
Take a moment to inspect the card and the slot for dust or damage. If the contacts look clean, you can reinsert the card into the same orientation (label facing up, contacts toward the device) or move it to a card reader to back up footage. If you notice scratches, deformation, or a stuck card, stop and consult DJI support. After removing, transfer footage to your computer or cloud backup to ensure you won't lose anything.
Aftercare: storing the card and testing data transfer
Place the SD card in a protective case after backing up data. Store it in a cool, dry place away from magnetic fields. When ready, reinsert the card into the drone if needed and perform a quick test flight or data transfer to verify the card works correctly. Regular backups and physical care extend the life of your memory cards.
Tools & Materials
- DJI drone or remote/controller access(Ensure you can reach the SD card slot without removing other parts)
- MicroSD card (class 10 or UHS-I)(Check model specs for max capacity)
- Microfiber cloth(For wiping dust from contacts if needed)
- Soft, clean work surface(A mat or desk to prevent card loss)
- Small flashlight or phone light(Improves visibility in slot area)
- Card storage case(Keeps cards organized and protected)
Steps
Estimated time: 6-12 minutes
- 1
Power down and secure devices
Power off the drone and the remote controller. If the manual instructs it, remove the battery and wait for 10-20 seconds to discharge capacitors. This prevents data corruption and accidental power-ons during card handling.
Tip: Wait a moment after power-off to ensure all electronics are completely off. - 2
Locate the SD card slot
Find the slot by checking the model's manual or DJI support. Look for a small door or labeled slot on the drone body or near the battery area. Confirm you’re aiming at the correct slot for the SD card.
Tip: Use a flashlight if lighting is poor to avoid fumbling or inserting the card in the wrong slot. - 3
Open the slot access
Open any protective door or cover to reveal the card. Do not force covers; a gently lifted door is usually enough. Ensure the area is free of dust before touching the card.
Tip: Support the slot with one hand to prevent bending the mechanism when opening. - 4
Prepare to eject the card
If the card is spring-loaded, press it straight in until it releases. Do not wiggle the card; keep it aligned with the slot to avoid damaging the contacts.
Tip: If it doesn’t eject, double-check alignment and don’t force it. - 5
Remove the SD card
Gently pull the card straight out by its edges. Avoid touching the gold contacts. Hold over a soft surface in case of a drop.
Tip: Cover the card with the backside of your hand to shield from dust during removal. - 6
Inspect and decide on next steps
Check the card for dust or damage. If clean, reinsert or read data with a card reader to back up. If damaged, stop and consult DJI support.
Tip: Back up data before storing the card away. - 7
Reinsert or store the card
If reusing in the drone, reinsert in the same orientation (label up, contacts in). If backing up, place in a protective case and label it.
Tip: Store spare cards in a cool, dry place away from magnets. - 8
Power back on and test
Power the drone back on and run a quick data transfer test to ensure the card is functioning. Confirm that new footage saves correctly.
Tip: Run a short test flight if possible to verify everything works.
Frequently Asked Questions
Do I need to power off the drone before removing the SD card?
Yes. Powering off prevents data corruption and reduces the risk of short circuits while you handle the card.
Always power off before removing the SD card to protect your data and hardware.
Where is the SD card slot located on most DJI drones?
Slot location varies by model. Check the manual or DJI support for the exact position and any protective doors.
Location depends on the model; consult the manual.
Can I remove the SD card from the controller instead of the drone?
Some models store the card on the drone, others in the controller. Verify for your specific model before removing.
It depends on the model—check your manual.
What kind of SD card does DJI require?
DJI devices typically use microSD cards that meet the device specification. Always verify supported card type and maximum capacity in the manual.
Check the manual for the supported card type and max capacity.
What should I do if the card won’t eject?
Power down, check for a locked slot, and confirm you're using the correct orientation. If it still won’t eject, consult DJI support.
If it won’t eject, power down and consult the manual or support.
How often should I back up SD card data?
Back up after every flight or after full card write cycles to minimize data loss.
Back up after every flight.
Watch Video
Quick Summary
- Power down before handling the card.
- Locate and confirm the correct SD slot.
- Eject gently and handle by edges to avoid damage.
- Back up data and inspect for wear after removal.
- Store cards securely to extend lifespan.