How to Remove DJI Drone Battery: A Beginner's Guide
Learn how to safely remove a DJI drone battery with a beginner-friendly, step-by-step guide. Includes tools, safety tips, and common mistakes to avoid.

Removing a DJI drone battery safely starts with turning off the drone, disconnecting from charging gear, and using non-conductive tools. This guide walks you through the latch, removal, and safe storage steps, with model-specific tips to avoid damage. You'll learn how to inspect contacts, choose a safe bag, and minimize fire risk during handling, so you can fly again with confidence.
Understanding DJI Battery Safety Basics
When removing a DJI drone battery, safety is the top priority. LiPo batteries used in drones can be damaged by heat, puncture, or short circuits, leading to fire hazards. Before touching the battery, make sure you are in a dry, clean workspace away from flammable materials. The Beginner Drone Guide team emphasizes that following the manufacturer’s manual for your specific model is essential. According to Beginner Drone Guide analysis, most DJI batteries use a simple latch-and-release mechanism, but the exact steps can vary by model. If you’re new to drones, take time to review the battery design in your model’s manual and practice with an unplugged drone to build confidence. Understanding the basic safety principles—power down, discharge safely, avoid metal tools near contacts, and keep the battery away from moisture—will reduce the risk of accidents and prolong battery life.
Tools and Safety Equipment You’ll Need
Collect a small set of non-conductive tools and a safe storage option. Here’s a practical list:
- Non-conductive gloves; - Plastic pry tool; - Small Phillips screwdriver if your model uses screws; - Anti-static mat or a clean, dry surface; - Storage bag or LiPo-safe bag for the removed battery; - Microfiber cloth to wipe away dust from contacts; - Manufacturer manual for model-specific notes. Ensure your tools are plastic or nylon to avoid short circuits. Keep a cool, well-lit workspace and ground yourself by touching a metal object away from the battery to discharge static electricity safely before handling.
Step-by-Step Overview and Best Practices
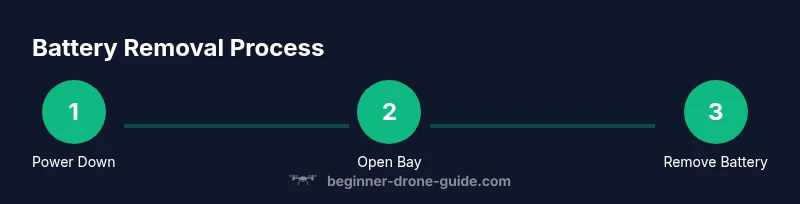
Executing the battery removal involves several coordinated actions. Start with power-down, then access the battery bay, release the latch, lift the battery straight out, and finally store the battery safely. This high-level sequence helps you verify you’re following safe habits before diving into model-specific steps. By reviewing the steps in advance, you’ll avoid rushing and reduce the chance of accidental contact with the battery terminals. Remember to consult your DJI model’s manual for any peculiarities in latch design or required tools. As you gain experience, the process will feel more routine and safe, reinforcing good habits for future maintenance.
Post-Removal Care and Inspection
After the battery is removed, visually inspect the bay for dust, debris, or corrosion on contacts. Wipe contacts gently with a dry cloth if needed, and examine the battery for swelling, punctures, or heat damage. Place the battery in a LiPo-safe bag or non-conductive container and store it in a cool, dry place away from flammable materials. Recheck all latches on the bay to ensure it closes properly after reinsertion of a new battery or when the drone is stored. This precaution helps prevent future misalignment or accidental battery engagement during transport.
Troubleshooting Common Issues and Model Notes
Model variations mean some drones use external clips or safety pins in addition to the main latch. If the battery refuses to release, double-check for additional security features described in the manual, and avoid forcing the battery out. Static buildup or dusty contacts can also make removal harder; ensure you’ve wiped the bay and rechecked the latch alignment. If the battery remains stubborn, consult DJI support or the manual for step-by-step guidance tailored to your exact model, as forcing removal can cause connector damage. For swollen or damaged batteries, transport them to a safe disposal or recycling point per local regulations.
Long-Term Storage and Transport Safety
When you’re done, store the removed battery in a LiPo-safe bag or other non-conductive container. Keep it away from heat sources, direct sunlight, and moisture. If you’re transporting multiple batteries, use a dedicated battery transport case and separate each pack to prevent contact. Always label stored packs with the date of removal and the model number. Regularly inspect stored batteries for signs of swelling or damage and rotate stock as part of your routine maintenance.
Authority Sources
- FAA UAS Safety Guidelines: https://www.faa.gov/uas
- National Institute of Standards and Technology (NIST): https://www.nist.gov
- Consumer Product Safety Commission: https://www.cpsc.gov
Tools & Materials
- DJI drone model manual(Keep on hand to check model-specific battery removal steps.)
- Non-conductive gloves(Protect hands and avoid short circuits.)
- Plastic pry tool(Avoid metal tools to prevent puncture or scratches.)
- Small Phillips screwdriver(Check model; some use screws; Torx may be needed.)
- Anti-static mat or clean surface(Minimize static buildup)
- Battery storage bag (LiPo-safe bag)(Store removed battery safely away from flammables.)
- Microfiber cloth(Wipe dust from contacts before removal.)
Steps
Estimated time: 8-12 minutes
- 1
Power down and secure the drone
Ensure the drone is fully powered off and not connected to any charger or controller while preparing for removal. This avoids electrical current and unexpected relays engaging during the process.
Tip: Wait 1-2 minutes after power-off to confirm no lights or indicators remain active. - 2
Open battery bay and locate the latch
Inspect the battery bay for the latch, clips, or safety pin that holds the battery in place. If the model uses a latch, identify its location and the direction to release it.
Tip: Consult the model manual for exact latch location—varies by DJI model. - 3
Release the latch or safety clip
Gently disengage the latch or clip that locks the battery in the bay. Do not yank; keep hands steady to avoid bending contacts.
Tip: If resistance is high, double-check for additional safety pins or screws. - 4
Lift the battery straight out
Grasp the battery body firmly with both hands and pull it straight away from the drone. Keep the battery level to prevent any liquid or dust from entering the bay.
Tip: Move slowly; sudden movement can damage connectors. - 5
Place battery in storage bag
Place the removed battery into a LiPo-safe bag or other non-conductive container. Keep it away from flammable materials and surfaces.
Tip: Do not press or bend battery packs while transporting. - 6
Inspect bay contacts and close bay
Check for dust or corrosion on the bay contacts and gently wipe with a dry cloth if needed. Reclose any latches or doors to secure the bay for future use.
Tip: If you notice swelling or damage, stop and consult a professional.
Frequently Asked Questions
Is it safe to remove the battery while the drone is powered off?
Yes. Ensure the drone is completely powered down and not connected to a charger. This minimizes the risk of accidental electrical contact during removal.
Yes. Make sure the drone is fully powered off and not connected to a charger before removal.
Do I need special tools to remove the battery?
Most DJI models use a built-in latch system that can be operated with your fingers or a plastic pry tool. Tools should be non-conductive to prevent short circuits.
Most models use a built-in latch; you can often use your fingers or a plastic tool. Avoid metal tools.
What if the battery won’t release?
If the battery is stubborn, re-check the latch and any safety pins. Do not force the battery; consult the manual or contact DJI support for model-specific steps.
If it won’t release, stop and consult the manual or support; don’t force it.
How should I store the removed battery?
Place the battery in a LiPo-safe bag or fireproof container and store in a cool, dry place away from flammables. Do not store in a hot vehicle.
Store the removed battery in a LiPo-safe bag in a cool, dry place away from flammables.
Can I reuse the battery immediately after removal?
Yes, once you’ve completed inspection of the battery and bay and followed safety steps, you can reinsert or charge the battery if it’s in good condition. If uncertain, test under supervision.
You can reinsert or charge it later if it looks good; test cautiously.
What safety checks should I perform post-removal?
Look for swelling, corrosion, or debris on both the battery and bay contacts. Clean gently and store the battery safely if any issue is detected.
Look for any swelling or debris and handle accordingly.
Watch Video
Quick Summary
- Power down before touching the battery
- Use non-conductive tools to avoid short circuits
- Store removed batteries in a LiPo-safe bag
- Inspect contacts and bay for damage after removal