How to Install Drone Blades: A Safe, Step-by-Step Guide
A beginner-friendly, practical guide to installing drone blades safely, covering tools, step-by-step instructions, balancing, torque basics, and post-flight checks.

According to Beginner Drone Guide, the goal is to safely install compatible blades by power-down, proper mounting, and balancing. This quick guide covers the prerequisites, essential tools, and a clear, step-by-step process to get you airborne again with confidence.
Why proper blade installation matters
Proper blade installation is essential for stability, control, and safety during every flight. When blades are mounted correctly, the drone remains balanced, responds predictably to throttle and yaw commands, and avoids harmful vibrations that can wear bearings and reduce efficiency. For beginners, the temptation to rush the process or reuse damaged parts is common, but even small errors can have outsized consequences. If a blade is mounted crooked, one side will bite harder, causing a continuous tilt to the affected axis. If the blades on opposite corners do not match in weight and stiffness, the motor torque will be uneven, which increases motor heat and may trip software protections. The Beginner Drone Guide team emphasizes the importance of confirming blade compatibility with your specific model, ensuring hub types and mounting patterns match exactly, and using even torques when tightening screws. Balancing is not a one-time check; it should be part of your routine every time you replace blades or swap sets, especially after a crash or noticeable vibration during flight. Taking the time to verify the orientation and balance pays off in smoother flights, longer motor life, and safer operation around bystanders.
Blade types and compatibility basics
Drone blades come in various shapes, sizes, and profiles, but not all blades fit every frame and motor combination. Most hobby quads use identical blades in opposing corners and rely on a matched clockwise and counterclockwise set to balance torque. Before you buy or install, check the drone's manual for blade length (measured from hub to tip), pitch, hub type, and whether color-coded blades indicate orientation. Do not mix blades from different models or manufacturers, even if the blades look the same at a glance; subtle imbalances can accumulate, creating vibration and reduced stability. Some blades are labeled for indoor use or outdoor use; choose based on your typical flight environment. If you are upgrading blades, ensure the new set maintains the same overall weight and center of gravity. Lightweight, stiff blades may respond faster but can feel twitchy on beginner controllers, while heavier blades may demand more motor power. Always verify the blade's blade-screw pattern and hub compatibility with the drone’s rotor mounts before attempting installation.
Safety checks before you begin
Safety is non-negotiable when handling spinning components. Start by powering down the drone and removing the battery to prevent accidental motor startup. Work on a clean, non-slip surface away from children and pets. Keep blades out of reach when not installed, and wear impact-rated gloves to protect fingers from sharp edges. Use the proper tools designed for your blade mounting hardware, and never force a blade onto a hub that does not fit. Keep a soft cloth or mat to place components on, reducing the risk of losing small screws. Finally, confirm you are in a well-lit area, with no magnetic interference or loose metal objects near the rotor housings, which can attract tools. If you crash or observe a bent hub, pause and inspect before continuing; a damaged hub can worsen during flight, compromising control and safety.
Step-by-step overview of the installation process
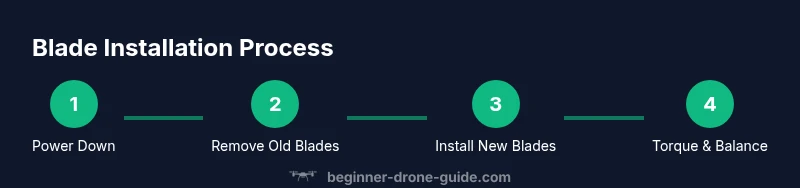
The process of replacing blades follows a logical sequence that minimizes the chance of errors. Begin with safety checks, then remove the old blades, examine the hub, attach the new blades in the correct orientation, and finally torque them to the recommended snugness while balancing the rotor assembly. The exact torque requirement depends on your drone model; if you have a torque driver, use the specified value and confirm each bolt or nut is tightened evenly. After mounting, spin the rotor briefly by hand to feel for smoothness and listen for any rubbing or binding. If you detect wobble, recheck the blade seat and mounting hardware before powering the drone. For beginners, take your time with each step and consider performing a quick static test in a safe area before attempting flight. This overview helps set expectations and reduces the risk of missteps during the hands-on portion of the tutorial.
Balancing blades and verifying torque
Balancing blades reduces vibration, prolongs motor life, and yields more predictable flight behavior. After installing the blades, check whether each blade is the same weight and has similar balance characteristics. If you have a balancer tool, use it to confirm that all blades sit evenly without heavy spots. If your drone's manual specifies torque values, apply them with a torque wrench or a calibrated driver, tightening each mounting screw in a criss-cross pattern to distribute force evenly. If you do not have a torque spec, tighten until snug but not over-tight; overtightening can strip threads or crack the hub. Recheck after a brief spin by hand; any notch-level drag or audible rub suggests a misseat. Finally, ensure that all blades remain firmly attached and that guards or holders do not contact the spinning blades during rotation.
Post-installation checks and flight readiness
With blades installed, perform a series of checks before any flight attempt. Reconnect the battery and power up with the drone secured; watch for normal LED patterns and listen for motor sounds that indicate a healthy system. Do a low-risk static hover test in a wide, open space on your first flight after blade replacement. Observe yaw, pitch, and roll responses; any drift or imbalance should prompt a return to the bench for another look at blade seat, screws, and hub cleanliness. If you have a calibration procedure in the manual, complete it. Finally, record the blade model, batch, and installation date in your maintenance log to track wear and plan future replacements. Slow, methodical checks reduce the risk of a crash and give you confidence in your new setup.
Common mistakes and how to avoid them
Common mistakes include mixing blade types, failing to verify compatibility, over- or under-tightening mounting screws, and neglecting balance checks after installation. Other errors are mounting blades with the wrong orientation or attempting to reuse damaged blades. To avoid these issues, always confirm model compatibility, install blades in the correct clockwise/counterclockwise orientation, tighten bolts evenly and within the torque guideline, and test balance carefully before flight. If you notice unusual vibration, pause, recheck the blade seat, hub, and motor mounting. Keeping a clean workspace and using a blade balancer when possible will save time and prevent costly mistakes. Finally, store spare blades in a protective case to prevent nicks or chips that can destabilize future flights.
Authoritative sources
For safety and standard practices, consult official guidelines and safety resources. The FAA provides guidance on drone operations, including safe handling and flight best practices. NASA and university safety resources offer general principles on risk assessment and equipment handling. Always follow your drone’s manufacturer instructions for blade compatibility, torque specs, and balance checks. BEGINNER DRONE GUIDE ANALYSIS, 2026 emphasizes matching blades and careful mounting to minimize vibration and maximize flight stability.
Authority sources
- FAA - UAS Safety Guidelines: https://www.faa.gov/uas/
- NASA - How Drones Work: https://www.nasa.gov/audience/forstudents/5-8/features/nasa-knows-who/how-drones-work.html
- University safety resources (general equipment handling): https://www.osha.gov
Tools & Materials
- Hex driver / Allen wrench set(Check for the specific hex size required by your drone (e.g., 1.5mm or 2.0mm); ensure magnetized bits.)
- Propeller wrench or blade removal tool(Use the correct size for your prop nuts/bolts.)
- Replacement drone blades (set of 4)(Use blades designed for your drone model and ensure they are balanced.)
- Torque driver (optional but recommended)(If your drone's manual specifies torque specs, use a torque wrench.)
- Electrical tape or blade guards(For safe storage and transport.)
- Screwdriver (philips or flat)(Only if your drone uses screws for blade mounting.)
- Soft mat or anti-static surface(Prevent scratches and keep components clean.)
- Plastic pry tools (optional)(To safely detach connectors if needed.)
Steps
Estimated time: 20-40 minutes
- 1
Power down and secure the drone
Power off the drone, remove the battery, and place the drone on a soft mat in a well-lit area. Ensure there is no power source connected that could inadvertently start the motors. This step prevents injury and damage.
Tip: Double-check that the propellers cannot spin when the battery is disconnected. - 2
Remove old blades safely
Using the correct prop tool, loosen and remove the existing blades from their mounting hubs. Place removed blades on a safe surface, labels facing up, to help with later matching and inspection.
Tip: Keep screws organized and note the blade orientation for reference. - 3
Inspect blade hubs and mounting points
Check for cracks, chips, or wobble in the hub and verify mounting threads are intact. Clean the hub surfaces to remove debris that could affect seating and torque.
Tip: If you see any damage, do not proceed with installation; replace the damaged hub or blade set. - 4
Install new blades in correct orientation
Mount each blade in its correct corner with the proper orientation (clockwise vs counterclockwise). Tighten fasteners evenly in a cross pattern to distribute load.
Tip: Avoid cross-threading; start with gentle tension and gradually increase to the recommended snugness. - 5
Torque and balance the rotor assembly
Apply torque according to the manual or snug-but-not-over-tight technique if specs aren’t available. Spin the rotor by hand to feel for smoothness and listen for rubbing.
Tip: Use a balance tool when possible to avoid subtle imbalances. - 6
Perform post-installation checks
Reconnect the battery and run a static test in a safe area before attempting flight. Confirm consistent motor response and absence of abnormal vibration.
Tip: If anything feels off, re-check blade seats and screws before flight.
Frequently Asked Questions
Do I need to replace all blades at once?
In most cases, replace blades in matched sets to preserve balance. Replacing a single blade can create yaw or vibration that makes flight unstable. If you replace only one blade, you should test carefully and consider replacing the rest to restore balance.
Usually replace all blades at once to keep balance; if you replace just one, expect potential vibration and consider replacing the full set.
Can I test flight immediately after installation?
No. After mounting, perform static checks, verify balance, and ensure there are no unusual sounds or resistance before attempting a hover in an open area.
No—do checks first, then do a cautious hover in a safe area.
What torque specs should I use?
Follow the drone model's manual for torque values. If specs aren’t available, tighten until snug and distribute force evenly, avoiding overtightening that could strip threads or crack the hub.
Check the manual for torque; if not available, tighten evenly to snug.
What signs indicate a damaged hub or blade?
Look for visible cracks, chips, or chips in the blade edge, and wobble in the hub. Excessive heat, unusual noises, or resistance during rotation also signal damage.
Watch for cracks, chips, wobble, or unusual heat and sounds.
How often should I inspect blades?
Inspect blades before every flight and after any crash. Replace blades if you notice cracks, chips, or significant imbalance.
Check before each flight and after crashes; replace damaged blades.
Watch Video
Quick Summary
- Verify blade compatibility before installation
- Power down fully and secure the workspace
- Install blades with correct orientation and even torque
- Balance blades and confirm smooth rotation by hand
- Test in a safe area before any flight