Beginner Drone Mapping: A Practical Guide
Learn how to drone mapping with a practical, beginner-friendly guide covering planning flights, data capture, processing outputs, and essential safety practices for new pilots.

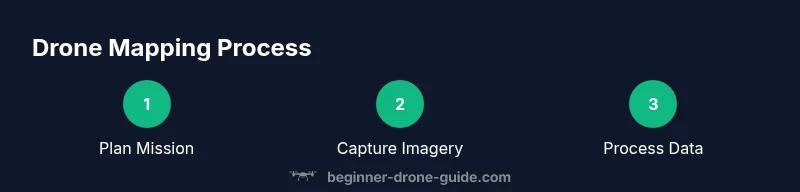
By the end of this guide you will know how to drone mapping from planning to processing. You’ll learn how to design a safe flight plan, capture high-quality georeferenced imagery, and generate accurate orthomosaic and digital elevation models. This hands-on approach covers equipment basics, software workflows, and practical safety tips so beginners can map sites confidently.
What is drone mapping and why it matters
According to Beginner Drone Guide, drone mapping turns aerial imagery into precise geographic data that can be used for surveying, agriculture, construction, and real estate. When you map an area, you capture a grid of overlapping photos and combine them into a single, georeferenced dataset. The result is an orthomosaic map that aligns with real-world coordinates, plus 3D models of terrain or structures if you collect multi-angle data. For beginners, the appeal is clear: you can monitor farm fields, plan construction sites, or create property visuals with professional precision, all from the air. The quality of your outputs depends on careful planning, stable flight, accurate camera settings, and robust processing workflows. With the right approach, even a consumer-grade drone can deliver mapping results that rival traditional ground surveys in specific contexts. Throughout this guide, you’ll see practical steps, common pitfalls, and safety best practices that help you map confidently without breaking the bank.
Gear readiness and safety foundations
Before you lift off, establish a baseline of safety and readiness. You’ll need a drone capable of stable flights and a mapping workflow you can repeat. Ensure your batteries are charged, storage is sufficient, and you have a way to verify GPS quality and sensor calibration. Build a simple checklist that covers airspace awareness, weather suitability, and a clear objective for the mission. By starting with safety and consistency, you reduce the risk of lost data, damaged equipment, or regulatory trouble. This section also underscores the value of documenting settings so you can reproduce successful flights and quickly diagnose issues in future mappings.
Planning your mission for consistent results
Effective mapping hinges on planning. Define your area of interest, desired outputs (orthomosaic, DSM/DEM, contour lines), and the required ground sample distance (GSD). Choose flight lines that provide sufficient overlap—typically 75–85% front overlap and 65–75% side overlap for standard terrains. Select an appropriate altitude and a stable wind window to balance coverage with image quality. Decide whether you’ll use a grid pattern or a double-grid for complex terrain. A clear plan helps you collect complete data, reduces gaps, and speeds up processing later. This block also highlights practical checks, such as confirming coordinate reference systems (CRS) and establishing ground control points when high accuracy is essential.
Data capture fundamentals: flight patterns, overlap, and GCPs
Capturing data for mapping relies on deliberate flight patterns and sensor settings. A well-chosen grid or zigzag pattern ensures consistent overlap and minimizes shadowed areas. Enable the highest feasible image resolution to improve detail, while balancing storage needs. Calibrate the camera and ensure the drone’s GPS is locked before takeoff. Ground control points (GCPs) or RTK/PPK solutions can dramatically boost accuracy, especially for large sites or professional surveys. In practice, you’ll collect imagery with metadata about location, altitude, and time to support precise georeferencing. Always perform a quick quality check in the air by glancing at live feed and verifying that images include reference markers or distinguishable ground features.
Processing data into maps and 3D models
Processing converts hundreds or thousands of photos into usable products. Begin with image alignment to create a dense point cloud, then generate an orthomosaic and a digital surface model (DSM) or digital elevation model (DEM) as needed. Many beginner-friendly tools automate steps like tie point matching, bundle adjustment, and exporting to standard GIS formats (GeoTIFF, LAS). Pay attention to alignment accuracy and check for gaps or misalignments. Finally, export products in the formats your project requires and document the coordinate system used. This section also discusses common artifacts and how to mitigate them through re-processing or adjusting flight data.
Practical tips for beginners and essential safety practices
As a new mapper, develop a reliable workflow you can repeat. Create a pre-flight checklist, verify airspace restrictions, and stay within visual line of sight. Practice on smaller, low-risk sites before tackling larger areas. Keep a log of flight settings, weather conditions, and data quality so you can refine your process over time. Safety matters most: respect no-fly zones, monitor battery health, and have a plan for emergency landings. Finally, use non-destructive processing methods when learning, and gradually move to more advanced features like GCP integration or RTK/PPK workflows as you gain confidence.
Validating results and avoiding common mistakes
Validation is not optional—it's essential for credible mapping. Compare outputs against known measurements where possible, and assess RMSE (root mean square error) to gauge accuracy. Visually inspect the orthomosaic for blur, seams, and gaps, and verify the alignment of building corners or landmark features. Common mistakes include insufficient overlap, poor calibration, and flying in marginal weather. By systematically checking data quality at each stage, you’ll build trust in your results and reduce rework. This section also covers post-processing quality controls and how to document validation steps for clients or stakeholders.
Tools & Materials
- Drone with mapping capabilities(Stable platform with a good camera and GPS; ensure firmware is up to date)
- Planning software or app(Used to design flight lines, overlaps, and altitude)
- Mapping software for processing(Supports orthomosaic, DSM/DEM generation, and GCP workflows)
- Extra batteries and charger(Plan for at least 1.5x the expected flight time)
- Storage (SD cards or portable SSD)(High-speed cards recommended for large datasets)
- Ground Control Points (GCPs) or RTK/PPK setup(Important for high-accuracy projects)
- GPS-enabled controller or tablet(Ensure reliable GNSS reception during flight)
- Weather and regulatory checks(Always verify wind limits, precipitation, and airspace rules)
Steps
Estimated time: 2 hours 30 minutes
- 1
Define mapping objective
Clarify what outputs are needed (orthomosaic, DSM/DEM, contour lines) and the required accuracy. Establish the area of interest and the final deliverables so you can tailor flight parameters and processing settings.
Tip: Write down the exact coordinates, output formats, and target ground sample distance (GSD). - 2
Check airspace and weather
Review local airspace restrictions and NOTAMs for your proposed flight window. Confirm wind speeds, visibility, and precipitation are within safe operating limits for your drone and sensor.
Tip: If in doubt, postpone to a calmer day and consider a shorter mission first. - 3
Plan the flight path
Choose grid or zigzag lines that provide the required overlap. Set altitude to achieve the desired GSD and ensure safe clearance over obstacles. Save the mission as a repeatable template.
Tip: Use a conservative altitude first and adjust after a quick test flight. - 4
Calibrate sensors and camera
Calibrate the compass and IMU if your drone supports it. Confirm camera settings (resolution, shutter speed, and white balance) suit the lighting conditions. Do a quick pre-flight check of gimbal stability.
Tip: Enable auto-exposure bracketing if lighting varies across the area. - 5
Set capture parameters
Set high-resolution image capture with consistent exposure. Ensure consistent framing, autofocus behavior, and a consistent shooting interval that matches the flight speed.
Tip: Enable histogram monitoring to avoid under- or overexposed images. - 6
Execute a test flight
Fly a small subset of the area to validate geometry, overlap, and data quality. Review initial images for visibility, blur, and sharpness. Adjust settings if needed.
Tip: Check for gaps in coverage and re-shot if critical areas are missing. - 7
Deploy GCPs or RTK/PPK
If you require high accuracy, place GCPs with clear visibility and record their coordinates. Alternatively, enable RTK/PPK in the workflow if your system supports it.
Tip: Use consistent marker sizes and measurable targets for easy identification. - 8
Fly the mission and transfer data
Execute the full mission following the planned lines. Bring the data back securely, and verify the integrity of the flight log and imagery before leaving the site.
Tip: Back up data on-site if connectivity is poor. - 9
Process and validate outputs
Import imagery into processing software, run alignment, generate the orthomosaic and DSM/DEM, and export formats you need. Validate outputs against known references and document any deviations.
Tip: Retain original raw images to enable re-processing if needed.
Frequently Asked Questions
What is drone mapping?
Drone mapping uses aerial imagery captured by a drone to create georeferenced maps and 3D models. Through careful planning, overlapping photos, and processing, you obtain outputs like orthomosaics and DSM/DEM that align with real-world coordinates.
Drone mapping creates maps and 3D models from aerial photos by planning and processing overlapping images.
Do I need a license to map?
Licensing requirements vary by country and intended use. Some regions require basic remote pilot certification for commercial work, while others may have broader permissions under recreational rules. Always check local airspace and aviation authority guidelines.
Licensing depends on your country and whether you're mapping commercially. Check your local airspace rules.
What software do I use for mapping?
Many mapping workflows use software that handles image alignment, georeferencing, and output generation. Start with beginner-friendly options to automate steps, then move to advanced tools if you need GCP workflows or custom exports.
Use software that aligns images, georeferences data, and exports maps; start simple and grow as you learn.
How long does a mapping mission take?
A typical mapping mission can range from 30 minutes for a small site to several hours for larger areas, plus time for data transfer and processing. Plan for processing time in your schedule.
Missions vary by site size; set aside time for data transfer and processing after flight.
Can mapping be used for real estate?
Yes. Drone mapping can produce high-quality orthomosaics and 3D models that enhance real estate listings, site assessments, and architectural planning. Ensure you follow local regulations and disclose data sources when presenting results.
Mapping provides useful maps and 3D models for real estate visuals when compliant with local rules.
Watch Video
Quick Summary
- Plan meticulously before flight.
- Ensure sufficient image overlap for reliable stitching.
- Use GCPs or RTK/PPK for higher accuracy.
- Validate outputs against known benchmarks.
- Prioritize safety and regulatory compliance.