How to Install DroneDeploy on Smart Controller
A practical, beginner-friendly guide to installing DroneDeploy on a DJI Smart Controller, including prerequisites, step-by-step setup, safety checks, and troubleshooting tips.

In this guide you will learn how to install DroneDeploy on a smart controller and run your first mission. You'll confirm compatibility, sign in to DroneDeploy, install or update the app, connect your drone, and load a flight plan. Follow these steps to fly smarter, safer, and with confidence.
how to install dronedeploy on smart controller
Learning how to install dronedeploy on smart controller can seem daunting for brand-new pilots. This guide walks you through the process with practical steps, safety checks, and troubleshooting tips. According to Beginner Drone Guide, using DroneDeploy on a smart controller can streamline mission planning and data collection for beginners who want reliable, on-site mapping without juggling multiple devices. In this guide, you will learn the exact steps to get DroneDeploy up and running on your smart controller, including prerequisites, sign-in, app installation, and a first test flight. By the end, you’ll be able to plan and execute basic mapping tasks with confidence and better safety practices.
Compatibility and prerequisites
Before you begin, verify that your hardware and software align with DroneDeploy’s requirements. DroneDeploy supports a DJI Smart Controller with the latest firmware and a compatible drone, along with a stable internet connection for activation and data syncing. Ensure the controller has a current OS build and access to the official app store. As noted in the Beginner Drone Guide analysis, compatibility is the foundation for a smooth installation, so double-check model numbers, firmware versions, and account status. You should also confirm that you have a DroneDeploy account ready for login and mission planning, and that your controller has adequate battery life for setup and test flights. This stage reduces surprises during the installation itself and helps you avoid mid-flight interruptions.
Accounts and setup
Create or sign in to your DroneDeploy account on the smart controller or via a desktop browser. If you’re new, complete the signup, verify your email, and set up two-factor authentication for security. Once signed in, configure your profile for beginner-friendly mapping features such as flight planning templates and automated data export options. Having your account ready speeds up the activation process and ensures you can access flight plans and mapping templates immediately after installation.
Hardware connections and network setup
Power up the smart controller and drone, then establish a reliable network connection. Use a strong Wi-Fi or mobile hotspot for initial activation and app download. Keep the controller charged (at least 60%) before starting the installation, and place the drone and controller in an open space during setup to avoid interference. This step ensures the app can communicate with the drone during pairing and mission planning.
Installing the DroneDeploy app on the smart controller
Open the official app store on the smart controller and search for DroneDeploy. If the app is already installed, choose update to ensure you have the latest features and fixes. Install or update, then launch DroneDeploy and sign in with the account you prepared earlier. Ensure you grant necessary permissions (location, storage, camera) so the app can operate normally during flight planning and data capture. If you encounter installation issues, verify device storage space and network connectivity before retrying. The exact wording in this section emphasizes the core action: install the app on the smart controller and sign in to begin using DroneDeploy for planning and mapping.
Connecting the drone and performing a basic check
Power on both the drone and smart controller, then connect the two via the recommended method for your hardware (USB-C cable or app-based pairing). Open DroneDeploy and confirm the drone is detected in the interface. Run a quick pre-flight check (GPS lock, compass calibration reminders, and battery level) to ensure safe operation. This connection is foundational for executing any flight plan and collecting data.
Calibrations, test flight, and first mission setup
Calibrate essential sensors if prompted (compass, IMU, and radio link sanity checks). Load a simple test flight plan to verify navigation and data capture; perform a controlled hover and a short waypoint sequence in an open area. Review the flight plan parameters (area, altitude, overlap) and ensure Return-to-Home is enabled with a conservative altitude. After a successful test, you can adapt the mission parameters for real flights, gradually increasing complexity as you gain experience.
Troubleshooting, safety, and next steps
Common issues include connection drops, app permission prompts, or aircraft not appearing in DroneDeploy. Restart devices, reinstall the app, and confirm firmware compatibility if problems persist. For ongoing practice, create a personal checklist that covers pre-flight safety, data backup, and post-flight analysis. The goal is to keep your flights safe, legal, and productive while you build your skills on the smart controller.
Tools & Materials
- Smart Controller with latest firmware(Charge to at least 60% before starting; ensure internet access)
- Drone (DJI or compatible) authorized for DroneDeploy(Check that your drone model is supported by DroneDeploy)
- DroneDeploy account(Have login credentials ready; enable two-factor authentication)
- Official DroneDeploy app on the smart controller(Install or update from the official app store)
- Stable internet connection(Wi-Fi or mobile hotspot for activation and data syncing)
- USB-C data cable(Used for direct data transfer or pairing if needed)
- Pre-flight checklist(Compass calibration, GPS lock, battery checks)
Steps
Estimated time: 60-90 minutes
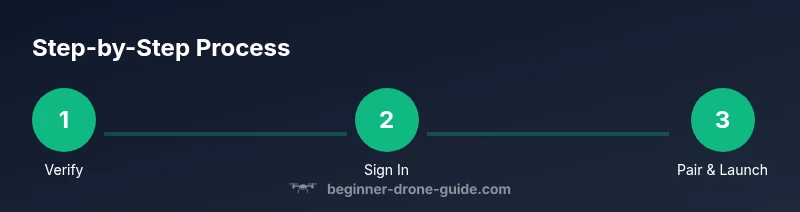
- 1
Verify compatibility
Confirm your drone, smart controller, and firmware meet DroneDeploy requirements. This upfront check prevents later compatibility issues during setup.
Tip: Consult the official DroneDeploy compatibility page before starting. - 2
Sign in to DroneDeploy
Sign up or log in to your DroneDeploy account on the smart controller or via the web. Ensure two-factor authentication is enabled for security.
Tip: Use a strong password and enable 2FA for account protection. - 3
Update firmware on smart controller
Connect to power and internet, then update to the latest firmware if prompted by the device.
Tip: Keep the controller plugged in during the update to avoid interruptions. - 4
Install or update DroneDeploy app
Open the official app store on the smart controller, search for DroneDeploy, and install or update. Launch the app after install.
Tip: Verify you are downloading the legitimate app from the official store. - 5
Pair the drone and controller
Power on both devices and use the recommended pairing method to connect DroneDeploy with the aircraft.
Tip: Use the original USB-C cable if your setup requires physical pairing. - 6
Run pre-flight checks
Check GPS status, calibrate compass if prompted, and confirm battery levels before takeoff.
Tip: Avoid flying with low battery or in areas with poor GPS signal. - 7
Load a simple flight plan
In DroneDeploy, load a basic mission to test navigation and data capture in a safe, open area.
Tip: Start with a short waypoint route to minimize risk while validating setup.
Frequently Asked Questions
Is DroneDeploy compatible with the DJI Smart Controller?
DroneDeploy supports many DJI controllers, including the DJI Smart Controller, as long as the firmware and app are up to date. Always verify the latest compatibility notes in DroneDeploy's official docs.
DroneDeploy works with many DJI controllers, including the Smart Controller, when up to date. Check the official docs for the latest compatibility notes.
Do I need an internet connection to install and use DroneDeploy on the smart controller?
Yes. You need internet access for account activation, signing in, app downloads, and data syncing. Some features may work offline after initial setup, but core functions typically require connectivity.
Internet is needed for activation, signing in, and data syncing. Some features work offline after setup, but most require connectivity.
Can I use DroneDeploy offline on the smart controller for mapping?
DroneDeploy supports some offline workflows, particularly for preloaded missions. Real-time map updates and cloud processing require internet access.
Offline mapping is limited; preloaded missions can work offline, but cloud processing needs internet.
What should I do if DroneDeploy doesn’t launch after installation?
First, restart the device, then check for app updates and firmware compatibility. If problems persist, reinstall the app and confirm the account status.
Restart the device, update the app, and verify firmware. If it still won’t run, reinstall the app and check your account.
What safety checks are essential before the first mission?
Ensure GPS lock, compass calibration, battery levels, and that you’re in a safe, legal area. Enable Return-to-Home with a conservative altitude and check weather conditions.
Check GPS, compass, battery, and a safe area. Enable Return-to-Home and check weather before flying.
Watch Video
Quick Summary
- Verify compatibility before installation.
- Sign in and update the app for a smooth start.
- Pairing and pre-flight checks prevent common failures.
- Test with a simple flight plan before full missions.
- Always follow safety and regulatory guidelines.