Drone Test: A Practical Step-by-Step Guide for Beginners
A comprehensive, beginner-friendly guide to planning, executing, and reviewing a drone test. Learn pre-flight checks, safety, data interpretation, and practice drills to fly smarter and with confidence in 2026.

Perform a safe, structured drone test to verify stability, control, and sensor performance. You’ll outline objectives, check battery health and firmware, calibrate sensors, select a safe test area, execute controlled maneuvers, and review results before any real-world flights. This guide helps new pilots build confidence through a repeatable process.
What a drone test is and why it matters
In the world of beginner drones, a drone test is a planned, supervised flight designed to verify core capabilities before pursuing more ambitious tasks. The goal is to confirm stability, responsiveness, sensor reliability, and battery health in a controlled setting. By documenting outcomes, new pilots can track progress over time and reduce the risk of surprises during real flights. According to Beginner Drone Guide, a well scoped test builds confidence, minimizes error, and helps you fly smarter from your very first practice sessions. This article focuses on practical, repeatable steps you can perform in 2026, using common beginner gear and safe environments to set a strong foundation for longer flights and more advanced tasks.
Defining objectives and success metrics
Before you power up, outline what success looks like for your drone test. Typical objectives include stable hover at a fixed altitude, smooth transitions between pitch and roll, accurate GPS hold, reliable return to home, and consistent battery telemetry. Translate these objectives into measurable metrics such as drift tolerance in meters, response time in seconds, and battery health indicators. With clear targets, you can assess results objectively rather than relying on memory. This approach also helps you communicate progress if you’re training with a club or mentor. Emphasize safety first and keep expectations aligned with your skill level.
Safety prerequisites and regulatory considerations
A successful drone test starts with safety. Check local regulations, airspace restrictions, and any no-fly zones in your area. Ensure you have line of sight, a calm weather window, and a clear takeoff/landing zone away from people, pets, and property. Prepare a plan for emergencies and establish Return-to-Home thresholds. Remember that even beginner drones can drift or react to gusts, so choose a wide, open space with few obstacles. Keeping a safety mindset reduces risk and makes your test more enjoyable.
Environmental factors and site selection
Environment plays a major role in test outcomes. Wind speed, gusts, and ambient noise can affect drone stability and sensor performance. Look for sites with open sky, flat terrain, and minimal RF interference. Avoid crowded areas, tall trees, power lines, and busy roads. If possible, perform tests near your home or a familiar location so you can compare future results with a known baseline. Document weather conditions for each test to track how they influence performance over time.
Pre-flight setup and calibration routine
A thorough pre-flight routine saves time and improves data quality. Begin with a firmware check and battery health assessment. Calibrate compass and IMU if recommended by your drone’s manual. Inspect propellers for wear, verify prop nut tightness, and confirm that the gimbal and camera are secure. A clean, well-lubricated drone flies more predictably, and calibration aligns sensors for accurate data. Keep a log of dates and firmware versions to trace any changes that impact performance.
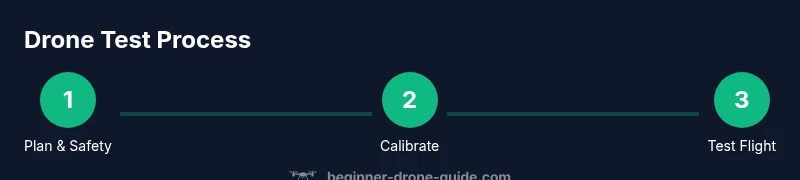
Step-by-step drone test protocol (high level)
This section lays out a repeatable sequence you can adapt. Start with a controlled hover at low altitude, then gradually introduce forward, backward, and lateral movements. Include a gentle yaw rotation and a brief wind-influenced drift test if conditions allow. Record flight data such as altitude accuracy, GPS lock quality, and battery discharge. Conclude with a safe landing and a post-flight inspection. A consistent protocol makes it easy to compare results across sessions and track improvement over time.
Data interpretation and logging results
Post-flight analysis matters as much as the flight itself. Review telemetry for altitude stability, hover accuracy, and sensor anomalies. Compare planned targets with actual outcomes, then note any deviations. Use a simple log template to capture date, weather, site conditions, battery level, flight duration, and observed issues. Over multiple sessions this data becomes a narrative of progress, helping you decide when to push toward more complex tasks or adjust ground school topics.
Troubleshooting common issues during a test flight
Common issues include compass drift, GPS hiccups, motor vibrations, and unexpected yaw. If you see drift beyond your target margin, pause, recheck calibration, and retest in better conditions. If a motor flag appears, land safely and inspect the propeller, motor mounts, and power connections. Maintain a calm, methodical approach and document issues for future reference. Safety should always be your top priority.
Building a repeatable practice plan for new pilots
Turn your drone test into a weekly habit with a simple practice plan. Alternate between stability-focused days and maneuver-focused days, gradually increasing complexity. Track your metrics consistently and celebrate small wins. A steady cadence builds muscle memory, improves reliability, and makes advanced tasks approachable over time. By the end of a few weeks you’ll fly with greater confidence and better situational awareness.
Tools & Materials
- Drone(Fully charged with latest firmware; spare propellers recommended)
- Controller/remote(Functional, with screen or companion app as appropriate)
- Extra batteries(At least one spare battery for longer practice sessions)
- Battery charger(Federal safety-compliant charger; use original or equivalent)
- Propellers(Extra set; ensure compatibility with your model)
- MicroSD card(For flight data logging if your drone records logs locally)
- Calibration tools(Compass calibration pad or built-in calibration tools if needed)
Steps
Estimated time: 20-30 minutes
- 1
Pre-flight safety check
Power on the drone and controller, verify firmware versions, and confirm battery levels. Inspect for loose screws, damaged props, and any debris on the frame. This step prevents avoidable in-flight issues and keeps you safe.
Tip: If something feels loose or unusual, pause and recheck before takeoff. - 2
Calibrate compass and IMU
Follow your drone’s manual to calibrate the compass and IMU. This aligns internal sensors, reducing drift during hover and maneuvers. Do not skip calibration after firmware updates or if you’ve flown in a new environment.
Tip: Perform calibration away from metal objects and electronic interference. - 3
Set test area and safety boundaries
Choose a wide, open space with clear line of sight and no bystanders. Mark a safety boundary and enable return-to-home features if available. Confirm airspace restrictions in your area before takeoff.
Tip: Create a visible boundary you can easily monitor during the flight. - 4
Power up and perform a stable hover
Ascend slowly to a safe hover height (about 1–2 meters) and maintain position for 20–30 seconds. Observe vertical stability and wind effects. If drift occurs, adjust trims gently and recheck controls.
Tip: Do not push the throttle aggressively; tiny adjustments yield better stability. - 5
Execute basic maneuvers
Test forward/backward, left/right translation and gentle yaw. Record how the drone responds to inputs and how quickly it returns to center after command. These basics reveal responsiveness and control accuracy.
Tip: Keep movements small at first to avoid overshoot. - 6
Landing and post-flight checks
Return to a controlled landing, then power off and inspect the airframe and propellers. Review flight data and note any anomalies. This final step closes the loop for a safe, repeatable test.
Tip: Document any abnormal sounds or vibrations for later inspection.
Frequently Asked Questions
What is the purpose of a drone test?
A drone test validates essential flight capabilities in a controlled setting. It confirms stability, control, sensor reliability, and battery health before tackling more complex flights. Regular testing helps beginners build confidence and avoid surprises during real-world use.
A drone test checks core flight skills in a safe setting to build confidence and reduce risk.
Do I need special permission to test-fly?
Permissions depend on local laws and airspace rules. In many places, you can test in designated areas or private property with consent, but you should always verify rules with local aviation authorities.
Check local rules and always fly in permitted areas with permission if required.
What should I look for during a hover test?
Look for stable altitude, minimal drift, smooth responsiveness to controls, and consistent GPS hold. Note any oscillations or lag, and compare with your baseline from previous tests.
Watch how steady the drone stays in place and how quickly it responds to control inputs.
How do I record and interpret flight data?
Use the drone’s telemetry and flight logs to track altitude accuracy, GPS signal strength, battery drain, and motor temperatures. Create a simple log to compare results across sessions and identify trends.
Keep a simple log of battery, GPS, and stability metrics to see progress.
How often should beginners perform drone tests?
Start with weekly or biweekly tests to build familiarity and confidence. Increase frequency if you’re practicing new maneuvers or if you’re preparing for longer flights.
Test regularly, especially when learning new skills, to build steady progress.
What are common reasons a test fails?
Common failures include calibration drift, wind gusts, propeller issues, and controller misconfigurations. Address these step by step and re-test after each fix to isolate causes.
Most failures come from calibration, wind, or hardware checks—fix them and re-test.
Watch Video
Quick Summary
- Plan clear objectives for each drone test
- Calibrate and inspect before every flight
- Use a safe, open area with visible boundaries
- Record data consistently to track progress
- Progressively increase task difficulty as skills grow