How to Install Drone Camera: A Complete Beginner's Guide
Learn how to install a drone camera safely and effectively with a practical step-by-step guide. From mounting to calibration and testing, we cover tools, safety, and common pitfalls for new pilots.

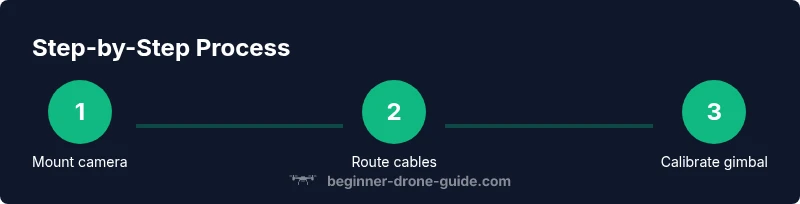
By following this guide, you will safely install a drone camera and begin using it for aerial footage. You'll learn to assess compatibility, choose the mounting method, attach the camera, manage power and wiring, calibrate the gimbal, and perform a controlled test flight. This quick process emphasizes safe handling, proper balance, and basic troubleshooting.
Assess Compatibility and Safety Considerations
Before you attach any camera, take a careful look at your drone's frame, payload limits, and flight controller options. Compatibility isn't only about physically fitting a camera; it's about how the added weight, dimensions, and wiring will affect the drone's center of gravity, motor load, and aerodynamics. Starting with a clear assessment reduces the risk of vibration, drift, or electronics interference during flight. According to Beginner Drone Guide, starting with a compatibility check helps prevent wasted effort. Gather the drone's user manual, the camera's technical sheet, and any gimbal specifications, and compare mounting points, connector types, and maximum payload. If your drone uses a built-in gimbal, verify that the camera you plan to install is supported by that gimbal and that the interface provides the needed power and control signals. For most hobbyist setups, you want a light, compact camera that won’t exceed the drone’s rated payload and won’t require extensive wiring changes. Plan for future upgrades by reserving connector slots and keeping spare mounting hardware.
Tools and Materials You’ll Need
Assemble a ready-to-work station with the essential items before you start. A small toolkit (screwdrivers and pliers), mounting hardware compatible with your drone and camera, and cable management supplies are non-negotiable. If your setup uses a separate gimbal, include the correct mounting plate and dampers to reduce vibration. Keep spare screws and small components in a labeled work tray to avoid misplacing parts mid-assembly. By preparing in advance, you minimize interruption and keep your flight-test window intact.
Mounting Method: Choosing the Right System
There are multiple mounting approaches, from factory-provided mounts to third-party plates and vibration dampers. Your choice should balance weight, stability, and ease of integration with existing gimbal systems. The best option typically matches your drone’s payload rating, keeps center of gravity near the stock balance point, and leaves room for future upgrades. If you use a modular plate or clamp, verify compatibility with both the camera module and the drone’s mounting pattern. Remember to consider cable routing: clean runs reduce snag risk during flight.
Attaching the Camera and Mounting Hardware
With the mounting system selected, attach the camera securely and align the lens axis with the drone’s forward direction. Use the correct screws and spacers, tightening gradually in a cross pattern to avoid warping the mount. If your setup uses vibration dampers, seat them properly to isolate camera vibrations while preserving control inputs. After fastening, verify that the camera sits flush and there is no play in the mount. See Figure 1 in your diagram pack for recommended torque levels and alignment references.
Wiring, Power, and Data Cables Management
Route power and data cables away from moving parts and heat sources. Use heat shrink tubing and proper cable clamps to create clean, short runs that won't snag during flight. Label each connector for easy troubleshooting later. Ensure that the main battery lead remains isolated from the camera power rail to prevent voltage dips from affecting flight control. Beginner Drone Guide analysis shows that cables left loose are a common failure point, so secure every wire with Velcro or zip ties and inspect for chafing before test flights.
Calibrating the Gimbal and Camera Settings
Power up the system on the ground and perform a gimbal calibration if your drone supports it. Set the camera’s tilt and pan offsets according to the mount’s geometry so the field of view matches your flight plans. Adjust exposure, white balance, and frame rate based on the scenes you intend to capture, and save presets for different lighting. When calibrating, reference your drone's app or control software to ensure the gimbal responds smoothly to stick inputs. If possible, document the calibrated values for future reference.
Balancing for Flight Performance
Weight distribution affects stability, efficiency, and responsiveness. After mounting the camera, check the drone’s balance by placing it on a flat surface and verifying that it sits level. If the nose dips or rises, add lightweight counterweights or reposition the camera mount to restore balance. Re-check the center of gravity after any later changes. A well-balanced platform reduces motor strain and improves video stability during hover and forward flight.
Safety Checks and Pre-Flight Testing
Before taking to the sky, perform a thorough pre-flight: secure all screws, confirm cable routing, and test spin the propellers with the drone secured to avoid contact. Verify video transmission, gimbal stability, and control responsiveness in the controller app. Conduct a short hover at low altitude to confirm the camera stays level and the aircraft remains controllable. In open, safe spaces, practice a few gentle flights to accumulate confidence and detect any unexpected behavior early.
Troubleshooting and Maintenance
If you notice vibration, tilt, or poor video stability, re-check mounts, screws, and cable routing. Inspect for loosened fasteners or chafed wires and retighten or reroute as necessary. Regular maintenance includes cleaning contacts, testing battery health, and recalibrating the gimbal after heavy impacts or extreme temperatures. A simple post-flight check helps avert long-term damage and keeps your camera system reliable for future missions.
Tools & Materials
- Phillips head screwdriver (#1 or #2)(Use the appropriate size for drone screws; avoid stripping heads)
- Torx driver set(Common sizes such as T8 or T10; match your screws)
- Small wrench set or hex keys(For mounting hardware and adapters)
- Cable management supplies (Velcro, zip ties, heat shrink)(Secure wiring away from moving parts)
- Mounting plate or clamps compatible with camera(Check compatibility with your drone’s frame)
- Vibration dampers or soft mounting pads( Helps reduce camera vibration)
- Extra screws, nuts, and spacers(Keep spares on hand for replacements)
- Wire cutters and strippers(Trim and seal wires neatly)
- Electrical tape or heat shrink tubing(Insulate and protect connections)
- Multimeter or voltage tester(Useful for diagnosing power issues)
Steps
Estimated time: 60-90 minutes
- 1
Power down and secure the drone
Ensure the drone is powered off and the throttle is disengaged. Remove the battery if possible to prevent accidental motor activation during setup. This step protects you and prevents injuries or damage while you mount the camera.
Tip: Always remove the battery before any hardware work; it reduces risk of unexpected motor start. - 2
Access the mounting area
Open or remove any protective panels to expose the frame’s mounting points. Clean the area to remove dust or debris that could affect mounting stability. Use the manufacturer’s manual diagrams as a reference for the exact locations.
Tip: Take photos of the original layout before changes so you can revert if needed. - 3
Mount the camera using the chosen system
Attach the camera to the mounting plate or clamp, aligning the lens with the forward direction. Tighten screws gradually in a crisscross pattern to avoid warping. If using dampers, seat them correctly to maximize vibration isolation.
Tip: Check the fit for any interference with propellers or frame edges; clearance should be obvious. - 4
Route and secure cables
Run power and data cables along the frame, away from moving parts. Use clamps and Velcro to keep cables tight and prevent snagging. Seal exposed wire ends with heat shrink to prevent shorts.
Tip: Avoid bending cables sharply near connectors; use gentle curves to preserve signal integrity. - 5
Mount the gimbal and set initial balance
If your system uses a gimbal, attach it and check for any tilt or drift when the drone sits on a flat surface. Adjust mounting offsets so the camera remains level when powered or during light movement. Keep notes of any offsets for future reference.
Tip: Balance first on the bench; flight changes require fewer compensations. - 6
Connect power and data lines
Connect the camera power, data, and control lines as specified by your drone and camera manuals. Ensure polarity is correct and avoid crimping connectors. Perform a final visual check to confirm no loose wires.
Tip: Double-check connector orientation before plugging in; reverse polarity can damage electronics. - 7
Calibrate the gimbal and camera settings
Power the system and run the gimbal calibration if supported. Set the camera presets for lighting conditions and adjust exposure and frame rate. Save configurations for quick access during flights.
Tip: Document calibration values for consistent results across flights. - 8
Perform a ground test and initial hover
With the drone secured, power on and test basic controls. Observe gimbal response and ensure there is no sudden movement when applying throttle. If everything looks good, perform a low-altitude hover test in a safe area.
Tip: Start with short hover tests to avoid accidental collisions. - 9
Conduct a full pre-flight check
Run through a checklist: secure mounts, verify battery health, test video feed, and confirm GPS lock if required. Review the surroundings and confirm a safe flight zone. This final check minimizes unexpected issues during flight.
Tip: A thorough pre-flight checklist saves time and prevents accidents.
Frequently Asked Questions
What tools do I need to install a drone camera?
A basic toolkit with screwdrivers, pliers, wire cutters, and mounting hardware is enough for most setups. Always check your drone and camera manuals for any model-specific requirements.
You typically need a small screwdriver set, pliers, wire cutters, and the appropriate mounting hardware. Check your manuals for model-specific needs.
Can any camera be mounted on any drone?
Not every camera fits every drone. Check mounting points, weight limits, connector types, and compatibility with your drone’s gimbal system before purchasing a camera.
Not every camera fits every drone. Make sure the mounting points, weight, and connectors match your drone and gimbal.
Will installing a camera affect flight time and balance?
Yes. Additional weight changes the center of gravity and motor load, which can reduce stability and endurance. Rebalance after installation and consider lighter components where possible.
Yes, extra weight changes balance and can reduce flight time. Rebalance and use lighter parts where you can.
Do I need to update firmware after installing a camera?
Some drones require firmware updates to ensure camera control and video transmission work correctly. Follow the manufacturer’s guidance and update only when advised.
Some drones need firmware updates after camera installation. Follow official guidance and update when advised.
How do I test the camera after installation?
Power up in an open area and verify the video feed, gimbal movement, and control responsiveness. Start with short hover tests before longer flights.
Test in an open area, check video and gimbal, then do short hover tests before longer flights.
What are common signs of an improper install?
Vibration, unstable video, tilt, or control lag usually indicate misalignment or loose mounting. Re-check mounts, cables, and weight distribution.
Common signs are vibration, tilt, or control lag. Re-check the mounts and wiring.
How often should I inspect the camera mounting?
Inspect the mounting after every few flights or after a hard landing. Look for loose screws, cracked mounts, or any cable signs that need repairing.
Inspect mounts after several flights or a hard landing.
Watch Video
Quick Summary
- Verify compatibility before purchase and mounting.
- Securely fasten all components and route cables away from moving parts.
- Calibrate gimbal and balance before flight for stable video.
- Perform a thorough pre-flight check in a safe area.
- Maintain regular maintenance to prevent issues.