How to Remove Battery from the E88 Drone: A Beginner's Guide
Learn how to safely remove the battery from your E88 drone with this beginner-friendly, step-by-step guide. Safety tips, tools, and storage guidance for confident, risk-free maintenance.

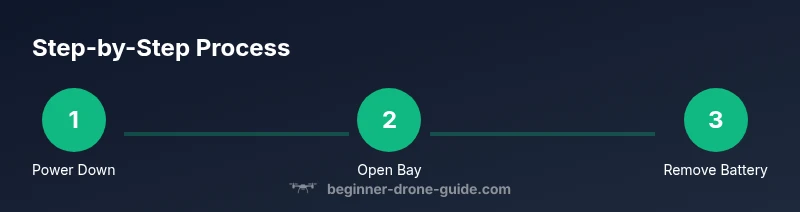
To remove the battery from the E88 drone, power off the drone, unlock the battery bay, disconnect the connector, and lift the battery straight out. Use non-conductive tools, avoid twisting cables, and store the battery upright in a fire-safe area. This protects both you and the drone while preserving the battery.
how to remove battery from e88 drone
In this guide, we focus on the precise steps and safety practices you need to safely remove the battery from the e88 drone. Understanding the process helps prevent damage to the drone’s electrical system and reduces the risk of short circuits or accidental activation. According to Beginner Drone Guide, following model-specific procedures minimizes warranty issues and keeps you in control while performing maintenance. The exact phrase how to remove battery from e88 drone appears here to anchor our topic and ensure you’re reading the guidance intended for this model. By mastering this task, you’ll gain confidence to perform routine checks and swaps without fear of harming the craft. This approach also helps you develop a routine that minimizes risks during future maintenance and flight prep.
Model-specific notes for the E88 battery
The E88 drone uses a compact, user-replaceable battery that fits snugly into a dedicated bay. Before attempting removal, confirm that the drone’s power switch is off and that there is no LED activity indicating residual power. While the physical latch system can vary by revision, most E88 variants rely on simple side latches or a top-cover release. Knowing these nuances helps you plan the disassembly and reduces the risk of damaging connectors or housing.
Preparing your workspace and safety checks
Set up a clean, dry workspace away from flammable materials. Ensure you have good lighting and a stable surface. Wear safety glasses if you’re anxious about small parts or screws. Removing a battery requires care because the pack is heavy and the terminals are metal. A static-free environment helps prevent accidental shocks or static discharge that could harm the drone’s electronics.
Tools and environment best practices
Select a small precision screwdriver, a plastic pry tool or spudger, and a small container to hold screws. Use non-conductive tools when handling the battery and connectors, and avoid metal tools that could short the terminals. Work slowly and deliberately, keeping track of each screw’s location. Conversely, avoid placing screws on a metal surface where they could bridge the battery contacts.
Step-by-step overview before disassembly
We’ll break the removal into clear phases: power-down and secure, access the battery bay, disconnect the connector, release mounting latches, extract the pack, and inspect the bay for debris. Each phase reduces risk and makes it easier to address any hiccups without forcing components. Following this phased approach helps beginners keep the process organized and less intimidating.
Removing the battery: practical sequence
- Power down the drone and confirm no LEDs indicate power is present. 2) Open the bay cover and locate the main battery connector. 3) Gently unplug the connector using a plastic tool to avoid damaging pins. 4) Release any latches or tabs holding the battery in place. 5) Lift the battery straight out and away from the drone, keeping the connectors aligned. 6) Place the battery on a non-conductive surface and prepare for inspection.
Handling connectors and avoiding damage
When disconnecting, hold the connector firmly by the plastic housing, not the cables. If the connector feels stiff, pause and re-check alignment rather than forcing it. Inspect contacts for corrosion or wear and store any removed screws in a labeled container. Misalignment or rough handling can bend pins or create loose connections later.
Post-removal handling and storage safety
After removal, store the battery in a cool, dry place away from direct sunlight and heat sources. Use a fire-safe container or Li-ion battery bag and avoid stacking multiple batteries together. Before reassembly or flight, inspect the bay for debris and ensure the battery terminals have no residue. Proper storage helps maximize battery life and reduces risk during future flights.
Common mistakes and quick fixes
Common mistakes include forcing the battery out, twisting wires, or leaving tools in the bay. If you encounter resistance, pause and re-check the alignment. If the connector looks damaged, stop and consult the manufacturer’s support page. A careful, patient approach pays off with a cleaner removal and less risk of damage.
Tools & Materials
- Small Phillips screwdriver (size #0 or #1)(Used to remove mounting screws securing the battery bay)
- Plastic pry tool or spudger(For gently prying panels without damage)
- Screw tray or labeled container(Keep screws organized to avoid mix-ups)
- Non-conductive work surface or mat(Prevents shorts during battery handling)
- Anti-static wrist strap (optional)(Reduces static risk on sensitive connectors)
Steps
Estimated time: 15-25 minutes
- 1
Power down and secure
Turn off the drone and remove any external power sources. This ensures there is no live current while you work, reducing the risk of short circuits or shocks. Wait a few seconds to ensure all systems are fully powered down.
Tip: Double-check the switch and LED indicators before proceeding. - 2
Access the battery bay
Open the outer shell or battery bay cover to expose the battery housing. Gently pry open any latches without forcing the cover.
Tip: Use a plastic pry tool to avoid scratching plastic or damaging housings. - 3
Disconnect the main connector
Grip the plastic connector housing and unplug it from the battery. Do not pull on the wires themselves.
Tip: If the connector is tight, wiggle gently while applying steady pressure. - 4
Release the mounting hardware
If there are screws or clips, remove them and keep them in a labeled tray for reassembly.
Tip: Avoid mixing screws; different lengths may be used in different mounting points. - 5
Lift the battery
With the connector free and mounting released, lift the battery straight out, keeping it level to prevent drops.
Tip: Support the battery with one hand while guiding it out with the other. - 6
Inspect and prepare for storage
Check the battery and bay for debris or corrosion. Wipe gently and place the battery on a non-conductive surface for inspection.
Tip: Do not place the battery on metal surfaces during inspection to avoid shorts. - 7
Store safely and plan reassembly
Put screws in a labeled container and store the battery in a fire-safe, cool location away from direct heat.
Tip: Note flight or maintenance logs to track battery usage.
Frequently Asked Questions
Is it safe to remove the battery while the drone is powered on?
No. Always power off the drone and unplug the battery before attempting removal. Keeping power on can cause short circuits or electrical shock.
Never remove the battery while the drone is on. Make sure it’s powered down and disconnected first.
What tools do I need for the E88 drone battery removal?
Typically a small Phillips screwdriver and a plastic pry tool are sufficient, plus a labeled container for screws. Optional anti-static gear can reduce static risk.
Usually a small screwdriver and a plastic pry tool are all you need.
How should I store the E88 battery after removal?
Store in a cool, dry place away from heat and moisture. Use a fire-safe container or Li-ion bag and avoid stacking batteries together.
Store the battery in a fire-safe, cool place and keep it separate from other batteries.
Can I reuse the battery after removal?
If the battery shows no damage and test results are within safe limits, you can reuse it after proper inspection. If you notice swelling, leakage, or abnormal behavior, replace it.
If the battery looks good and tests well, reuse is possible; otherwise replace.
Where can I find model-specific instructions for the E88?
Check the user manual or the manufacturer’s support site for model-specific guidelines and diagrams to avoid incorrect removal.
See the manual or the manufacturer’s site for model-specific steps.
Watch Video
Quick Summary
- Power off completely before extraction
- Use non-conductive tools to prevent shorts
- Keep track of screws and hardware
- Inspect battery terminals before storage