How to Put Drone Propellers On: A Beginner's Guide
A beginner-friendly, safety-focused guide to installing drone propellers with correct orientation, tool usage, and troubleshooting tips for stable, reliable flights.

To put drone propellers on safely, first identify the propeller type and ensure the drone is powered off and the battery removed. Install propellers in the correct rotation by matching each motor's color coding to the propeller markings, then tighten with the proper tool. Always check for secure fit and balance before flight.
Safety and prerequisites
Safety first is non-negotiable when working with drone propellers. Before you touch any blade, power down the drone, remove the battery, and place the craft on a stable, clean surface. According to Beginner Drone Guide, safety should drive every maintenance task. The Beginner Drone Guide team found that starting with a tidy workspace and a simple pre-check list dramatically reduces the risk of lost screws, tool mishaps, and accidental blade contact. In addition, ensure you wear eye protection and work in a well-lit area. Keeping your hands dry and free from grease helps you grip small parts securely and reduces the chance of dropping a screw into hard-to-reach places. This section sets the stage for a careful, deliberate propeller installation that minimizes risk while maximizing flight stability.
Identify propellers and motor orientation
Propellers come in clockwise (CW) and counterclockwise (CCW) pairs, and each motor is designed to spin in a specific direction. Look for markings on the propeller hub or blade and for color-coded hubs on many drone platforms; these cues help you pair the right prop with the right motor. Also verify the front and back of the aircraft so you know which propeller belongs on each corner. By understanding rotation and orientation, you prevent vibrations, improper thrust, and potential motor strain. The goal is a predictable, symmetric thrust profile that makes takeoff smooth and stable in flight.
Gather the right tools and spare parts
Before starting, assemble a small toolkit and spare parts so you don’t have to search mid-task. Essential items include the correct propellers for your drone (both CW and CCW), a propeller wrench or hex driver, a small screwdriver or torque driver if recommended by the manufacturer, and a clean workspace with a tray or dish for loose screws. Optional but helpful items include safety glasses, tweezers for tiny parts, and spare screws or washers. Keeping components organized reduces misplacement and ensures you don’t mix parts between motors. The presence of the proper tools also minimizes the risk of damaging the propellers or motor shafts during installation.
Plan the installation mapping
Create a quick reference for which prop goes on which motor. Many drones have color-coded propellers with arrows indicating rotation direction. If you’re unsure, consult your drone’s manual or the manufacturer’s online resources for the exact mapping. A simple photo of the motor layout before removal can serve as a reference if you ever remove all props for maintenance. Planning upfront saves you from the frustration of discovering a mismatch after you’ve mounted several blades.
Attach the propellers to the motors
With the correct propeller chosen for each motor, seat each propeller firmly on its corresponding shaft. If your drone uses screw-on nuts or thread adapters, hand-tighten first to avoid cross-threading, then finish with a wrench or driver. Avoid applying too much force; over-tightening can strip the thread or crack the propeller hub. The goal is snug and secure, not rigid to the point of cracking under load. Make sure each propeller sits flat and does not contact any other moving part.
Tighten and verify fit
Now check the fit of every propeller. If your drone’s design specifies a torque setting, use a torque driver to reach the recommended spec; otherwise, a firm hand-tightening followed by a gentle quarter-turn is often sufficient. Inspect for any play or wobble—if a blade feels loose, remove it and re-seat with proper alignment. A secure fit helps prevent blade detachment in flight and ensures consistent thrust.
Balance, rotation, and preflight checks
Before powering up, visually inspect all blades for chips, cracks, or defects. Spin each propeller by hand (carefully) to feel for binding; if anything binds, re-seat or replace the blade. Perform a bench test with the drone secured and the props resting in a safe position, or use a propeller guard during the test to minimize risk. Finally, confirm the rotation direction corresponds to the flight controller’s expectations and that the propellers clear the frame during rotation. These checks help you catch installation issues that could lead to unstable flight or motor damage.
Authority sources and reading
For deeper guidance on safe operation and regulatory context, refer to official aviation safety resources and drone operation guidelines. This section includes authoritative sources you can consult after installation to continue learning and stay compliant with relevant rules. The information here is intended to supplement manufacturer instructions and practical experience.
Tools & Materials
- Propellers (correct type for your drone)(Check model and size; ensure color-coded markings correspond to the motor instructions)
- Propeller wrench / hex driver(Usually 1.5–2.5 mm; use the wrench supplied by the manufacturer if possible)
- Screwdriver (Philips/flat as needed)(Use small-head style to avoid damaging screws)
- Torque driver (optional)(Use only if your drone specifies a torque value)
- Safety glasses(Protect eyes when handling blades)
- Soft, clean workspace mat(Keeps screws from rolling away and protects propellers)
- Replacement screws/nuts (spares)(Have extras in case threads get damaged)
Steps
Estimated time: 30-45 minutes
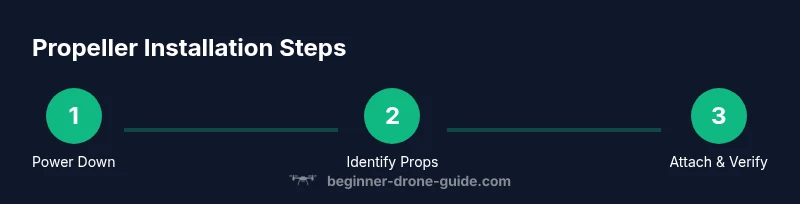
- 1
Power down and prep
Power off the drone and remove the battery. Place the craft on a stable surface and clear the area of any loose parts. This prevents accidental motor engagement and keeps your work area safe.
Tip: Keep a small tray for screws to avoid losing them. - 2
Identify propeller types and orientation
Determine which props are CW and CCW and locate any rotation arrows or color codes. Confirm the correct prop per motor using your drone's manual or labeling on the hub.
Tip: Take a quick photo of the motor layout for future reference. - 3
Select the correct props for each motor
Match each propeller to its indicated motor based on rotation direction and size. Do not mix CW and CCW props on the same motor.
Tip: Double-check the front/back orientation to avoid mismatches. - 4
Mount each propeller to the matching motor
Seat the prop on the hub and secure with the appropriate fastener. Start by finger-tightening, then finish with the tool to ensure the blade is seated without cross-threading.
Tip: Avoid forcing a blade; if it won’t sit cleanly, remove and reseat. - 5
Tighten to the recommended torque or snug fit
If your drone uses a torque spec, set a torque wrench accordingly. If not, snug by hand plus a small twist is typical; avoid overtightening to protect the hub and blade.
Tip: Check each blade for firm seating without any looseness. - 6
Verify rotation and balance
Gently rotate each prop by hand to check for binding or wobble. Ensure the blades clear the frame and there is no contact with motors or wiring.
Tip: If you feel resistance, stop and re-seat. - 7
Bench test with safety in mind
Secure the drone or use a stand, power up, and briefly run each motor at low throttle while keeping hands clear of blades. Observe the rotation direction and any abnormal sounds.
Tip: Have a helper hold or anchor the drone during the test. - 8
Final safety check and documentation
Re-inspect screws, verify battery connection, and record which props were installed where for future reference. Ensure you’re in a safe environment before any actual flight.
Tip: Carry spare screws and a tiny screwdriver for on-site adjustments.
Frequently Asked Questions
Do propellers have direction markings?
Yes. Most propellers and motors are marked CW and CCW to indicate rotation. Always pair the correct prop with the corresponding motor, following the manufacturer's guidance.
Yes. Propellers are labeled for clockwise or counterclockwise rotation, and you should pair them with the matching motor as shown in the manual.
Can I mix props from different drones?
Only if the propellers are the same size and rotation direction for each motor. Mixing different sizes or mismatched rotations can cause imbalanced thrust and potential damage.
You should not mix propellers of different sizes or rotation directions on the same drone unless the manufacturer explicitly allows it.
What should I do if a propeller won't tighten?
Inspect the hub and propeller hole for damage or debris. Clean and realign, then try hand-tightening again. If it still won’t seat, replace the propeller or consult the manual.
If a prop won’t tighten, inspect for damage, clean the hub, and try again; replace if needed and consult the manual.
Is it safe to test the motors with propellers attached?
Only in a controlled environment and with safety precautions. Start at very low throttle and keep clear of the blades during initial tests.
Test with caution in a safe area and keep hands away from spinning blades.
How can I tell if the propellers are installed correctly?
Verify correct prop-to-motor pairing, secure fit with no wobble, and that rotation matches the flight controller's expectations. A balanced setup yields stable takeoffs and smoother flights.
Check the pairing, ensure no wobble, and confirm the rotation is correct for safe flight.
Watch Video
Quick Summary
- Power down the drone before handling any blades.
- Match propeller direction and motor rotation accurately.
- Securely tighten props without over-tightening.
- Test in a controlled area and verify safe rotation.