How to Put a DJI Drone in Quick Transfer Mode
Learn how to put your DJI drone in Quick Transfer mode with this step-by-step guide from Beginner Drone Guide. Discover prerequisites, a clear workflow, safety tips, and troubleshooting to speed up media transfers.

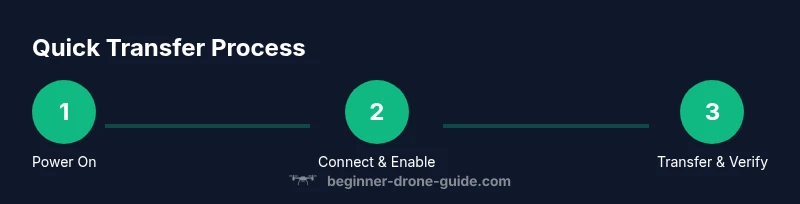
To put a DJI drone in Quick Transfer mode, power on the drone and connect your mobile device to the drone's Wi‑Fi via the DJI Fly app (or DJI Go 4 on older models). Open the media transfer/album settings and enable Quick Transfer, then start the transfer from your device. Verify the transfer completes and the files appear in your device gallery.
What Quick Transfer mode is and why you might use it
According to Beginner Drone Guide, Quick Transfer is a fast, wireless method to offload media from a DJI drone to your mobile device or computer without cables. This mode creates a direct, drone-to-device link that bypasses USB connections, enabling quicker retrieval of photos and videos right from the DJI Fly app's album. For many users, Quick Transfer is a practical solution when you are shooting in the field and want to pull footage to your phone for quick sharing or backup. The main advantage is speed and convenience, but there are caveats to watch for. Transfer speeds can vary based on drone model, firmware, device hardware, and network conditions. Some models may require a firmware update to unlock Quick Transfer, and older apps might present a slightly different flow. As you adopt Quick Transfer, keep expectations realistic; it’s typically faster for media files than cable-based transfer, but it’s not an instant, all-file pipe. Finally, remember that Quick Transfer relies on the drone’s own wireless link, so you’ll want to stay within a reasonable range and avoid interference from other wireless devices.
Compatibility, prerequisites, and where to find the option
The availability of Quick Transfer depends on your specific DJI drone model and the version of the DJI Fly (or DJI Go) app you’re running. In practice, newer drones that support the latest app ecosystems usually expose Quick Transfer as a built-in media transfer option. Before you begin, ensure your drone firmware is up to date and that your mobile device has the latest app updates installed. If you see no Quick Transfer option, check the model’s documentation or the official DJI support site for guidance. You’ll also want to confirm your device is connected to the drone’s direct network rather than your home Wi‑Fi. This direct link is what enables the high‑speed transfer and minimizes interference. For safety, operate transfers when the aircraft is stationary and on the ground.
When to use Quick Transfer vs. traditional USB transfers or cloud syncing
Quick Transfer shines in field scenarios where you want rapid access to media without dragging along a laptop or cable. For quick social posts or immediate backups, it’s often your fastest option. However, if you need to offload lossless RAW files or transfer entire flight videos that are very large, you might prefer a USB connection or a card reader, depending on your drone and SD card setup. Similarly, if you’re in an area with unstable drone Wi‑Fi links or a congested environment, a wired transfer could be more reliable. In other words, Quick Transfer is a great first step for fast, on‑site sharing, while traditional methods still have their place for thorough archival workflows.
Troubleshooting, safety, and common gotchas
If Quick Transfer isn’t working as expected, start with the obvious: verify power levels, ensure firmware is current, and confirm you’re connected to the drone’s direct network, not a shared hotspot. Restart the app, re‑pair the drone, and try again. Interference from nearby devices, walls, or metal surfaces can degrade speed; if possible, reduce obstacles and stay within a few meters of the aircraft during transfer. Remember to disable any VPNs or firewall settings that block local network traffic on your device. Finally, practice safe transfer habits: avoid operating the drone in restricted airspace while transferring and always comply with local regulations.
Tools & Materials
- Smartphone or tablet with DJI Fly app(Ensure device is updated and connected to the drone's network during transfer)
- DJI drone that supports Quick Transfer(Firmware should be up to date; check for the latest app compatibility)
- USB-C or Lightning cable (optional)(Needed only if you plan an alternate USB transfer as backup)
- MicroSD card reader (optional)(Useful for offloading directly from SD card if needed)
- Laptop or computer (optional)(Can be used as an alternative transfer device)
Steps
Estimated time: 10-15 minutes
- 1
Power on drone and device
Turn on the drone and your mobile device. Open the DJI Fly app and verify you’re connected to the drone’s direct network. This establishes the fast transfer channel and ensures the app can access media without buffering delays.
Tip: Keep the drone within line of sight and avoid metal obstacles that can interfere with the direct link. - 2
Navigate to media transfer settings
In the DJI Fly app, access the album or media area and locate the transfer options. Look for Quick Transfer or a similar media transfer setting. If you’re on an older model, this may appear under a different section (e.g., Camera or Gallery).
Tip: If you don’t see Quick Transfer, ensure your app and drone firmware are up to date. - 3
Enable Quick Transfer
Toggle Quick Transfer on, or choose the specific transfer mode labeled for fast wireless transfer. Confirm any prompts that appear—these may ask for permission to use the drone’s direct network for media transfer.
Tip: Enabling this mode may pause ongoing live video to prioritize transfer traffic; do not start transfers during critical flight operations. - 4
Initiate the transfer from the app
Select the media you want to transfer and choose the destination on your device. Start the transfer and monitor progress in the app’s transfer/status area.
Tip: For large batches, transfer in smaller groups to avoid timeouts or failures. - 5
Accept and complete on the device
Accept the incoming transfer on your device if prompted. Wait for the transfer to complete—duration depends on file count and size. Finish by checking that all intended files appear in your gallery or designated folder.
Tip: Verify checksum or file integrity if your device supports it. - 6
Verify and back up files
Open a few transferred items to confirm they’re intact. Back up to a secondary storage solution (cloud or external drive) if you plan to archive the footage.
Tip: Keep a modest archive on the drone’s SD card and a separate local backup for safety. - 7
Disconnect safely
Once all desired media is transferred, disconnect from the drone’s network and power down devices. If you plan to reuse Quick Transfer, revisit the app settings to ensure the option remains enabled for future use.
Tip: Always power down the drone before removing the USB cable or performing hardware changes.
Frequently Asked Questions
What is Quick Transfer mode in DJI drones?
Quick Transfer is a direct, wireless method for moving media from a DJI drone to a mobile device without a USB cable. It uses a direct drone-to-device link for faster offloads, typically through the DJI Fly app.
Quick Transfer is a direct, wireless way to move media from your DJI drone to your phone or computer without cables, via the DJI Fly app.
Which DJI models support Quick Transfer?
Support for Quick Transfer varies by model and firmware. In general, newer DJI drones with the latest app ecosystem expose Quick Transfer as part of media transfer options. Always consult the official DJI documentation for your exact model.
Support depends on your drone model and firmware; newer models typically support it, but check the official docs for your exact device.
Do I need internet to use Quick Transfer?
No, Quick Transfer relies on a direct wireless link between the drone and your device, not an internet connection. You’ll still need internet only if you plan to back up to cloud storage.
No internet is required for the direct transfer itself; only cloud backups would use internet.
Can I transfer RAW photos via Quick Transfer?
RAW transfer support varies by model and app version. Some drones support JPEG and RAW via Quick Transfer, while others may limit to JPEG or require USB for RAW files. Check your model’s documentation.
RAW transfer availability depends on your model and app version; some support it, others do not.
How do I disable Quick Transfer?
Open the DJI Fly app, go to the media transfer or album settings, and toggle Quick Transfer off. This returns transfers to the default wired or app-based method.
In the app, disable Quick Transfer in the media transfer settings.
What could cause slow transfers?
Slow transfers can result from strong interference, distance between drone and device, outdated firmware or app, and congestion on the direct network. Try reducing distance, eliminating obstacles, and updating software.
Interference, distance, or outdated software can slow transfers; move closer, reduce obstacles, and update everything.
Watch Video
Quick Summary
- Enable Quick Transfer to speed up media offloads.
- Ensure firmware and app are up to date before starting.
- Transfer in safe, grounded conditions to avoid interference.
- Verify file integrity after the transfer and back up.