How to Clean Drone Propellers: A Beginner's Guide
Learn how to clean drone propellers safely, remove debris, inspect for damage, and maintain flight performance with a beginner-friendly, step-by-step approach designed for confidence and safer flights.

You will learn how to safely clean drone propellers, choose cleansing methods, and perform essential inspections to prevent damage. This guide covers prep, dry and alcohol cleaning, maintenance timing, and how to reinstall with confidence, reducing vibration and prolonging propeller life for reliable flights.
Why Clean Drone Propellers Matter
Propellers are the most visible and critical moving parts on your drone. Regular cleaning helps maintain lift, balance, and control, reduces vibration, and extends motor life by preventing dust and grit from grinding into bearings. For beginners, learning how to clean drone propellers is an essential first maintenance skill that saves time and prevents crashes caused by faulty parts or unbalanced thrust. When you ask how to clean drone propellers, you’re really asking how to protect your investment and ensure predictable performance in real-world flights. The most common issues linked to dirty propellers include decreased lift, jerky throttle response, and faster wear on motors. By establishing a simple cleaning routine, you remove corrosive grime, inspect for cracks, and verify that the propellers are properly seated and balanced. According to Beginner Drone Guide, building a reminders-based approach to maintenance helps new pilots fly smarter and safer from day one.
Safety First: Prep and Safety Gear
Before touching the drone, power off, disconnect the battery, and wait for all moving parts to stop. Clear a clean workspace with good lighting, lay down a soft mat, and gather your tools. Put on safety glasses if you are cleaning near small screws or if your propellers are brittle. This stage is not optional: dusty blades can hide micro-cracks that might fail mid-flight. Quick checks: identify the model and confirm propeller removal directions in your manual. If you cannot recall the correct method, stop and consult the manufacturer’s guide. The goal is to minimize the risk of injury or damage while you clean.
Cleaning Methods: Dry Cleaning, Alcohol Wipes, and When to Use Water
Dry cleaning is often sufficient for routine maintenance. Use a soft brush or microfiber cloth to remove loose dust from the blade surfaces and between the tips. For more stubborn grime or oily residue, dampen a microfiber cloth with 70% isopropyl alcohol and gently wipe the blades, hub, and mounting holes. Avoid soaking the propellers or getting liquid near the motor housing. If the propellers are of a degraded material or have chips, replace rather than clean. Water should be avoided on most plastic props to prevent warping and unbalance. For safety, dry the blades completely before reattaching and testing. When in doubt, perform a quick preflight after reassembly to verify there is no binding or unusual noise.
Inspecting Propellers: Signs of Wear, Damage, and Replacement
Inspect each blade for cracks, chips, or bending. A hairline crack around the tip can propagate into a prop-wedging failure; discard any prop with visible damage. Check the hub for looseness or wobble, which indicates wear in the mounting screw or balance. Look for warping or discoloration caused by heat or chemical exposure. If you notice any warping or inconsistent coloration, replace the propeller set as a pair to keep thrust balanced. Keep a spare set handy so you can swap quickly after a hard landing or crash. Always mark the orientation so you reinstall the same blade in the same position.
Establishing a Clean Routine: Maintenance Schedule for Beginners
Create a monthly cleaning schedule that aligns with your flying frequency and environment. After every outdoor flight, inspect for dirt and debris and perform a quick wipe if needed. After heavy use or a crash, clean and recheck more thoroughly before the next flight. Keep a small parts tray for screws and a labeling system to track which propeller belongs to which motor. Record the date of each cleaning in a notebook or digital log so you can spot patterns in wear. By building a routine, you reduce surprise repairs and keep your drone performing at its best.
Authority Sources
To support best practices, consult reputable safety resources. The FAA provides UAS safety guidelines and preflight checks that cover how to handle propellers and safe operation. NASA offers UAS safety and integration resources that emphasize careful maintenance and system checks. National Geographic and other major publications regularly feature practical drone maintenance pieces for beginners. For more details, see the linked sources in the Authority Sources section.
Tools & Materials
- Allen wrench / hex driver(Choose the size that fits your drone's screws (commonly 1.5–2.5 mm).)
- Screwdriver (Phillips or flathead as needed)(Match the screw heads on your propeller hubs.)
- Soft-bristled brush(Gentle on blades; removes surface dust without scratching.)
- Microfiber cloths(Lint-free for streak-free cleaning.)
- Isopropyl alcohol 70% or higher(Use on blades and hubs; avoid liquid near motors.)
- Lint-free wipes(For quick wipe-downs without leave-behind fibers.)
- Small parts tray or organizers(Keep screws and props separated.)
- Safety glasses(Extra safety when handling brittle props.)
- Gloves (optional)(Protect hands when dealing with sharp blades.)
- Isopropyl wipes (pre-soaked)(Fast cleaning on the go.)
Steps
Estimated time: 20-40 minutes
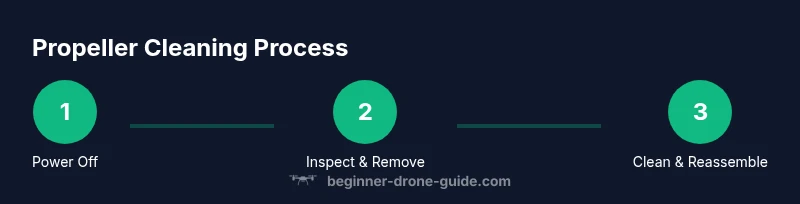
- 1
Power off and remove the propellers
Power off the drone completely and disconnect the battery to avoid any accidental motor engagement. Remove each propeller using the proper tool for your model, keeping screws and blades in labeled containers to prevent mix-ups. Note the orientation so you can reinstall correctly.
Tip: Take a quick photo of every blade orientation before removal to simplify reassembly. - 2
Inspect for damage before cleaning
Hold each blade up to a light source and inspect for cracks, chips, or warping. If you see any damage, replace the propeller rather than attempting a repair. Check the hub and mounting area for looseness or wear that could affect balance.
Tip: Even a small crack can propagate; prioritize safety over reuse. - 3
Dry cleaning first
Begin with a dry brush or microfiber cloth to remove loose dust. For stubborn grime, lightly wipe with a cloth dampened in 70% isopropyl alcohol, then dry completely. Avoid saturating the hub or motor area.
Tip: Work from blade tip toward the hub to minimize grime rubbing into the core. - 4
Clean mounting points and screws
Wipe the mounting holes, screws, and hub with a dampened cloth or alcohol wipe. Ensure no lint remains in the screw holes, and allow everything to dry fully before reassembly.
Tip: Use a flashlight to verify no debris remains in tight spots. - 5
Reinstall and test safely
Reattach each propeller in its original orientation and snug screws to the manufacturer-specified torque. Perform a low-throttle hover test in a clear area to confirm balanced thrust and no unusual vibrations. If vibration persists, recheck the screws and blade orientation.
Tip: If you notice imbalance, re-check torque and try swapping blades to diagnose a bad prop.
Frequently Asked Questions
Can I use water to clean drone propellers?
Water should be avoided on most plastic propellers as it can cause warping and unbalance. Use a dry brush or alcohol dampened cloth for cleaning, and ensure all parts are completely dry before reassembly.
Water can damage propellers and motors, so prefer dry cleaning or isopropyl alcohol and make sure everything is dry before flying again.
How often should I clean propellers?
Clean propellers after dusty or sandy flights or if you notice reduced lift or vibration. For most beginners, a monthly check plus post-flight wipe is a practical baseline.
Clean after rough flights or if you see dust buildup; a monthly wipe helps keep performance consistent.
Is it safe to fly after cleaning?
Yes, but only after all parts are completely dry and reassembled. Do a preflight check for balance, loose screws, and proper prop orientation before takeoff.
Yes—once dry and reassembled, do a quick preflight to confirm safe operation.
What if a propeller shows a small chip?
Small chips that affect the blade edge can create uneven thrust. Replace any damaged propeller rather than attempting a repair.
If you notice a chip, replace the blade to avoid unpredictable thrust.
Should I balance propellers after cleaning?
Cleaning itself rarely balances props. If you notice persistent vibrations after cleaning, inspect torque, re-check orientation, and consider balancing or replacing blades if needed.
If vibrations persist after cleaning, re-check mounting and consider balancing.
What safety gear is recommended during maintenance?
Safety glasses are recommended for handling brittle blades and small screws. Keep tools organized and unplug power sources when removing propellers.
Safety glasses and tidy work area help prevent injuries during maintenance.
Watch Video
Quick Summary
- Power off and remove props before cleaning.
- Inspect for damage and replace brittle blades.
- Use dry cleaning first, then controlled alcohol wipes.
- Reinstall with correct orientation and torque.
- Maintain a simple log for prop maintenance.