Drone Roof Inspection: A Beginner's Guide to Safer Roof Surveys
Learn how to perform a drone roof inspection safely and efficiently. This beginner-friendly guide covers planning, flight, data capture, and reporting for real-world roof assessments.

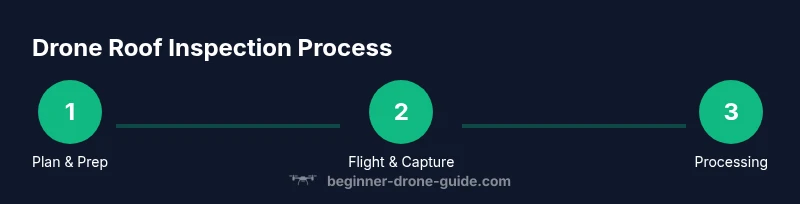
With a drone roof inspection you can safely evaluate roof condition from the air, identify damaged shingles, and document debris without dangerous climbs. This guide walks you through planning, flight, data capture, and reporting using beginner-friendly steps and practical tips.
Why drone roof inspection matters
Roof conditions are often hidden from ground level, and risky ladder climbs can lead to injuries. A drone roof inspection lets you safely capture high‑resolution imagery of shingles, flashing, gutters, and vents from multiple angles. According to Beginner Drone Guide, starting with a clear objective and a safe flight plan helps newcomers gather reliable data without overstepping safety boundaries. From insurance claims to maintenance planning, the digital record you create can show changes over time and support more informed decisions for repairs or upgrades. This approach reduces physical risk while delivering repeatable, shareable data for homeowners, contractors, and insurers alike. By documenting the roof from above, you gain a comprehensive view of areas that are easy to miss from the ground, such as edge wear, seam gaps, and debris accumulation after storms.
Equipment and safety basics for beginners
Getting started with drone roof inspection requires reliable gear and a strong safety mindset. For beginners, focus on a stable, beginner-friendly platform with a good obstacle‑avoidance system and GPS positioning. A camera with solid high‑quality imaging, a gimbal for steady shots, and enough storage are essential. You’ll also want spare batteries, a charger, and a way to organize files after the flight. Safety gear for rooftop work matters even when the drone is doing the work: carry a non-slip ladder, fall‑protection basics, and a helper on the ground to spot hazards. ND filters can help in bright sun, but are optional for early practice. Practice in a controlled space before attempting real roof surveys. The Beginner Drone Guide team recommends starting with a low-risk roof and gradually increasing complexity as you gain confidence.
Planning your flight for roof inspection
Successful roof inspections start with careful planning. Map out the areas you need to cover (ridge lines, overhangs, gutters, and vent stacks) and decide on the flight pattern that gives you the best data with the least risk. Check local weather conditions and wind limits for your drone. Clear the site of people, pets, and loose objects, and ensure you have a second observer if possible. Confirm regulatory requirements for your area and obtain any necessary permissions. Set your altitude, speed, and overlap targets to balance image quality with efficiency. Before takeoff, run a brief preflight checklist that covers firmware updates, compass calibration, and home point settings. A well‑documented plan makes data processing easier and reduces surprises mid‑flight.
Capturing actionable data
During the flight, capture a mix of vertical and oblique images to reveal both surface wear and edge details. Use consistent lighting by scheduling flights when shadows won’t obscure problem areas. Focus on critical roof features: shingles, flashing around chimneys and skylights, gutter condition, and vent seals. Maintain a safe distance from edges and avoid overflying fragile roof components. Record video segments for context and stills for documentation. Label images with location identifiers (e.g., north-east corner, near exhaust vent) and back them up to a dedicated project folder. After landing, review footage on a larger screen to detect missed spots and plan follow‑ups for any suspicious findings.
Flight techniques for different roof shapes
Roof geometry affects how you approach data capture. Flat or low‑slope roofs require careful edge scanning and some vertical angles to confirm membrane integrity. Steep or multi‑level roofs demand shorter flights at safe standpoints and step‑by‑step progress to the apex with extra caution around parapets. For complex shapes, combine planned waypoints with manual hovering to inspect trouble areas like valleys, skylights, and vent gaps. Use ground references or markers to help you identify roof sections later in your reports. Practice variations in distance and angle to learn what yields the best balance of detail and safety on each roof type.
Post-flight workflow: processing, reports, and sharing
Organize your data promptly after the flight. Rename files consistently (location, date, and roof area), back up to a cloud library, and create a simple report that links photos to each roof section. When sharing with homeowners or contractors, provide a short portfolio of representative images and a short caption describing observed issues and suggested next steps. If you’re compiling for an insurance claim, attach precise timestamps and identify any weather effects that could influence roof condition. Consider creating a short video highlight reel that shows both the overall roof layout and individual problem spots for easier communication with non-technical stakeholders. By standardizing your workflow, you’ll improve efficiency across future inspections.
Real-world scenarios and case studies
In everyday practice, a drone roof inspection helps catch issues early and reduce downstream repairs. For instance, after a heavy storm a homeowner can use drone imagery to verify whether a roof edge has shifted or a flashing seal is compromised. In another scenario, a real estate listing can benefit from an aerial roof overview that demonstrates the roof’s condition to prospective buyers, while a property manager can document wear patterns over time. Each scenario demonstrates how clear, consistent data supports decision-making without risky climbs. The key is to keep the data organized, clearly labeled, and easily shareable with the relevant stakeholders.
Insurance and compliance considerations
Drones fall under local aviation rules and property access considerations, so stay aware of licensing requirements, airspace restrictions, and privacy concerns. Before you fly, verify your registration status if required in your jurisdiction, understand the applicable safety guidelines, and respect no‑fly zones around critical infrastructure. Always keep your flights within visual line of sight and avoid flying over people or private property without permission. Seek up‑to‑date guidance from reputable sources, such as government or university aviation programs, to stay compliant. While this guide focuses on practical steps for beginners, following local rules reduces risk and keeps long‑term projects moving smoothly.
Beginner-friendly rooftop inspection checklist
- Define the inspection objective and target roof areas
- Check weather, wind, and lighting conditions
- Inspect gear: drone, batteries, memory cards, safety kit
- Create a simple flight plan with clear waypoints
- Photograph each critical area from multiple angles
- Label and back up data immediately after flight
- Review footage for missed spots and plan follow‑ups
- Share findings in a concise, organized report
- Review local regulations and obtain permissions as required
- Practice in a controlled setting before real roof work
Tools & Materials
- Drone with stabilized gimbal (4K video recommended)(Ensure obstacle avoidance and reliable GPS hold)
- Extra batteries and a charger(Plan for flight duration and warm-up)
- High-capacity memory card (microSD/SD)(At least 32GB; format before flight)
- ND filters for sun control (optional)(Helps maintain exposure in bright conditions)
- Phone or tablet with flight app(Live feed, controls, and logs)
- Ladder and basic rooftop safety gear(Non-drone safety for access when needed)
- Marker flags or chalk(Reference points for ground mapping)
Steps
Estimated time: 60-120 minutes
- 1
Define the objective
Clarify which roof areas require inspection and what issues you’re looking for, such as damaged shingles, flashing gaps, or debris buildup. A clear objective helps guide your flight path and data capture.
Tip: Write the objective on your preflight checklist to stay focused. - 2
Check weather and site
Evaluate wind, sunlight, and visibility. Choose a calm window, clear the area of people and obstacles, and identify safe takeoff/landing zones.
Tip: If winds feel uncertain, postpone and plan for a calmer day. - 3
Prepare equipment
Charge batteries, insert a fresh memory card, and verify firmware. Calibrate the compass and ensure the return-to-home point is correct.
Tip: Do a quick preflight check even if you just used the drone yesterday. - 4
Plan the flight path
Set up a safe route that covers ridge lines, edges, gutters, and vents. Decide between a grid pattern or targeted passes and ensure overlap for reference.
Tip: Consider adding a manual pass near complex features for better detail. - 5
Execute the flight
Fly at a safe altitude and maintain line-of-sight. Keep a steady pace, avoid overflying fragile areas, and capture both vertical and oblique shots.
Tip: Have a spotter assist on the ground during edge work. - 6
Capture and review data
Review imagery on a larger screen, tag key areas, and ensure coverage of critical roof features. Back up files immediately to a local and cloud location.
Tip: re-check any areas flagged as potentially problematic. - 7
Create a concise report
Assemble images by roof section with notes on observed issues and suggested actions. Use simple language so non‑technical readers understand.
Tip: Attach a short video highlight reel for context. - 8
Plan a follow‑up
Schedule a follow‑up flight if issues require monitoring or post‑storm assessment. Update your records to reflect any changes over time.
Tip: Document dates and any weather effects that could affect condition.
Frequently Asked Questions
Drone roof inspection?
A drone roof inspection uses a drone to photograph and video a roof from above, helping identify damage without dangerous climbs. It’s practical for homeowners, contractors, and insurers who need clear evidence of roof conditions.
A drone roof inspection uses aerial photos and video to show roof conditions, helping you spot damage without climbing on the roof.
Permits required?
Permissions depend on local rules and space restrictions. Check whether you need airspace authorization, registration, or property permissions before flying near a roof.
Check local rules and property permissions before you fly near a roof.
Drone setup tips?
Keep firmware up to date, calibrate sensors, and verify battery health. Use a simple flight plan to reduce complexity, especially when learning on varied roof shapes.
Keep firmware updated and test your plan on a safe area before roof flights.
Typical flight time?
Flight duration depends on battery capacity and flight plan. Start with shorter sessions to build routine before longer roof surveys.
Start with short practice flights to build routine before long roof surveys.
Document roof data?
Label and store images by roof section, add notes for each area, and keep a clear log of observations to support repairs or claims.
Label photos by area and keep notes for easy sharing with contractors.
Safety concerns?
Always assess ground-based hazards and weather. If uncertain, pause the flight and re‑evaluate the plan to avoid accidents.
Assess hazards first, then fly only when it’s safe.
Watch Video
Quick Summary
- Plan before you fly to reduce risk.
- Capture data from multiple angles for a complete view.
- Organize and document findings for easy sharing.
- Follow local rules to stay compliant.
- Practice regularly to build confidence and accuracy.